This article may contain affiliate links. If you buy some products using those links, I may receive monetary benefits. See affiliate disclosure here
Ever published an incomplete blog post, only to find out later that you forgot to add the featured image? Or missing SEO?
If so, the solution is to keep a checklist. Write down all the things that you should do before hitting the publish button. Then go through it every time.
You can either do it manually or use a plugin to create and manage the checklist.
In this article, I will list out the things I do before publishing a blog post. We'll also discuss how you can use a plugin to manage it.
1. Proofreading - Check Spelling & Grammar
Silly typos and grammar mistakes are not fun. They can easily ruin the credibility of your article.
So, always use an automatic spelling checker like Grammarly. It checks the spelling and grammar as you type.
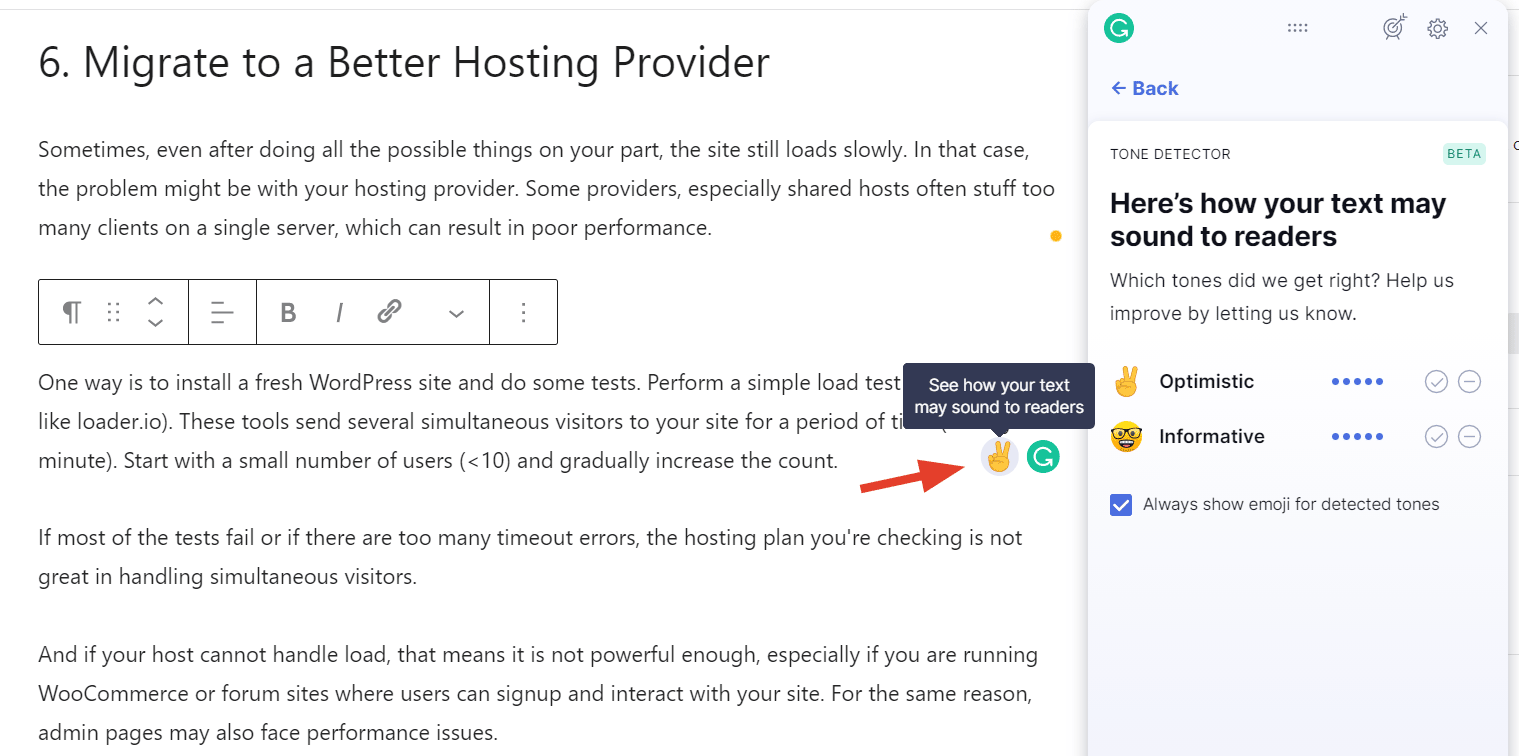
Checking grammar & spelling using Grammarly
However, some may find it distracting to make corrections while writing. So what can you do? Keep it turned off while writing, then turn it on once you've finished drafting your article, and do the corrections.
If you have other people on your team, then it is best to ask someone else to proofread your blog posts. They may be able to catch some errors that you overlook.
But most often, you might be the only person managing the blog. And there may not be anyone else to proofread it for you.
In such a case, don't proofread the article the same day you write it. If time allows, do the corrections a day or two later.
The idea is to give your mind some time to refresh. There's a better chance to catch wordy sentences and rewrite certain parts to bring more clarity.
In the meantime, you can deal with another post or do some other activity.
2. Content Formatting
Some of you may prefer writing the blog post in some other applications like Word or Google Docs. Some prefer to write in the WordPress editor itself as I do.
Either way, now it's time to harness the power of the blog's rich text editor.
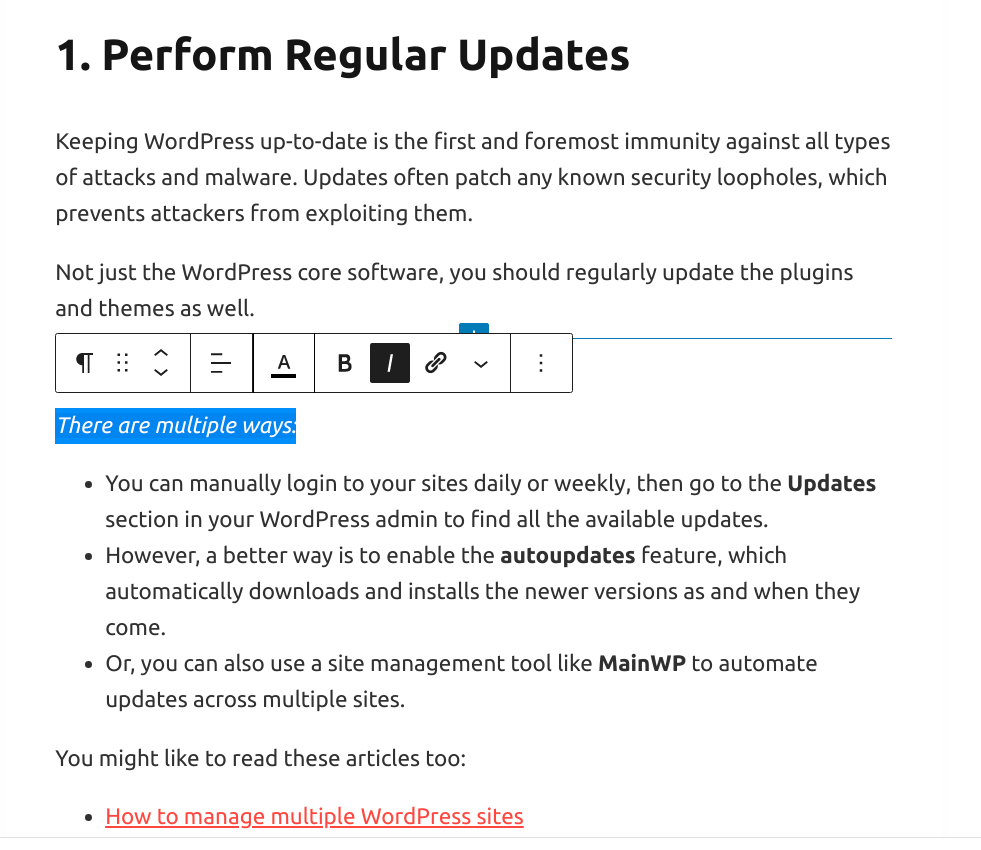
Bold that piece of text that you want to emphasize, highlight that paragraph that needs more attention.
- Use proper sub-heading levels - H2, H3, H4, etc.
- Add highlight boxes
- Use ordered, unordered, or icon lists
- Tweet boxes
- Blockquotes
- Images, etc
If you are using the WordPress block editor, then it has a variety of elements to choose from. You can also extend it with extra block plugins if required.
properly formatted text is easy for the reader to skim through
Here is an example of a highlighted paragraph.
You can even create custom CSS classes to apply certain styles.
However, don't overdo it. Use your creativity and logic to format the article in a sensible way.
3. Content SEO
Once you have done formatting the content, the next step is to optimize the post body for search engines.
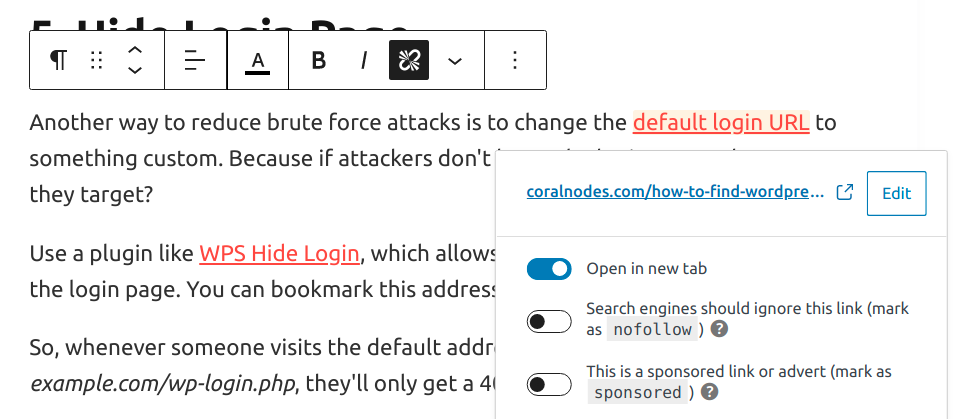
adding links that open in a new tab
There are several things to check here:
- Optimize sub-headings: Add you focus keyword somewhere in your sub-headings.
- Not just in the headings, ensure you use the keywords in the post's body as well. But don't stuff it unnecessarily. Place them in a natural way.
- Add appropriate alt text for all the images in your blog posts. The text should describe what the images represent. You can also link to the high-res version of the image, and allow users to open them in a lightbox or new tab.
- Links: Use internal links to link to other relevant posts in your blog. Also, insert outbound links to add more depth and credibility to your statements. Both helps to improve SEO in addition to adding more value to your blog posts.
- Add nofollow attribute to promotional or affiliate links.
4. Write Catchy Title, SEO Title & Meta Description
The first impression is the best impression. So craft the post title with utmost care. Here are a few tips I follow:
- Clearly state what to expect in the article
- Include numbers if relevant - e.g, 8 Ways to Solve Problem X
- Avoid click baits at all costs
Normally, you set an H1 tag (i.e., post title) for your post, which also serves as the title tag. But sometimes, you might want to set a custom title.
Before that, what's the difference between the H1 tag and the title tag?
- H1 tag is the heading you see at the top of an article.
- Whereas the title tag appears on the browser's tab. It also shows up in SERPs.
Guess what? When someone searches for your keyword on Google, what they see is the title tag. So it has a greater impact on click-through rates and overall SEO.
Ideally, use the same phrase for both the tags so that users won't be confused. They see the same thing on the SERP and on your web page.
But there are certain scenarios when you might want to craft a custom title tag. For instance, if your actual heading (H1) is a bit long, search engines might truncate it when showing on SERPs.
To avoid that, you can shorten it to create a catchy title tag. 50-60 characters can be an optimum length for title tags.
WordPress SEO plugins like Yoast allow you to set title and heading tags separately for each of your blog posts.
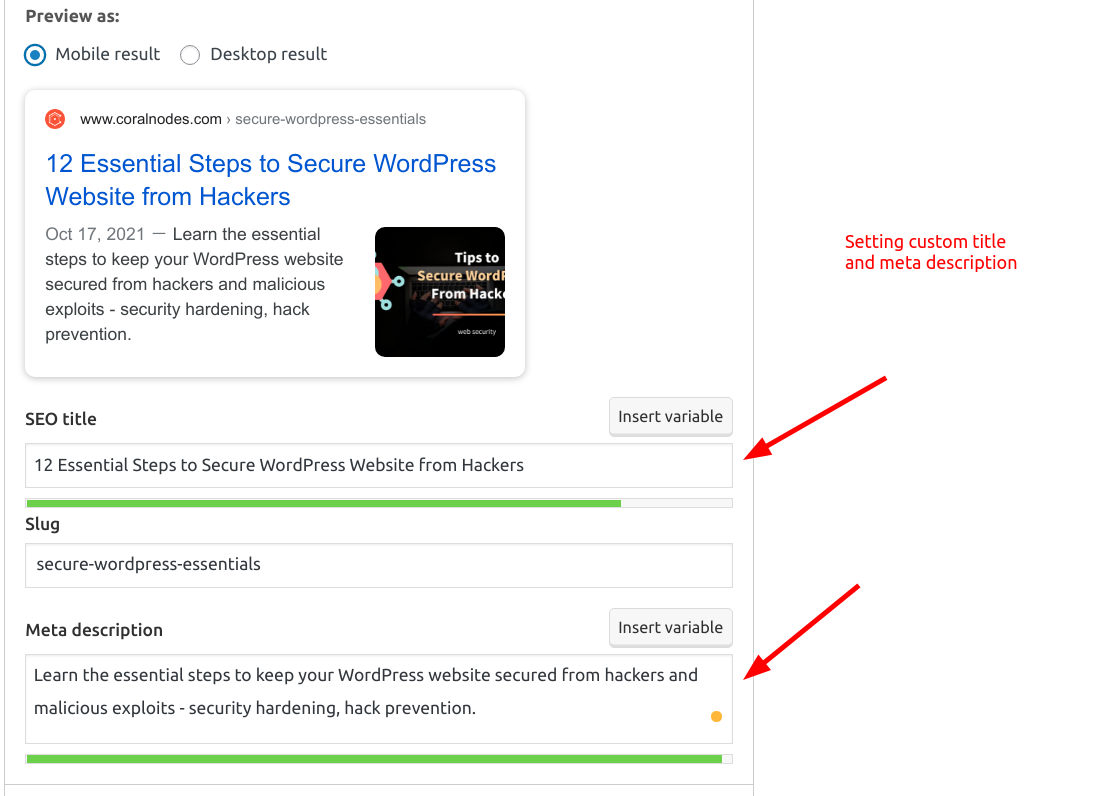
setting custom title and meta description using Yoast
Similarly, you can also set a custom meta description, which briefly describes what your article has to offer. It appears as the meta description tag inside your page's HTML. Search engines may use this information to display the description in SERPs.
Also, don't forget to add your focus keyword in both the title and the description.
5. Create a Featured Image
Featured images usually appear at the top of blog posts or alongside the title on archive pages. That's why it is also called the Post Thumbnail. Most themes support this feature.

adding a featured image to a blog post in WordPress Editor
These visual elements help to catch users' attention as they scroll through your web pages.
Not just on your site, featured images also serve as the preview images on social media sites like Facebook, Twitter, etc. You can also set separate images for each social media site if you want.
So, never skip this step thinking that it's unimportant.
But how to create a blog featured image?
You can use a photo or an illustration that conveys the essence of the blog post. There are several sites like Unsplash and Pixabay that offer hundreds of thousands of free stock photos.
However, it will be better if you try to make it unique rather than using an image as it is.
To do that, you can use a graphic design tool like Canva or Photoshop. These tools allow you to add overlay texts, layers, shapes, etc to make unique designs.
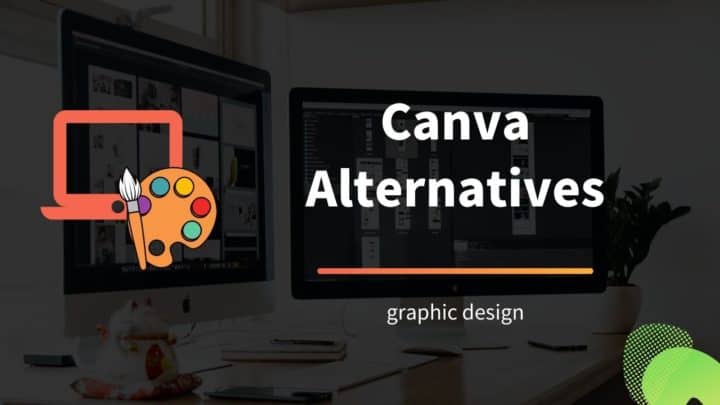
- See also: 9 Canva Alternatives
Always try to be consistent with the designs. If you have a brand color palette and font, try to stick to it every time you create an image. If you look at my blog page, you can find that I've been following the same style for a while.
So when someone sees your images on social media/other places, they will quickly identify it as your brand.
6. Set a Permalink
Most content management systems, including WordPress, allow you to set the URL slug for individual blog posts.
If you split the full URL by slashes, the slug is the last part (string) unique to a post/page.
By default, WordPress derives the URL slug from the post's title (H1 tag). Each word will be separated with a hyphen.
However, when doing so, the slugs often end up too long and unfriendly. So we need to shorten it to make it more readable and meaningful.
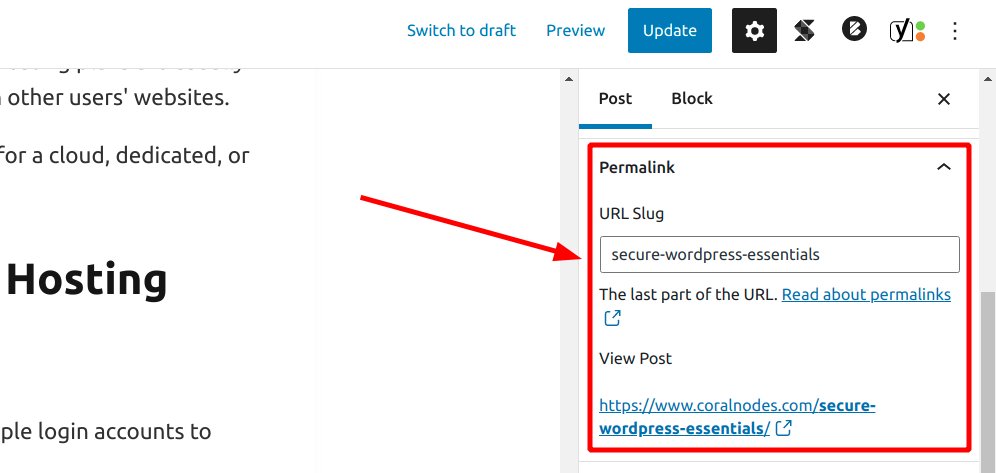
setting custom permalink slug for a post
Some suggestions would be:
- Remove stop words
- Remove numbers
- Avoid repetitive words & special characters
- Include the focus keyword
Although not as important as the title tag or meta description, URL is also an SEO ranking factor.
7. Set Appropriate Category & Tags
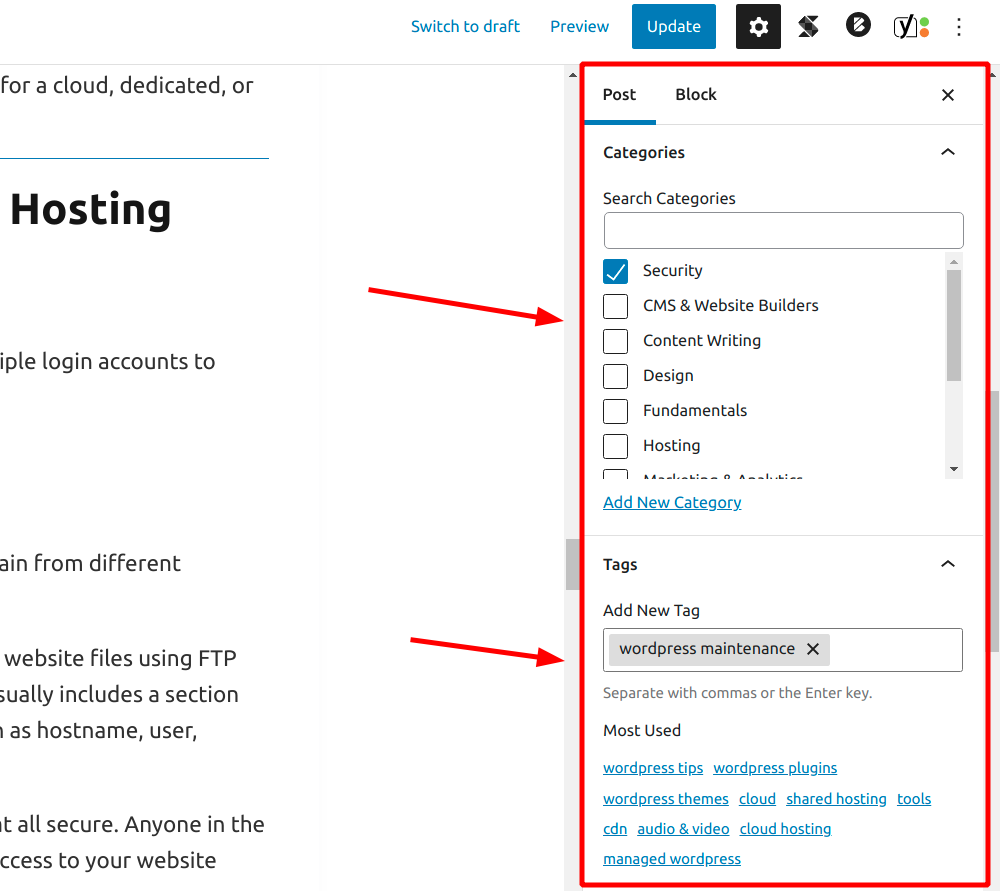
Categories are meant for organizing blog posts in WordPress. They are hierarchical.
Not just WordPress, most content management systems offer categories in some form or other.
Ideally, you can have around 5-10 categories representing the main topics of your blog.
Wise use of categories helps you to build a strong site architecture over time.
In WordPress, you should assign a blog post to at least one category. If you don't, WordPress will put it under the "Uncategorized" category.
assigning categories & tags
You can also assign multiple categories if required. But I usually limit it to one (or at most two) to make it meaningful. Yoast allows picking a primary category for posts that are assigned to multiple categories.
Tags are another way to organize content albeit slightly different than categories. They are more like keywords and are not hierarchical.
Pre-publish Checklist Plugin
If you still forget the things to do, you can get the help of a plugin like Pre-publish Checklist.
The plugin adds a widget to the post editor, where you can check off each item.
It also prevents you from publishing the post unless you complete all the tasks.
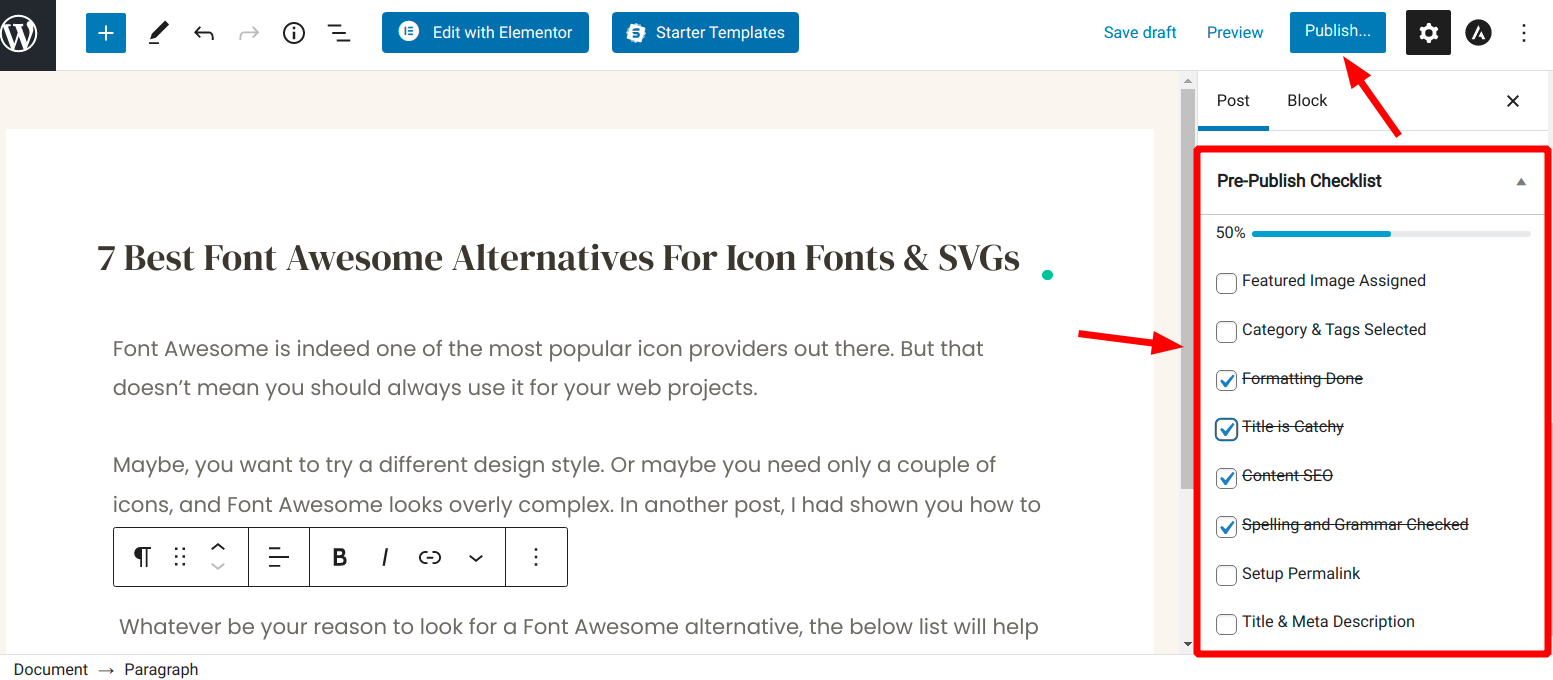
Checklist widget showing up in the Editor
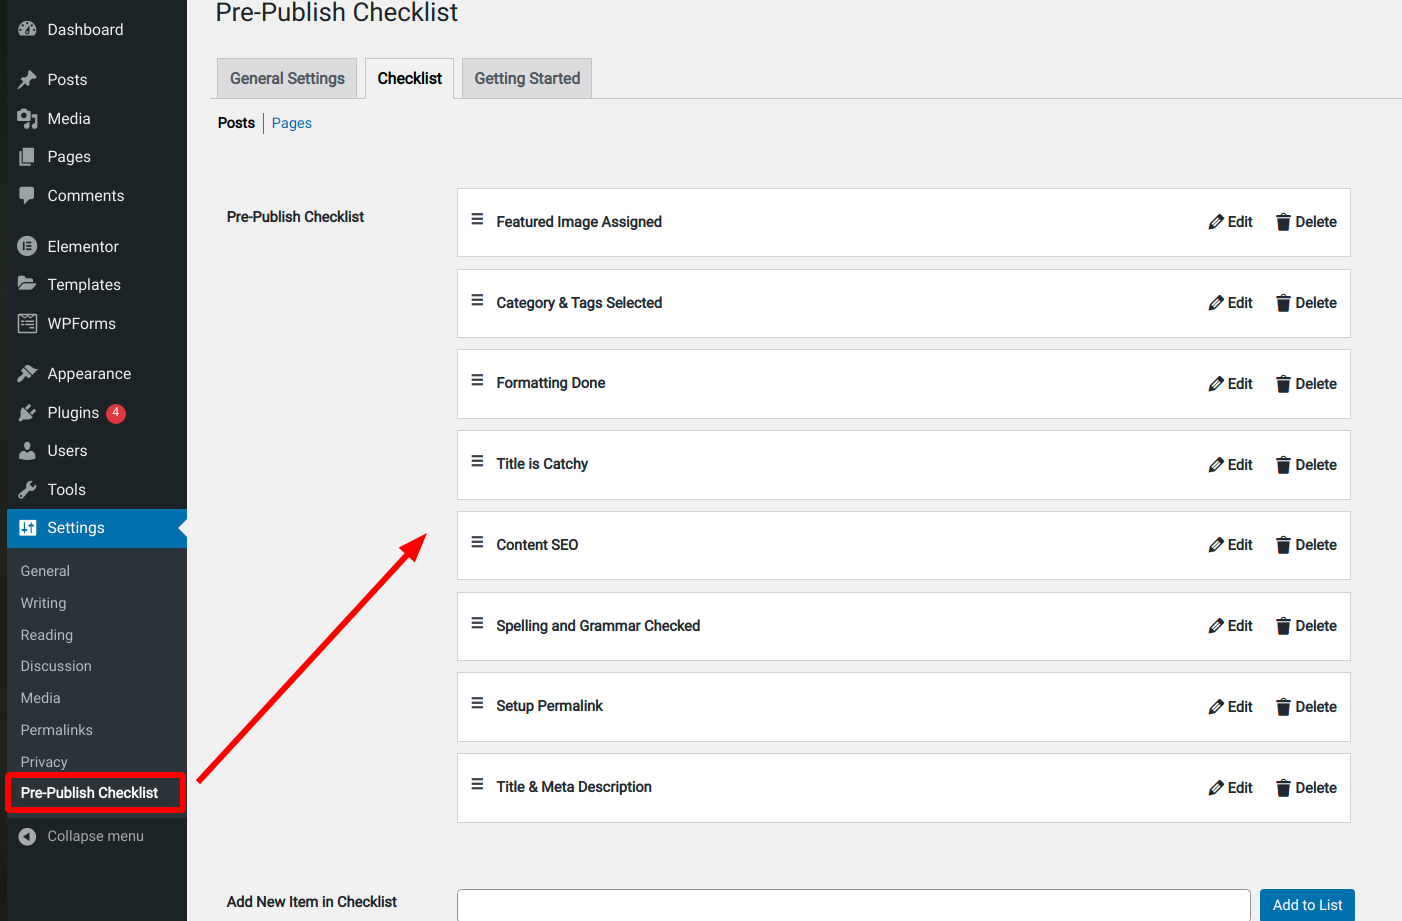
Create your own checklist tasks
Keep Blogging, Write Better!
Error-free, well-formatted, and optimized posts are essential to the success of any blog. People will love to read such content.
I hope this post helped to make you a better blogger.

![Grammarly Review [2021]: How to Make Error-free Writing Easy](https://cdn-2.coralnodes.com/coralnodes/uploads/medium/2019/08/grammarly-review-featured-1.jpg)