This article may contain affiliate links. If you buy some products using those links, I may receive monetary benefits. See affiliate disclosure here
Unless your WordPress hosting provider comes with their own caching solution, as on Kinsta or Sitegrond, your next best option is installing a free caching plugin to improve your site's speed. Among those free offerings, WP Super Cache and W3 Total Cache are the two popular choices. Both are freely available in the WordPress plugin directory.
But which one should you use? What are the differences? So in this post, we will discuss the essential points to consider when choosing WP Super Cache vs. W3 Total Cache.
If you are wondering about what plugin I use on this blog, it's W3 Total Cache. I will explain why. But that doesn't mean I always prefer W3TC for all sites. Continue reading to find out more.
Popularity & Background
Developed by the same team behind WordPress, Automattic, WP Super Cache is a simple and straightforward caching plugin. With over 2 million installations and a rating of 4.3 / 5, it is also one of the most popular WordPress plugins of all time.
In contrast, W3 Total Cache from Boldgrid is a comprehensive caching solution with over 1 million installations, a little lower than WP Super Cache. But, when it comes to rating, it is slightly better - 4.4 / 5.
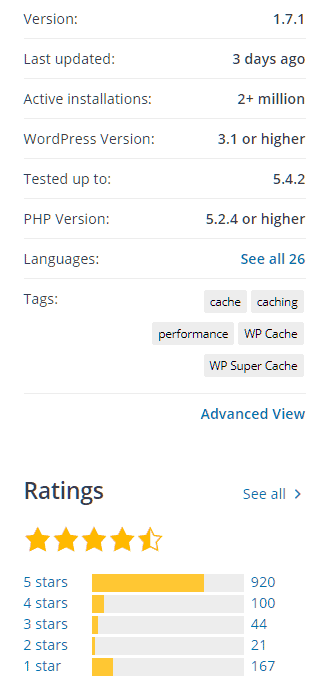
WP Super Cache - https://wordpress.org/plugins/wp-super-cache/
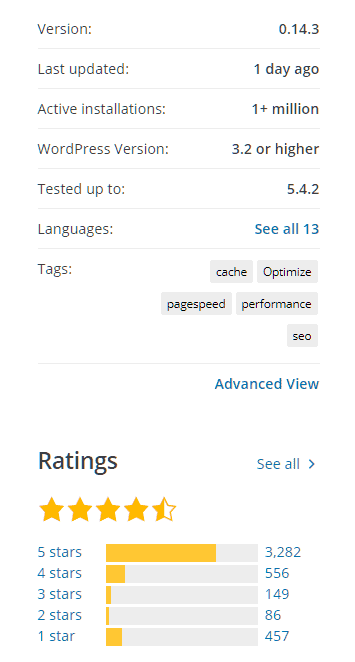
W3 Total Cache - https://wordpress.org/plugins/w3-total-cache/
- Winner: WP Super Cache
Features
First let us start by comparing the features:
| Feature | WP Super Cache | W3 Total Cache |
| Page Caching | ✔ | ✔ |
| Minification | -- | ✔ |
| Object / Opcode / Database cache | -- | ✔ |
| Enable CDN | ✔ | ✔ |
| Lazy loading images | -- | ✔ |
| Set up reverse proxy | -- | ✔ |
| Browser cache | -- | ✔ |
| Cache preloading | ✔ | ✔ |
| Cache Statistics | ✔ | Pro only |
WP Super Cache vs. W3 Total Cache - feature comparison
Page Caching
Both the plugins do their primary job well - page caching. When someone visits a post or a page on your site, the plugins store the static HTML output in the cache and serve it to subsequent users.
WP Super Cache offers two modes of caching:
- Simple
- Expert
Out of these, Expert mode works by adding necessary rewrite rules to the Htaccess file. It eliminates PHP and database queries entirely. So the Expert mode gives the maximum speed. However, Simple is the recommended method on the plugin page.
Similarly, W3 Total Cache also gives multiple options for page caching. Out of these, two are important:
- Disk: Basic
- Disk: Enhanced
In my tests, Disk: Enhanced gives the maximum speed benefits. So, that's the option I usually enable with W3TC.
CDN Integration
Another important feature that both the plugins offer is CDN integration. As an Automattic product, WP Super Cache recommends using JetPack's site accelerator - a free CDN solution for WordPress users. But it's quite limited. A better option would be using an affordable CDN provider like BunnyCDN or even free Cloudflare.
Likewise, W3 Total Cache offers tight integration with several top CDN providers like Stackpath and Amazon Cloudfront. Apart from these options, you can also integrate any provider by just entering your custom CDN URL.
Cache Preloading
Both plugins allow you to preload the cache so that visitors will only see the cached page.
However, W3 Total Cache gives more options to fine-tune it, such as preload interval and no. of pages to cache at a time. So you can adjust it in such a way that it won't overload the server even if you have thousands of posts.
Other Features
Beyond the basic features, W3 Total Cache totally outshines WP Super Cache. The former allows you to set up advanced caching systems like Object cache, Opcode cache, database cache, etc. However, these are only useful if you have a hosting provider that supports these things. You need not worry about any of these on a typical shared host.
Apart from that, W3TC also allows minification, lazy loading, and leverage browser cache.
As a caching plugin, it's disappointing that WP Super Cache doesn't even give an option to set browser cache options. However, you can easily solve many of these shortcomings by installing the Autoptimize plugin along with WPSC.
- See also: How to Leverage Browser Caching.
You can even set up a reverse proxy, which is beneficial if your host supports the Varnish cache.
For more details, check out my post on how to configure W3 Total Cache.
To summarize the above points, if you are looking for a caching plugin that offers maximum features with a free price tag, look no further than W3 Total Cache. It's on par with premium caching plugins like WP Rocket Cache.
In contrast, WP Super Cache is a lot easier to set up, as it does not overwhelm you with options and features.
- Winner: W3 Total Cache
WP Super Cache vs. W3 Total Cache: Performance
To determine which of the two plugins gave better performance, I tested both of them using GTmetrix and Pingdom. And these are the results:
| Plugin | GTmetrix | Pingdom | ||
|---|---|---|---|---|
| Wait | TTFB | Wait | TTFB | |
| No Caching | 306 | 475 | 313 | 393 |
| W3 Total Cache | 79 | 157 | 87.5 | 166 |
| WP Super Cache (Expert) | 83 | 189 | 98 | 178 |
| WP Super Cache (Simple) | 97 | 213 | 111 | 193 |
However, as I have said above, the two plugins are different in terms of available features. To make the comparison as fair as possible, I enabled only the Page Caching option and kept all the other options disabled while performing the tests.
But still, W3 Total Cache's Disk: Enhanced option gave maximum savings in TTFB and load times. WP Super Cache's Expert mode stood slightly behind, while Simple mode was way slower.
- Winner: W3 Total Cache.
Set up & Ease of Use
Setting up WP Super Cache
After installing the plugin, go to Settings > WP Super Cache in your WordPress admin.
There you'll see the options neatly arranged into seven tabs:
- Easy
- Advanced
- CDN
- Contents
- Preload
- Plugins
- Debug
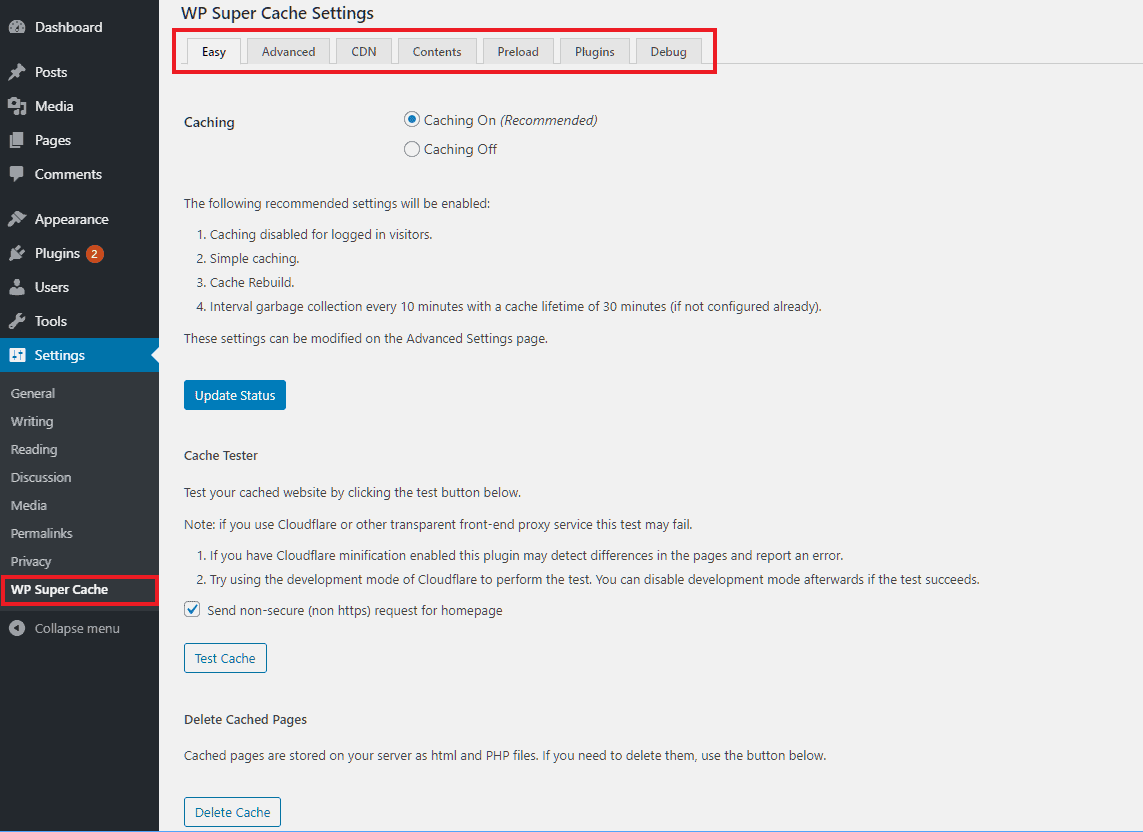
Easy
Under the Easy tab, you have to check the Caching On option and save the settings. It is the bare minimum thing to do to set up page caching on your site. The defaults are:
- cache lifetime: 30 minutes
- garbage collection interval: 10 minutes
- Caching mode: Simple
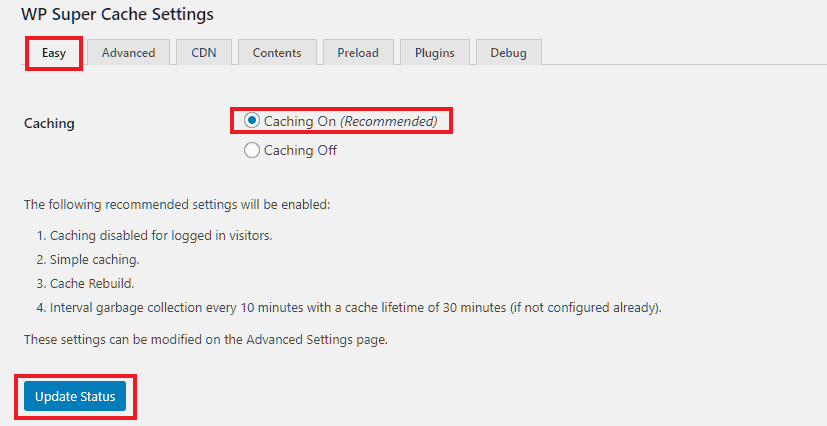
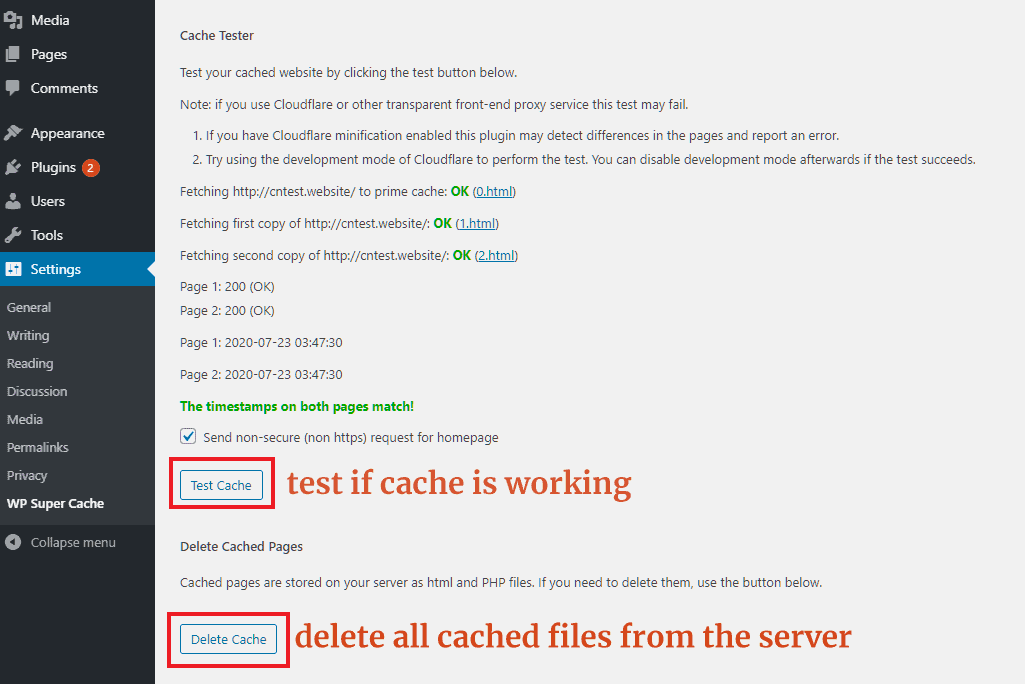
Below that, there are two sections: one to test the cache, and another to purge the cache.
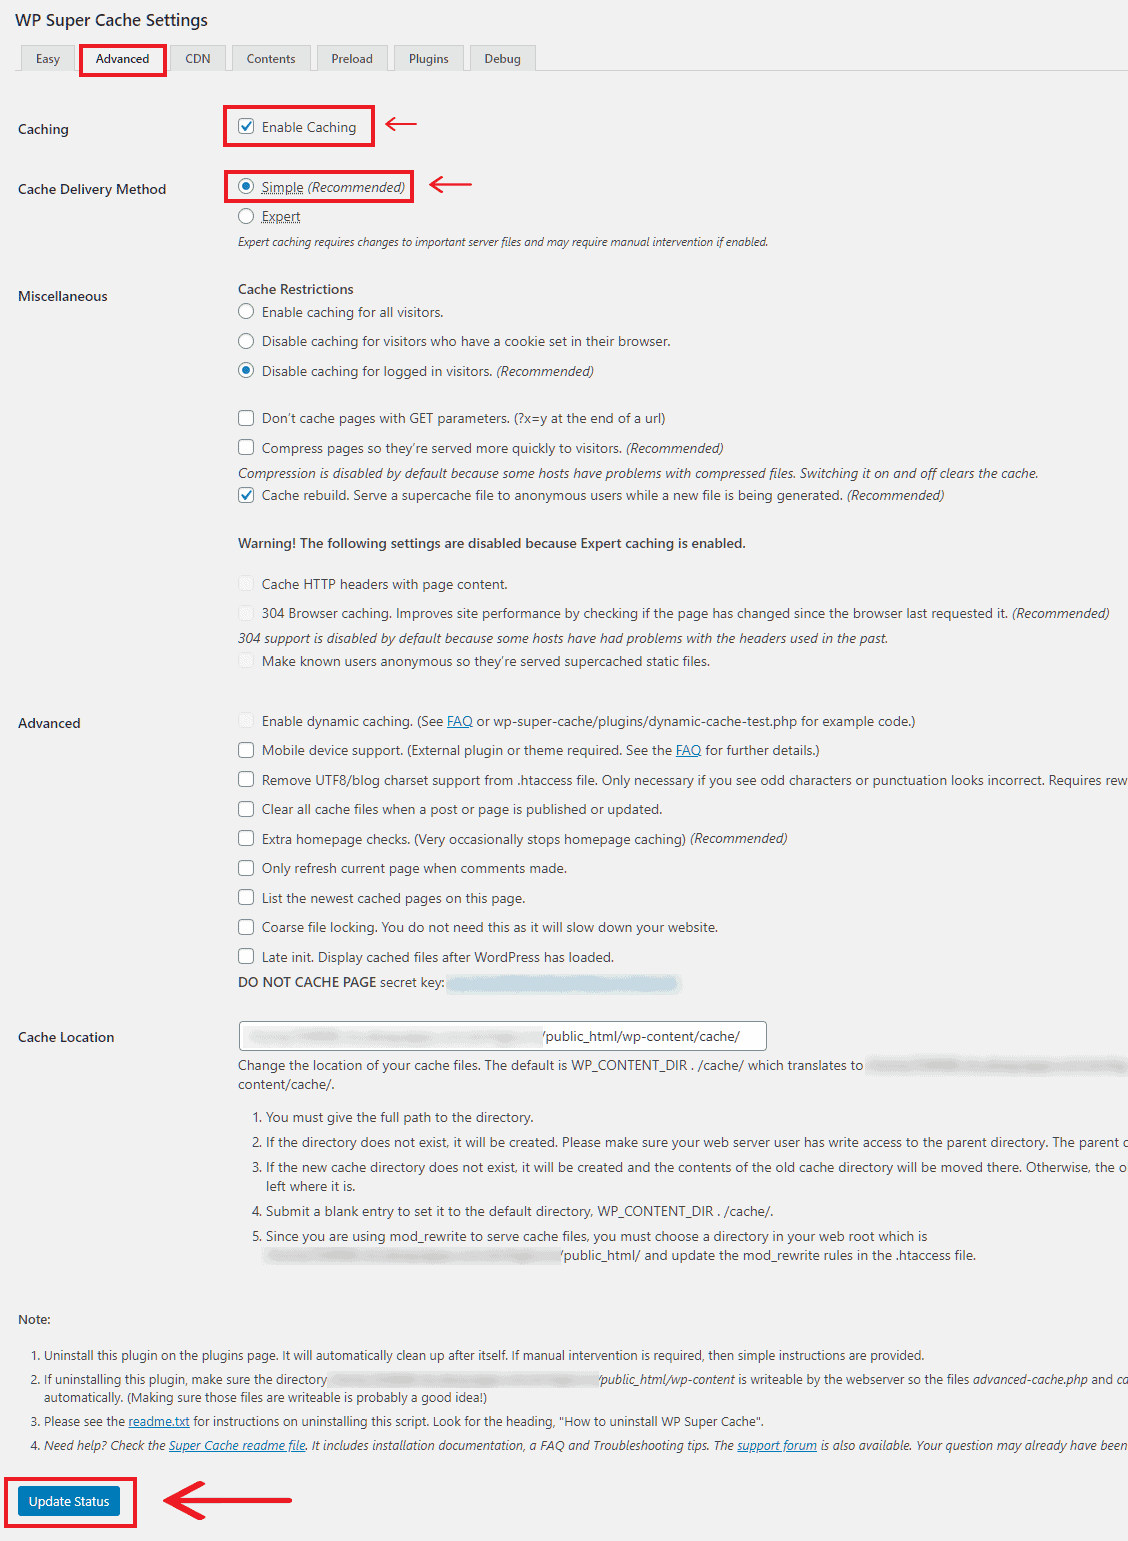
Advanced
The main option to set under the Advanced tab is the caching mode. For now, let us set it to the Simple mode, as it is the recommended method. Instead, if you select the Expert mode, it might require manually editing .htaccess files. I will explain it in a separate post.
Below that, there are a few checkboxes. Leave them to the default settings.
Here is what you get when you select the Expert mode:
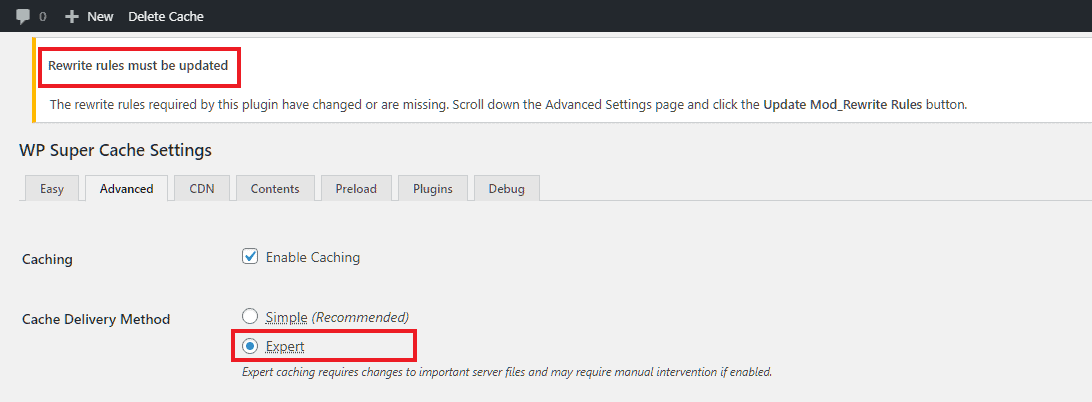
it requires manually editing the .htaccess file, so don't select it if you're not sure
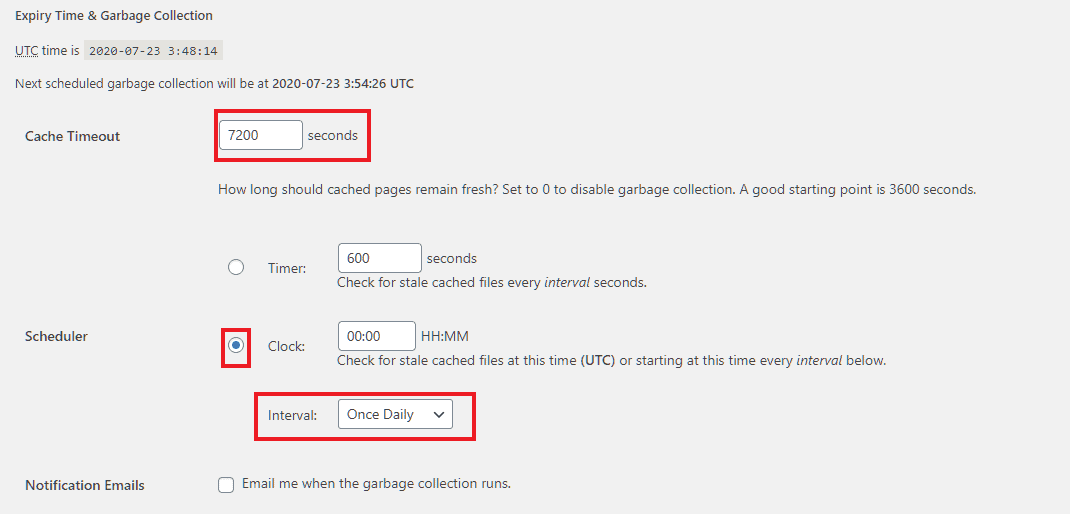
Below the Update Status button, you can find the cache lifetime settings. If you want to change the default timings, set these options. Otherwise, leave them. For now, let us set the lifetime to 2 hours and garbage collection to Once daily.
CDN
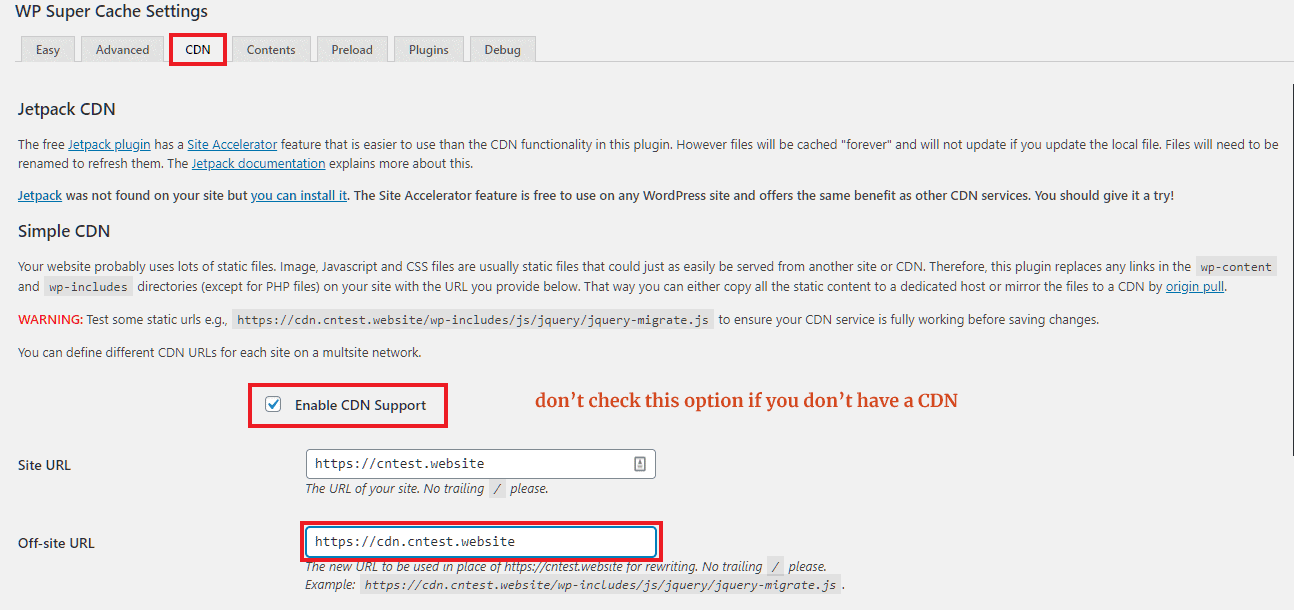
After adding your site to a CDN provider, go to the CDN tab, then enter your site URL, followed by the CDN URL. After that, WP Super Cache will replace all links to the static files with the CDN URL you have entered.
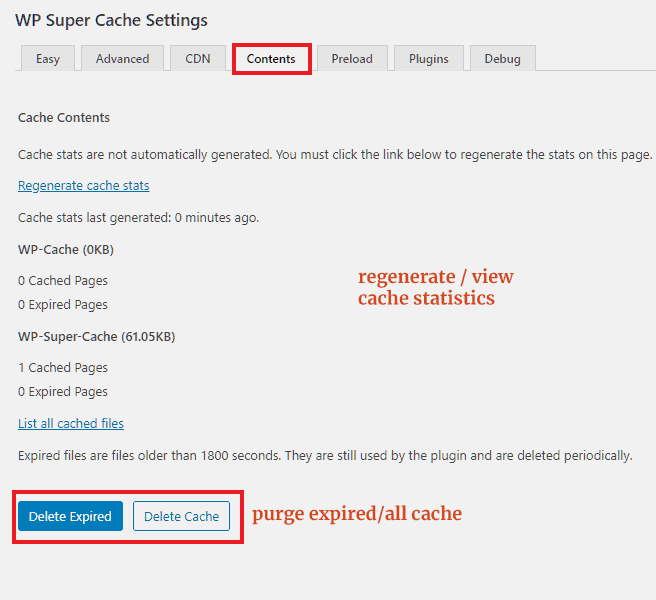
Contents
Under this tab, you can view the cache statistics. And at the bottom, there are two buttons:
- one to delete the expired cache
- and the other to remove the whole cache
These options will forcefully delete cache contents, without considering the cache expiration time or garbage collection intervals.
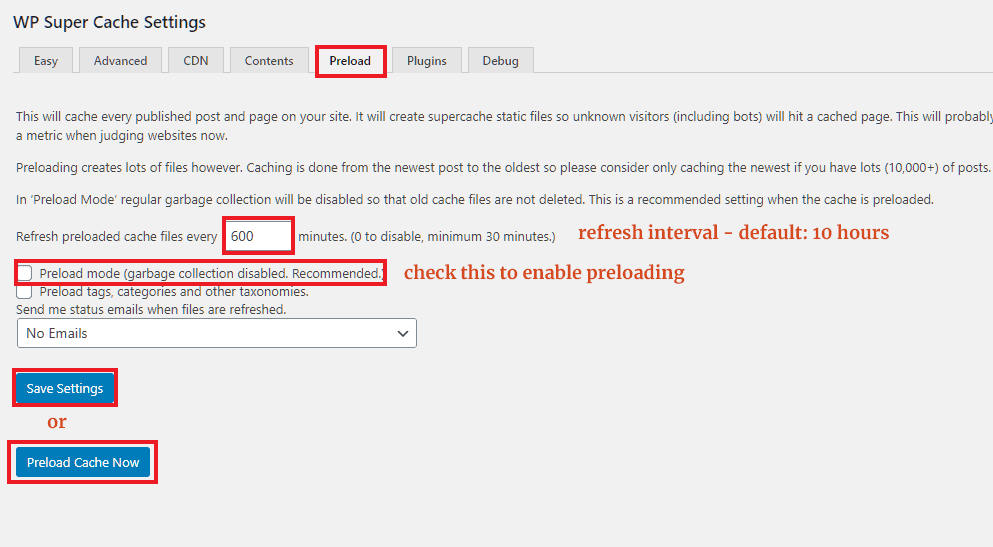
Preload
Under this tab, you can control how the plugin should preload the cache. However, if your site has thousands of posts, it might overload the server, especially if you are on a shared host.
There are two more tabs - Plugins & Debug. Since they are not that important, I am skipping it.
Setting up W3 Total Cache
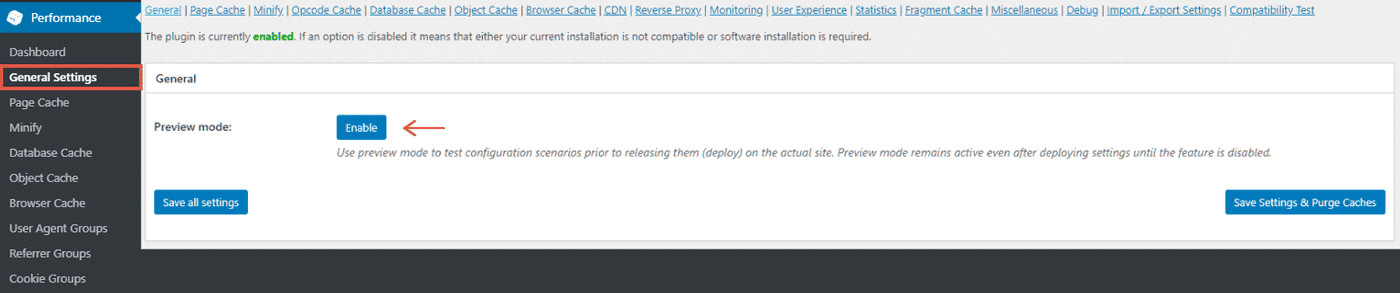
To enable Page Cache, install and activate W3 Total Cache, then go to Performance > General, then check the box against Page Cache.

For the caching method, W3TC gives around nine different options. Out of these, you need to think about only the first two:
- Disk: Basic
- Disk: Enhanced.
Other options require advanced server infrastructure to work, which most shared hosts don't offer. So in most cases, the best option would be selecting Disk: Enhanced.
However, unlike WP Super Cache, W3 Total Cache doesn't require any manual intervention to add the necessary rules to the .htaccess file.
Other settings
Since W3TC comes with a wide range of configuration options, discussing them in this post is out of scope. So I have made it into a separate post, please check it out:
- W3 Total Cache Recommended Settings for Shared Hosting
In short, it is a trade-off between features and ease of use. So if you are looking for a simple plugin, and don't bother lacking a few features, choose WP Super Cache.
Winner: WP Super Cache
Price
Both the plugins are free. So there is almost nothing to compare here. I said almost because W3 Total Cache also offers a paid version. It has even more features like Fragment Cache, Rest API Caching, and Cache statistics.
But still, the free version gives excellent value, and you rarely need to buy the pro version. So it's a tie.
Winner: Tie
Conclusion
Let me conclude this comparison by listing the pros and cons of each:
Pros & Cons of WP Super Cache
Pros
- Easy to set up
- Developed and maintained by Automattic
- More Popular
Cons
- Lack of advanced features
- No option to set leverage browser caching
- Expert mode requires manual intervention
Pros & Cons of W3 Total Cache
Pros
- Feature-rich
- Slightly better performance
Cons
- Configuring the plugin can be overwhelming at first
When to use WP Super Cache
- When you need a simple caching plugin, choose WPSC.
- If you are building a site and entirely handing it over to a non-tech-savvy client, use WP Super Cache because there is less to go wrong. Instead, if you misconfigure W3TC, it might degrade the performance instead of improving.
- A client specifically asks you to install WP Super Cache.
When to use W3 Total Cache
- Choose W3 Total Cache when you need maximum control over caching settings.
I personally prefer W3 Total Cache on all of my WordPress sites. Also, it allows me to set up the Varnish cache reverse proxy available on Cloudways [review] hosting.
Also, check out WP Fastest Cache, as it gives more features than WP Super Cache, but still quite easy to configure than W3 Total Cache.
- See Also: WP Super Cache vs. WP Fastest Cache
What is your opinion? Which is your favorite plugin? Mention it in the comments.