This article may contain affiliate links. If you buy some products using those links, I may receive monetary benefits. See affiliate disclosure here
Many problems in WordPress occur due to caching issues. For instance, changes not reflected on the frontend, settings not getting saved, and so on.
In most of those cases, the first thing to try is to completely clear the cache. However, it is easier said than done. Because most sites have multiple layers of caching.
If you are using only a simple caching plugin, then all you might need to do is to click that purge cache button from your WordPress admin.
Otherwise, you first need to identify the different types of caching enabled on your site, then clear them one by one.
So in this post, we will discuss some of the things you can try when you encounter caching-related issues.
Types of Caches to Clear
Note: Depending on how your site is configured, some of the below caches may or may not be applicable to you. For example, some plugins like the W3 Total Cache allow managing multiple caches, such as page cache, object cache, browser cache, etc. See the next section to see how to purge caches with popular caching plugins.
Page cache
It saves a static HTML copy of your web pages and serves them to subsequent visitors. Almost all caching plugins allow you to set up page caching.
Object Cache
Object cache allows saving the database query results in the memory. WordPress supports a native API to enable object caching. But it is not persistent.
But if your server supports Redis or Memcached, then you can consider enabling persistent object caching.
W3 Total Cache allows setting up and purging object cache. The Redis Object Cache plugin is another dedicated plugin for managing object caching. It supports PhpRedis, Predis, etc.
Opcode Cache
Opcode cache stores the results of compiled PHP scripts, which can greatly reduce the PHP execution time. Zend Opcache is available by default in PHP.
Browser Cache
This is client-side caching. The user’s browser stores cached copies of HTML documents, files, and other resources.
You can set the cache headers appropriately from the server-side to ask the browsers not to cache files.
- See also: How to leverage browser caching
CDN Cache
A content delivery network is usually used to cache static files like images, CSS, and JavaScript files. In case the old file is still showing up even after you upload a new version, you might want to delete the CDN cache.
Reverse Proxy Cache
Reverse proxy services like Cloudflare can also cache your web pages. There are plugins that allow you to integrate Cloudflare (or other services) with your WordPress website so that you can clear the cache right from the WordPress admin area.
Otherwise, you may need to log in to that particular website and clear the cache from there.
Clearing Cache with Popular Caching Plugins
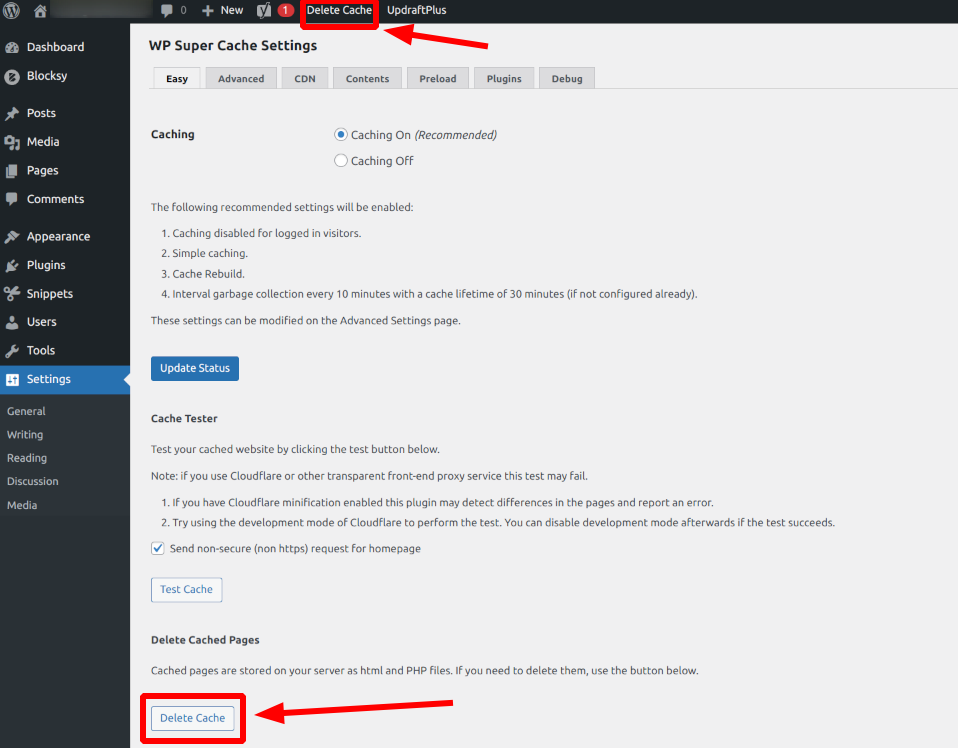
WP Super Cache
WP super cache is a simple plugin that enables page caching on WordPress websites. It allows clearing the cache files from the settings page.
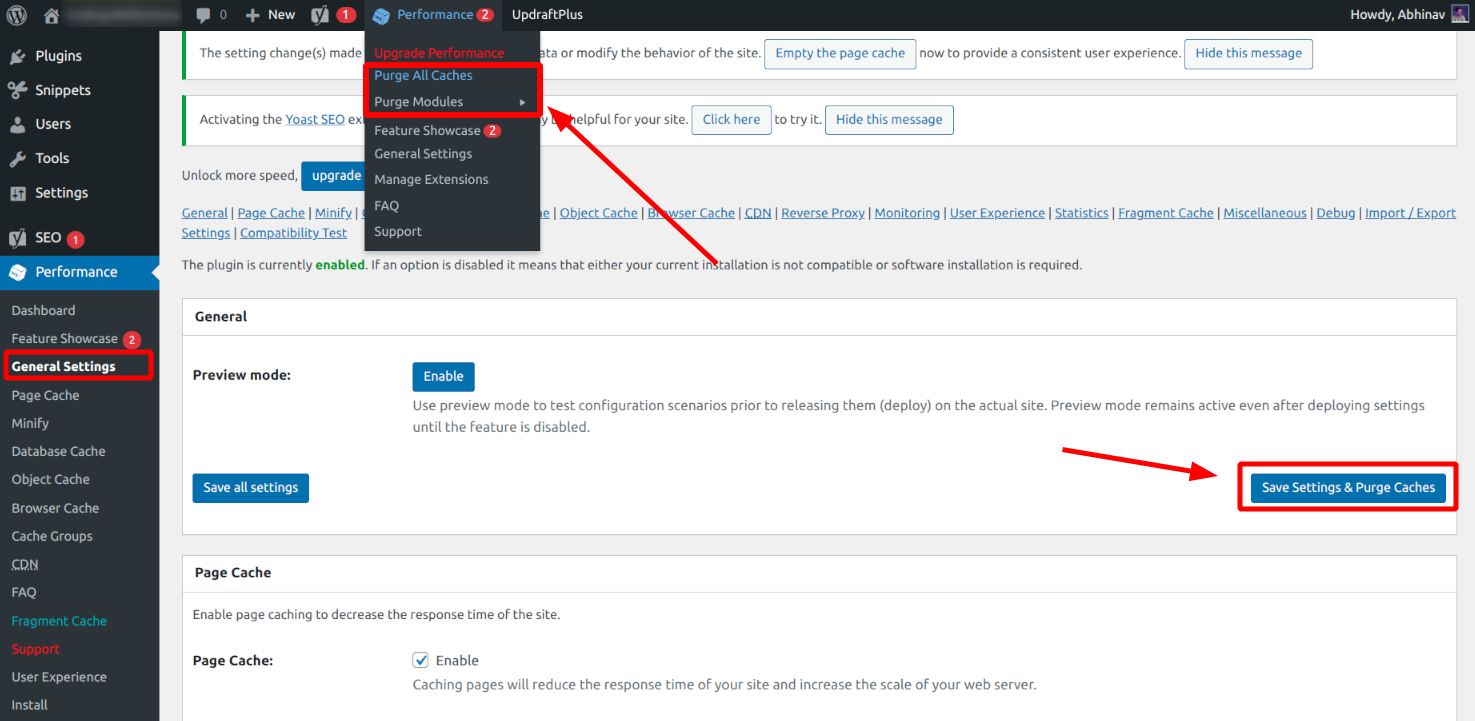
W3 Total Cache
W3 Total Cache is much more complex compared to WP Super Cache. In addition to page caching, it supports the following types as well:
- Object cache
- Database cache
- Opcode cache
- Browser cache
- CDN integration with major providers like Stackpath, Cloudfront
W3 Total Cache provides multiple ways to clear the cache. One way is to use the Purge All Cache option from the top bar. Or you can clear the cache individually also.
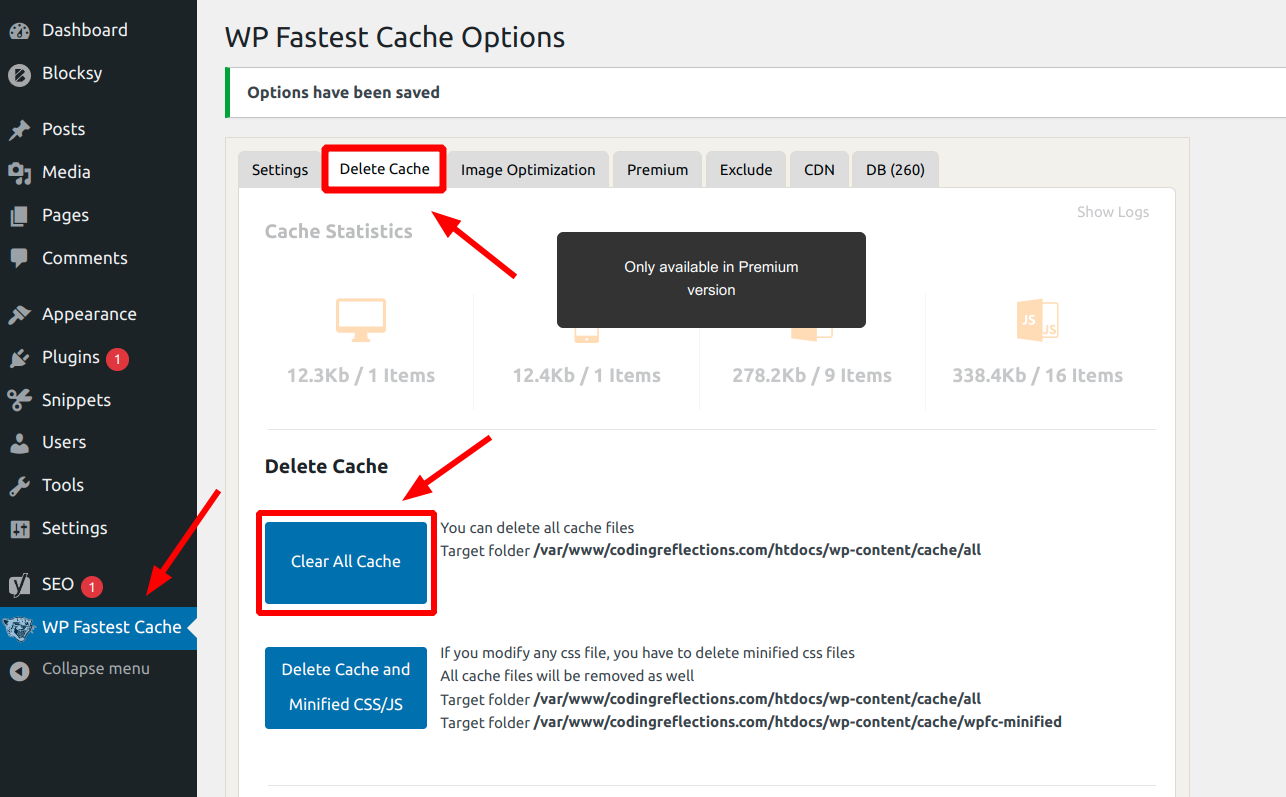
WP Fastest Cache
WP Fastest Cache is another plugin that comes in both free and premium versions. It supports page caching, browser caching, and other performance-related features, such as file minification and Gzip compression.
Here is how you delete the cache on WP Fastest Cache:
Nginx Helper
If you are using the Nginx web server instead of Apache, you may not need any of the above-mentioned caching plugins at all. It comes with a built-in caching mechanism called Nginx FastCGI cache, which can cache PHP requests. Here is an excellent tutorial on how to enable it.
However, it has a few limitations. For instance, there is no built-in way to purge or invalidate the cache. To overcome that you can use the Nginx Helper plugin. But for that to work first, you should make sure that the server has the ngx_cache_purge module installed.
Once those things are done, you can set purging conditions or clear the cache from the WordPress dashboard.

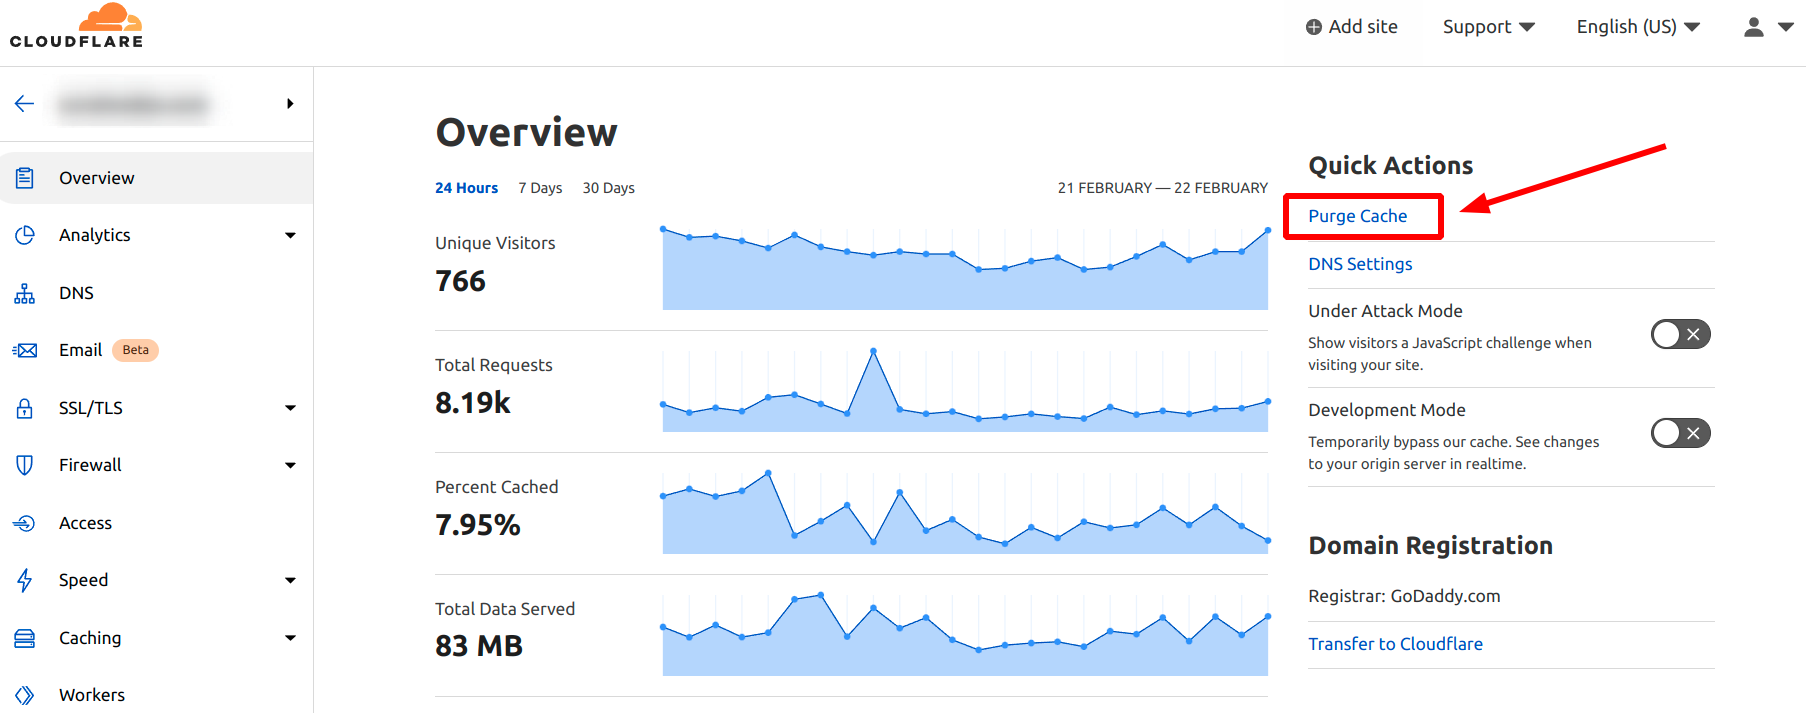
Deleting Cloudflare Cache
In another post, we had already discussed how to set up Cloudflare with WordPress websites. Some web hosts offer built-in integration with Cloudflare. Otherwise, you may need to do it manually.
Whichever method you choose to integrate Cloudflare, there are mainly two ways to purge the cache:
- By logging into the Cloudflare dashboard: On the Overview page, you can find a button to purge the entire cache.
- Using the Cloudflare WordPress plugin: This plugin allows managing the settings as well as purging the cache from the WordPress dashboard.
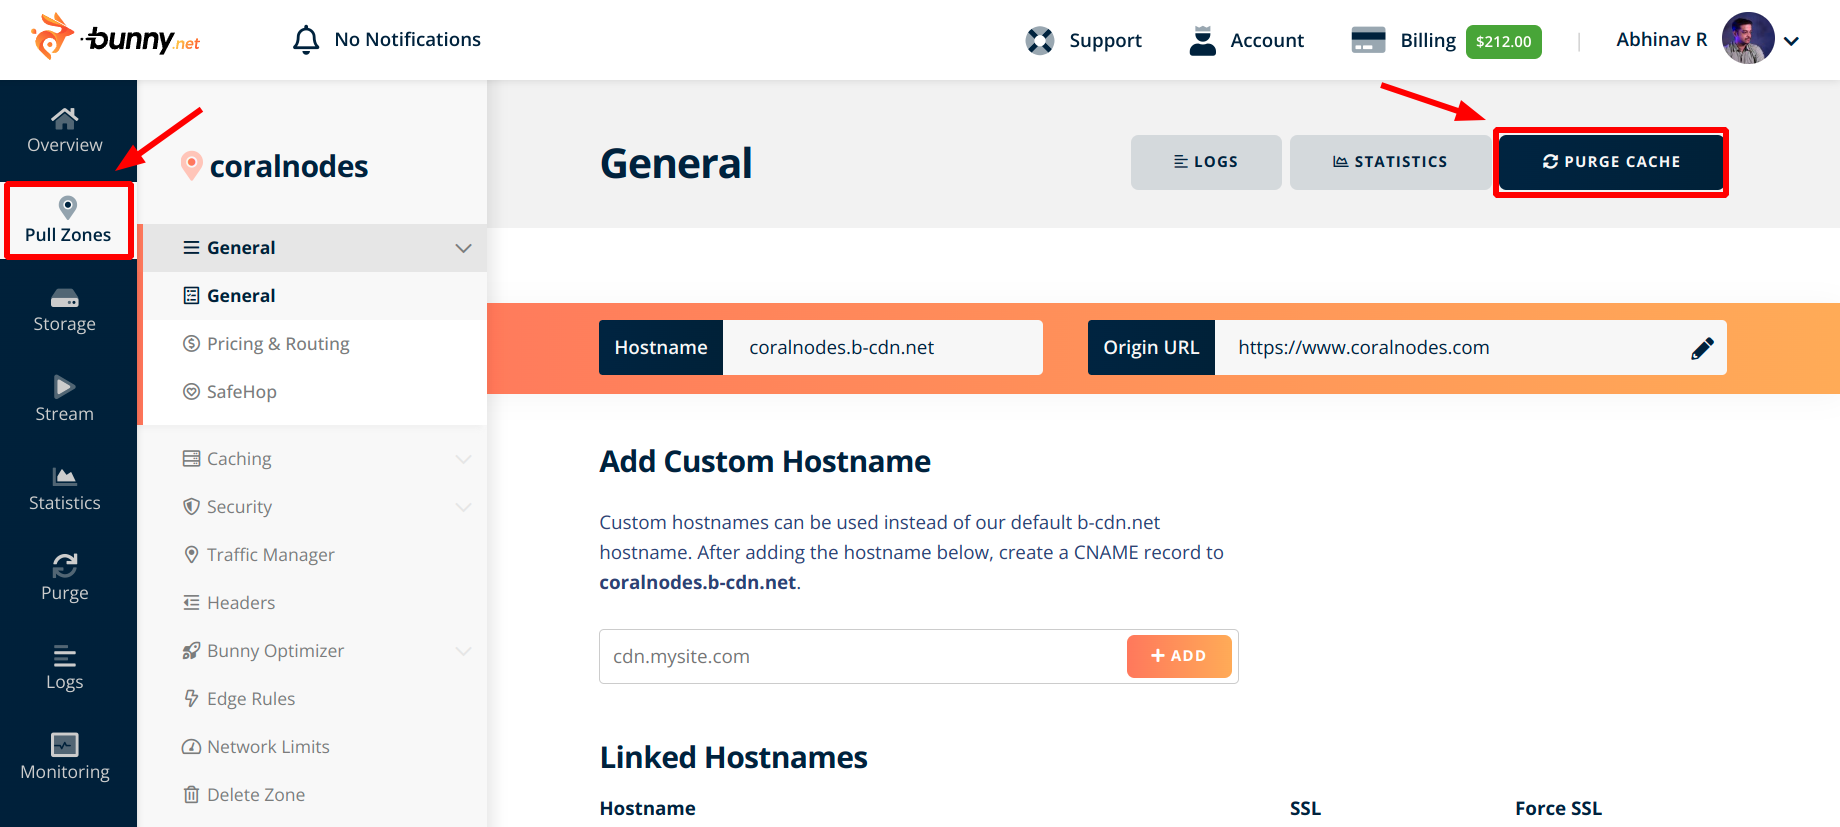
Delete CDN Cache
Are you using an external CDN like Stackpath or BunnyCDN to cache static files?
These services cache static files like CSS and images. So if you have made some changes to your theme files and are not able to see its effect on the front, the reason may be that you are viewing the old version cached by the CDN.
On this website, I am using BunnyCDN, and here is how to delete the cache files from the Bunny dashboard:
Delete Browser Cache
The last stop is your browser itself. Browsers can also cache static files and HTML documents. In case you are not able to view the changes after making some edits, try clearing the cache of your browser.
You can also try disabling the browser caching from the server-side. This can be highly helpful in development and staging environments, especially on localhost.
Here is how you can do it on Nginx. Similarly, on Apache, you can add some rules to the .htaccess file to disable browser caching. This should disable browser caching for all visitors.
Alternatively, you can clear the browser cache from your end also. Here is how to do it with Google Chrome and Firefox (Press Ctrl+Shift+Delete on Win/Mac to open the dialog):
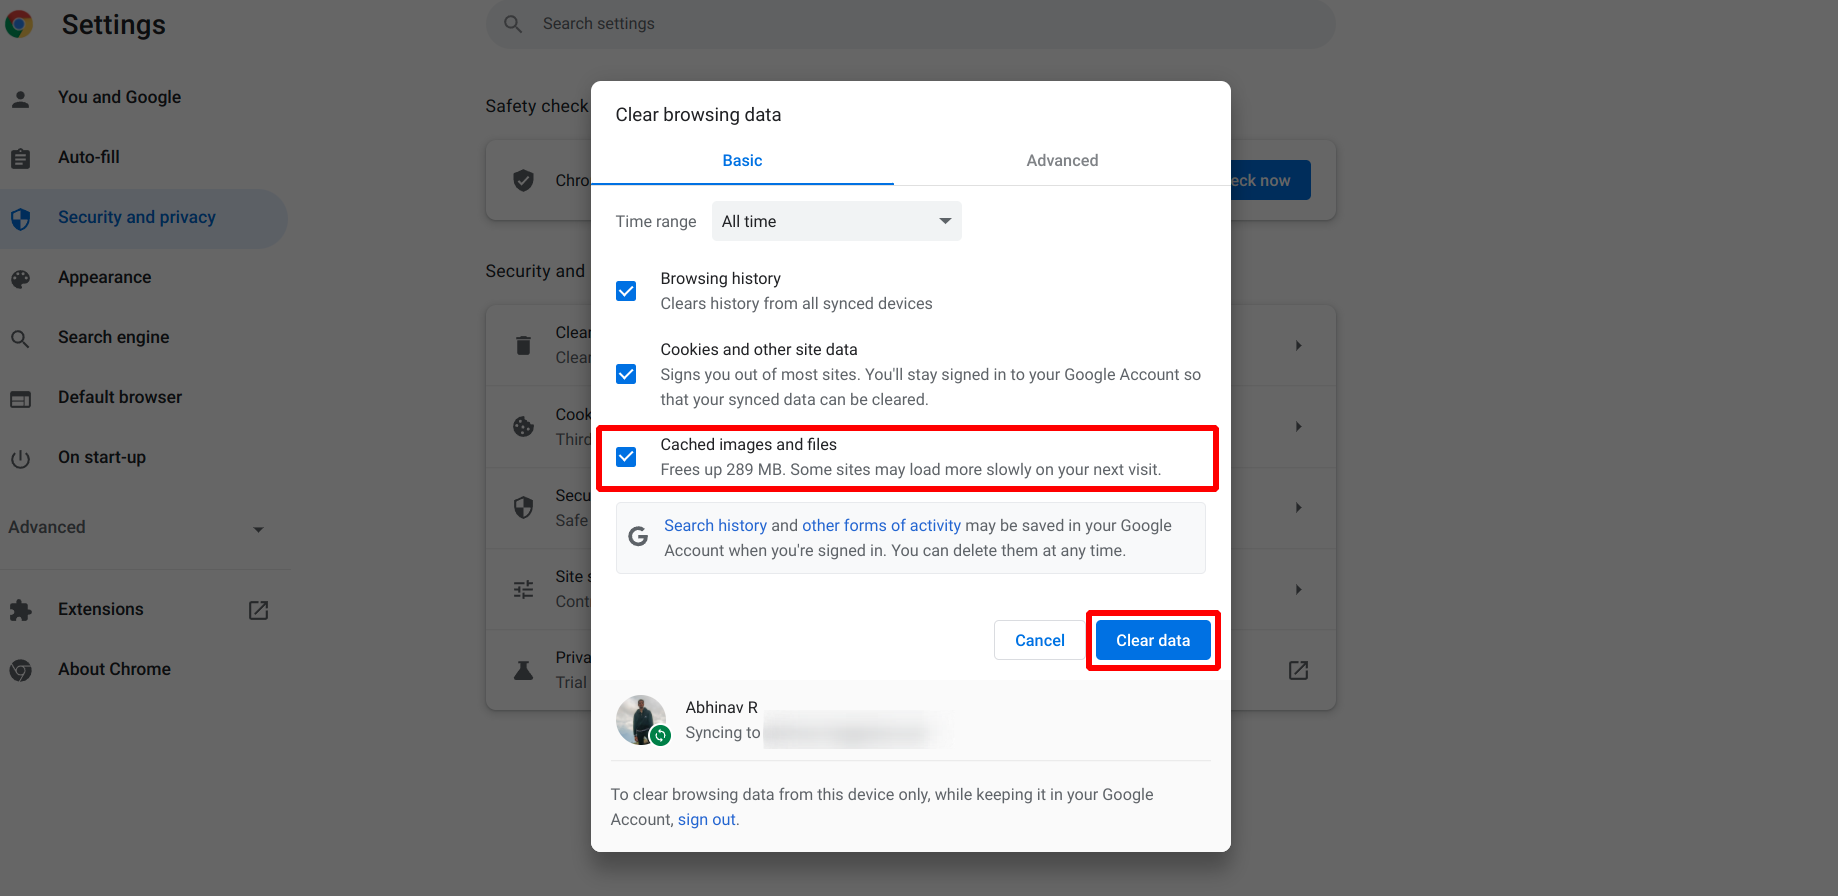
clearing browser cache in Chrome
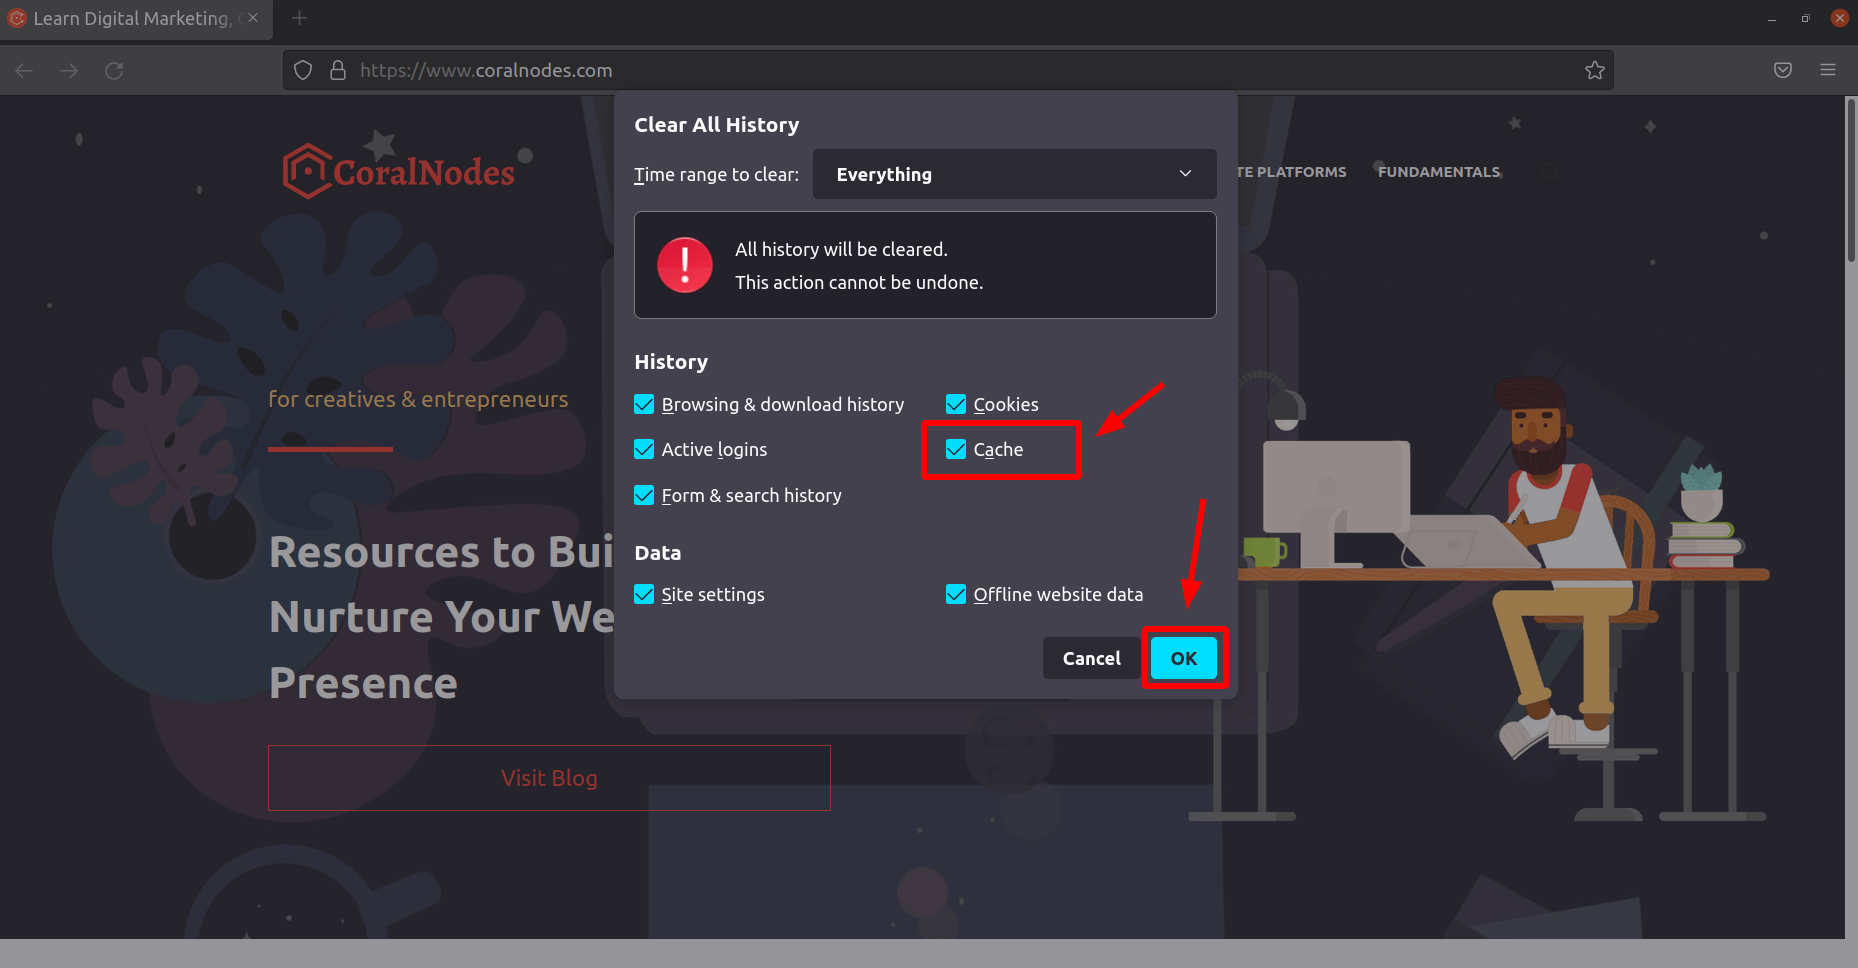
clearing browser cache in Firefox
Conclusion
I hope this will help you to fix most of the caching-related issues on your WordPress website.