This article may contain affiliate links. If you buy some products using those links, I may receive monetary benefits. See affiliate disclosure here
You might have already heard that Cloudflare is a great way to make your websites faster. But how to integrate it properly?
In this post, you will see how to set up Cloudflare on WordPress websites. Not just WordPress, you can use the same methods for other platforms as well.
Before that, here is a quick recap about what is Cloudflare and what are its advantages.
What is Cloudflare & Why use it?
In short, Cloudflare is a company that provides better performance and security for websites.
The following are the three main reasons to use Cloudflare:
- It acts as a content delivery network.
- It provides better security by protecting your origin server (reverse proxy).
- It’s free to use.
How does it work?
An essential step in integrating Cloudflare is changing your domain’s nameservers to Cloudflare’s nameservers.
After that, whenever someone requests your site, their DNS server resolves it to the IP of the nearest Cloudflare server, instead of your origin server. These edge servers store a cached copy of your website and serve it to your visitors.
Currently, they have around 200 such edge servers around the globe. It helps to reduce network latency, thereby reducing the server response time.
That’s how it works as a CDN. Then what about website security?
According to W3Techs, Cloudflare is the #1 reverse proxy service. Around 11% of the websites use it while their market share is a whopping 80%.
How does a reverse proxy help to give better security?
Once we change the nameservers, Cloudflare stands in front of our server as a shield. It blocks potential threats and helps to mitigate DDoS attacks.
Also, Cloudflare does not reveal your origin IP so that no one can access your server directly.
Advantages
Reverse proxy and CDN together give us the following benefits:
- Faster page load times
- Less load on your origin server
- Better security & DDoS protection
Disadvantages
Now, what are the disadvantages of using Cloudflare? In my experience, there are a few:
- Single point of failure: When using Cloudflare, you depend fully on their systems. If it goes down, your site also will go down along with other sites in the network. Even if your web host is up, Cloudflare can cause your website to go down. However, chances are rare.
- Occasional slowdowns: Usually, your site should load faster with Cloudflare. However, the opposite can also happen. I had noticed such slowdowns a few times in the past. Even if no downtimes occur, response times can hike.

- False Positives: Cloudflare uses several sources such as Project HoneyPot to identify and block bad traffic. While it is a good thing, some of them are false positives, especially if your visitor is using a dynamic IP. That is, if a legitimate user is visiting your site from an IP with a poor reputation, Cloudflare will present a Captcha challenge. It can harm the browsing experience of genuine visitors.
Restarting the router can solve the issue in many cases, but most users won’t bother to do that. They’ll bounce off to another website.
The free Cloudflare plan does not allow you to use the CDN alone, without changing the whole DNS - check this StackOverflow thread.
Steps to manually Setup Cloudflare on WordPress
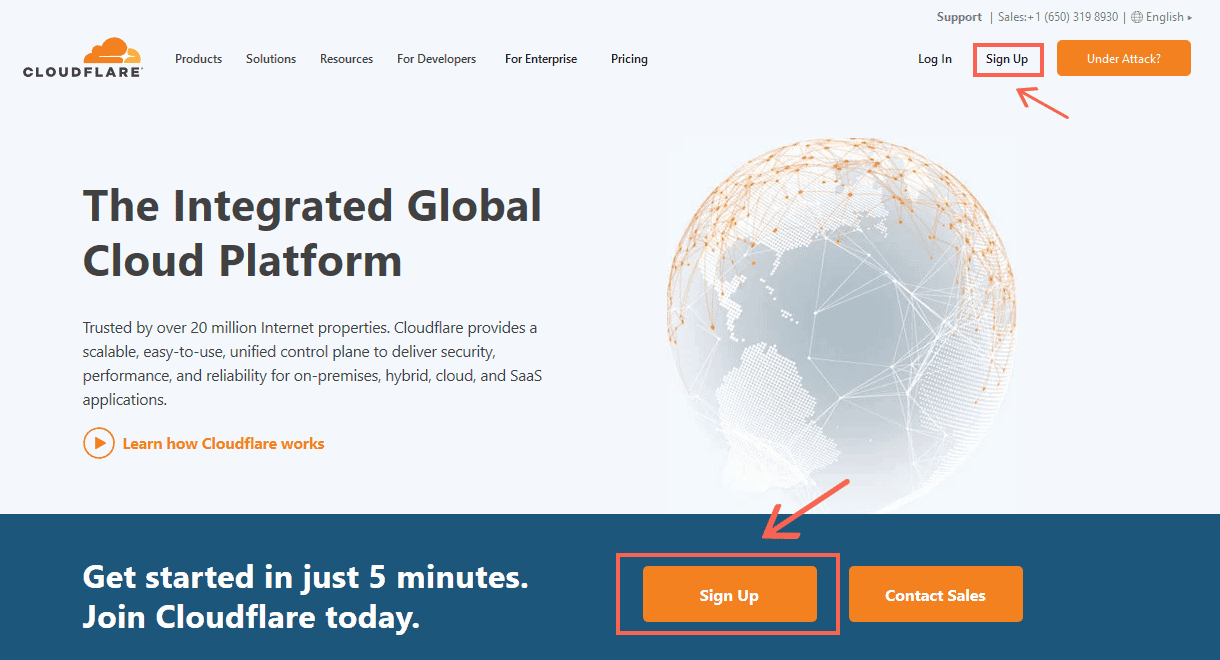
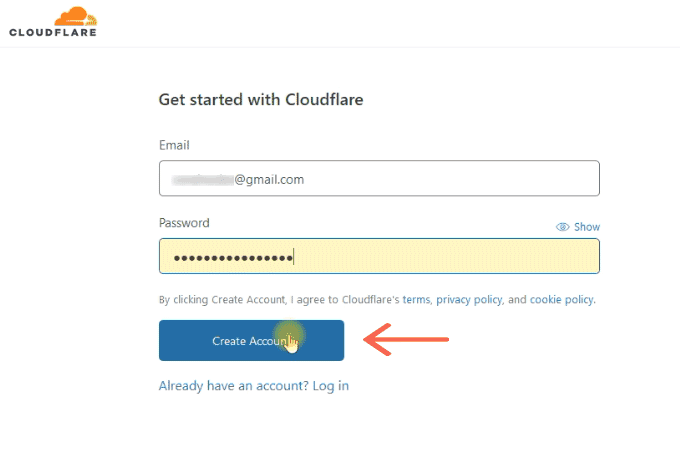
1. Sign-up on Cloudflare Website
Go to Cloudflare.Com, then register an account with your email and a password.
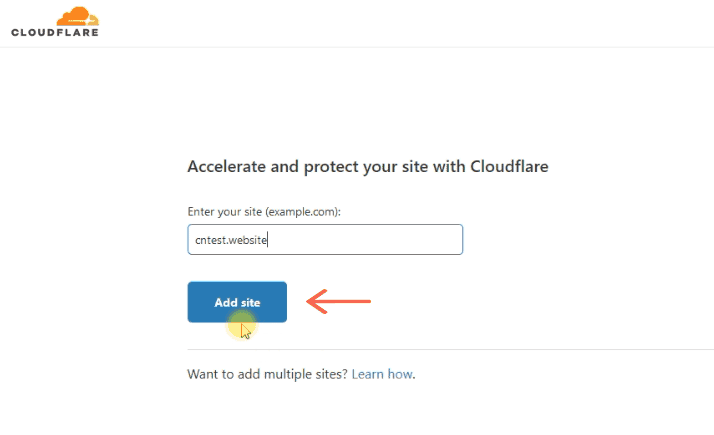
2. Add your Website
The next step is adding your website. Remember, you can add as many sites as you want under an account.
Enter the domain name and continue.
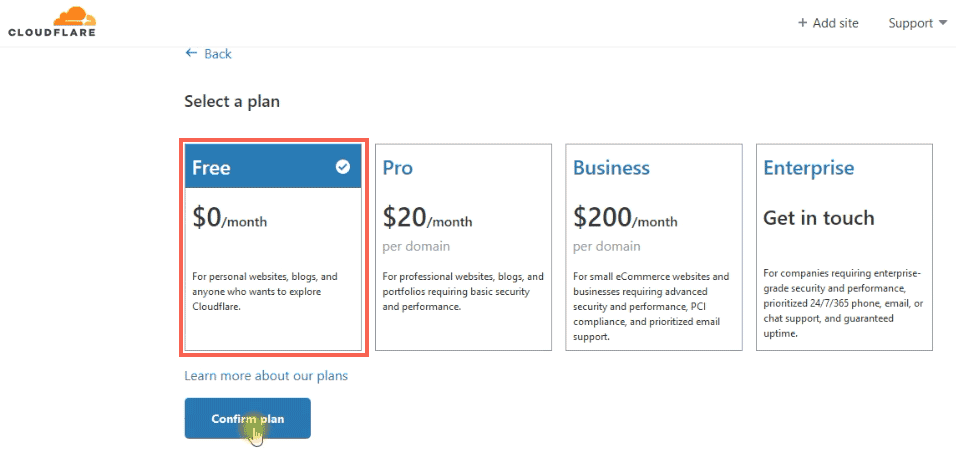
On the next step, you have to select a pricing plan. Select the free method for now. You can upgrade any time if you need advanced features like image optimization and Firewall.
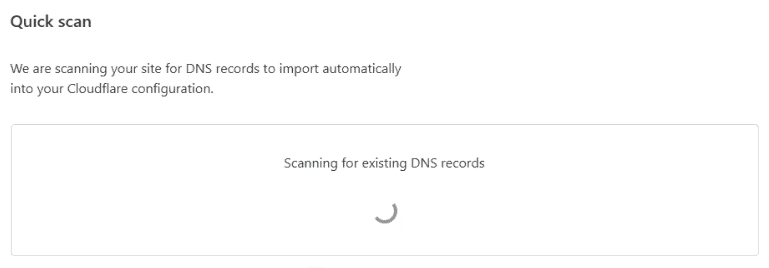
After that, Cloudflare automatically pulls your DNS records from your current provider. You can verify each record before continuing.
You will also see a Proxy Status icon against each A and CNAME records, which is turned on by default. Toggling it off will turn off reverse proxy; Cloudflare will resolve the requests to your origin server just like any other DNS server.
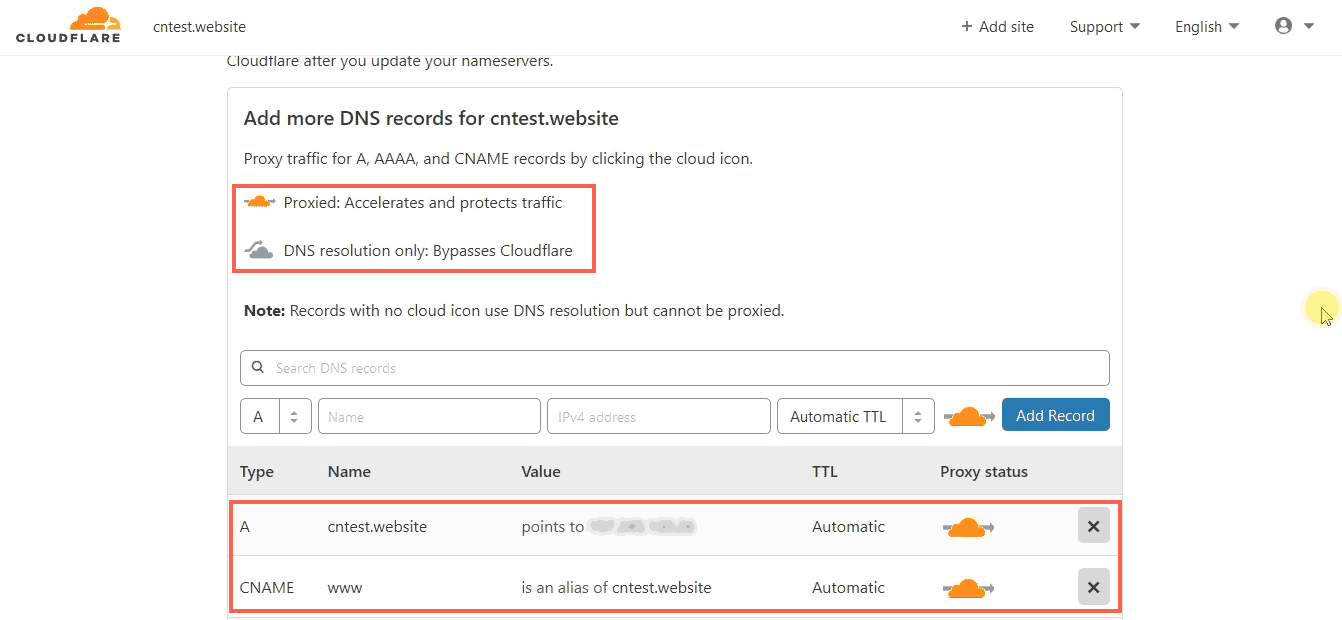
To get all the speed and security benefits, you have to keep the Proxy Status button enabled, so that Cloudflare acts as a reverse proxy.
After confirming the records, click Continue.
3. Change Nameservers
On the next page, you will see the details of the new nameservers.
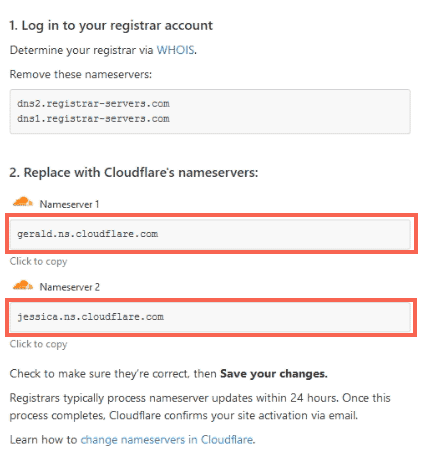
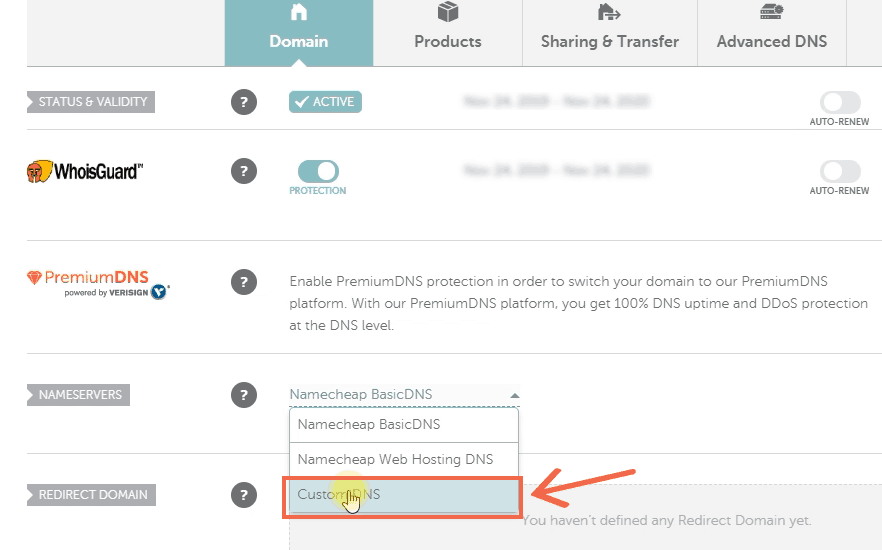
To change it, you have to log in to your domain registrar’s control panel. For the sake of this guide, I will show you how to do it with NameCheap.
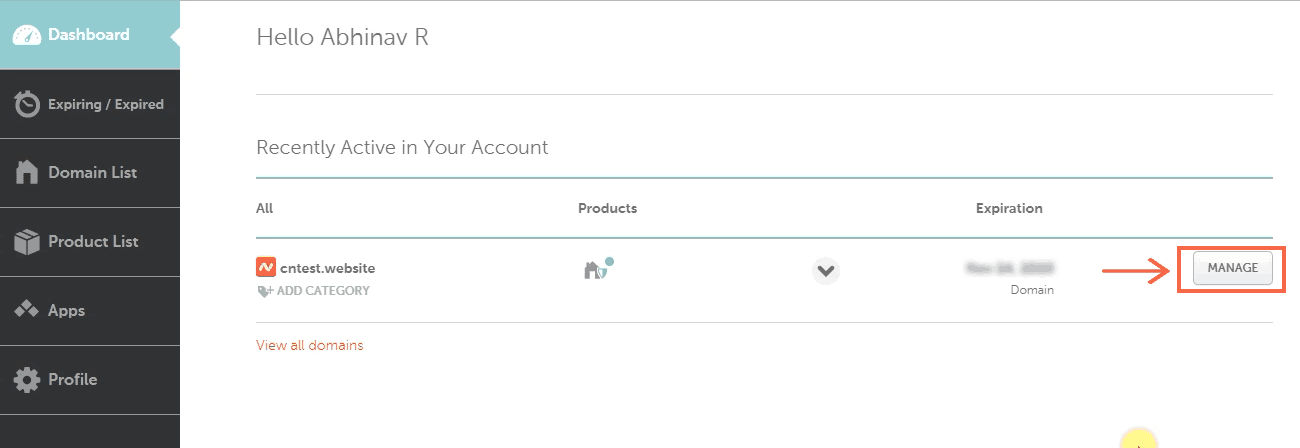
Select the CustomDNS option and copy-paste the two values, one after the other.

Editing nameservers can take up to 48 hours to propagate. It depends on your previous TTL value and a lot of other factors. For me, changes took effect in about 2 hours. You can use the DNChecker tool to check if your changes are live.
Recommended Settings
There are sixteen different tabs at the top of the dashboard from where you can change the different settings. Out of these, we will be looking at the seven most essential sections.

Overview
This section gives quick info about your website, along with the links to other relevant settings.
DNS
We have already covered this during the setup phase above. So, nothing to tweak here as of now. However, you can access this section to modify or add DNS records at any time.
For example, if you want to add a new subdomain, you can do it by entering a new CNAME record.
SSL/TLS Settings
SSL is a must for any website these days. So, I hope that you already have a valid certificate on your host. You can use this certificate to encrypt the communication between Cloudflare and your origin server.
However, since you are on a free plan, you cannot install the same certificate on Cloudflare. Luckily, Cloudflare can issue another certificate to encrypt the communication between a user’s browser and Cloudflare.
In the end, you’ll have two SSL certificates, one on your origin server, and the other one from Cloudflare.
Finally, you have to select one of the four options:
- Off
- Flexible
- Full
- Full (Strict)
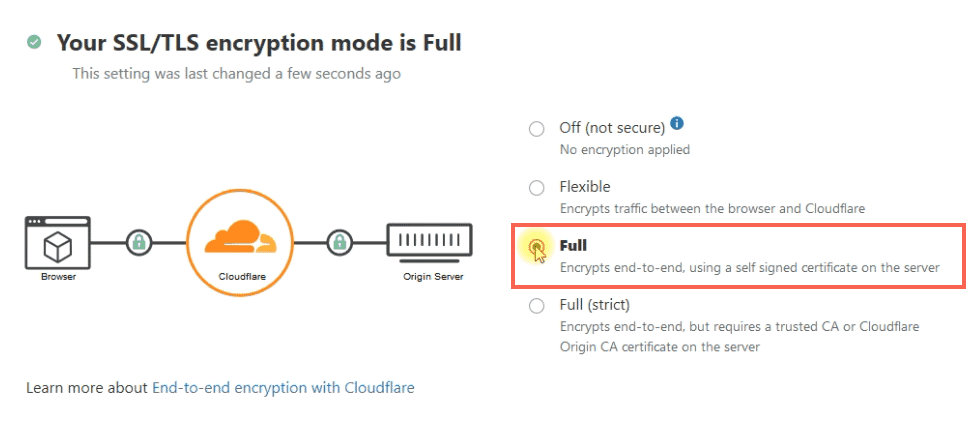
The default option is Full, which allows full encryption. It works for self-signed as well as recognized certificated from CAs. In most cases, you don’t need to change this option.
If you select the Full (Strict) option, you have to make sure that you have a valid certificate on your server.
Firewall
The Firewall section allows you to tighten the security by defining custom rules. For example, you can block visitors based on their country or IP.
Apart from these custom rules, there are also a few general settings available.
-
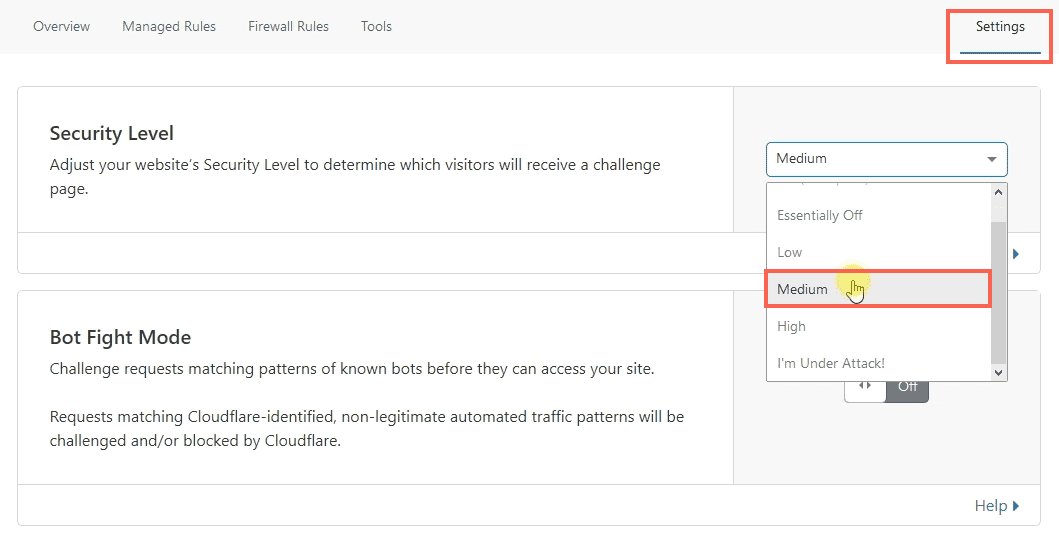
Security Level: This setting determines the strictness with which blacklisted visitors may receive a Captcha challenge before they can enter your site.
Medium is the default option. Off, Low, High, and I’m Under Attack are the other options.
Setting it to High can increase the number of false positives, which creates a bad experience for genuine users. So, it is better to keep it to Medium or Low.
If you use the last option, everyone will receive a Captcha, even if they are not in any blacklists. It helps during DDoS attacks.
- Bot Fight Mode: Helps to reduce traffic from bad bots - default is Off.
- Challenge Passage: 30 minutes is the default. If a suspicious visitor completes a captcha, that visitor can access the site for the next 30 minutes without any restrictions. After that, another Captcha will appear.
- Browser Integrity Check: Verifies the HTTP headers sent by the visitor’s browser - Default is On.
- Privacy Pass Support: Allow users with Privacy Pass browser extension to enter the site without a Captcha. It reduces the number of visitors receiving the Captcha, thereby improving the user experience for genuine users.
Caching Settings
In this section, you can control various settings related to caching, such as what to cache and how long to keep them.
Let us look at each of them:
- Purge Cache: This option allows you to remove cached files from the edge servers. Cloudflare will then fetch a fresh copy of those files from your origin server. It is helpful when you are updating your site or changing site files.
- Caching level: Sets which files to cache or not based on the query string. Standard is the default option. No need to change it in most cases.
-
Browser Cache Expiration: It determines how long a content stays in the user’s browser. In an earlier post, I had mentioned how to leverage browser caching.
So, if you have a cache expiration duration set on your host, Cloudflare usually respects that value despite this setting. That means, if you set 4hrs on the Cloudflare dashboard and one month on your host, the latter will take effect.
-
Always Online: It makes sure that your site stays up even if the origin server is down. Keep it on to improve your site’s uptime.
However, make sure you disable it for logged-in or admin pages. For that, you have to override it by creating a page rule (see below).
Page Rules
So far, we were discussing the general settings. Now, what if you want to give different settings for a specific page?
- That’s where Page Rules come in.
With that, you can define URL patterns and caching rules associated with them.
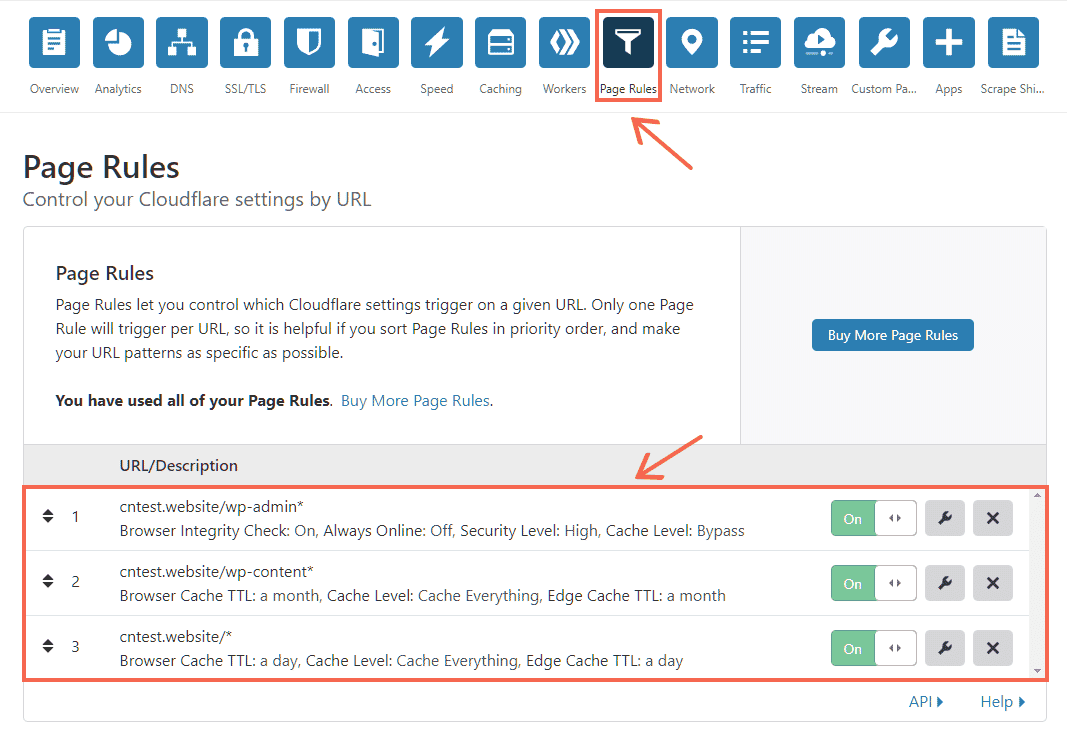
Note: the order of rules is important
Here is what we have done:
Cloudflare does not cache HTML responses by default. But enabling it can improve page speed. So, by using page rules, we can match the URLs and enable caching.
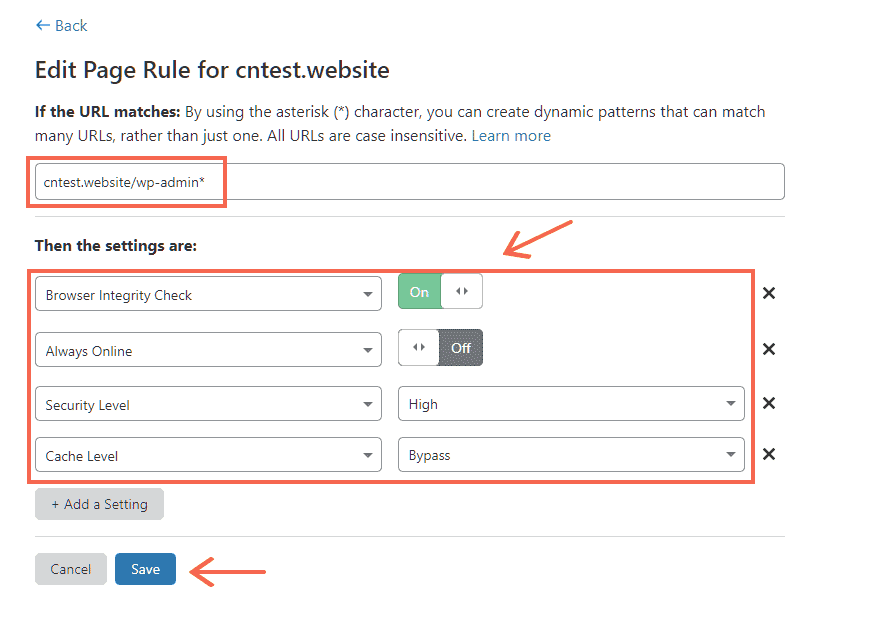
However, there is a problem. When we cache HTML, it caches admin pages, too, which we don’t want.
So, to exclude admin pages, we create another page rule and bypass caching for wp-admin.
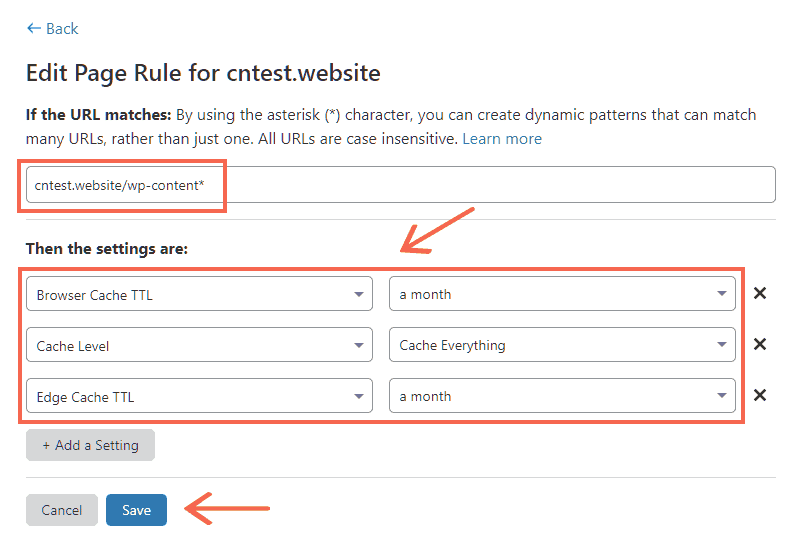
Next, we set a longer cache expiration duration for static files in the wp-content folder.
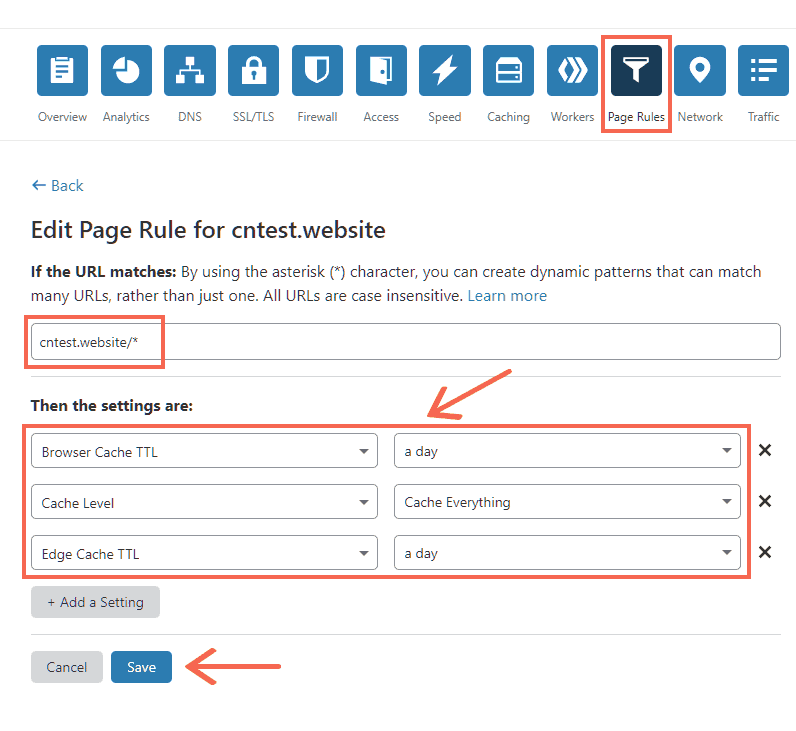
Finally, set one day expiration duration for all other pages. Without this rule, Cloudflare won't cache HTML.
The free plan allows only three page rules. So, if you have another important rule to set, you will have to drop the second or third rule above.
Speed Improvements
To know the real benefits, I have tested the speed using GTmetrix before and after setting up Cloudflare.
| Cloudflare Speed Test | ||||
|---|---|---|---|---|
| Location | Before Cloudflare | After Cloudflare | ||
| TTFB | Onload Time | TTFB | Onload Time | |
| Dallas | 139ms | 376ms | 115ms | 792ms |
| Hong Kong | 641ms | 1930ms | 163ms | 519ms |
| London | 229ms | 650ms | 197ms | 369ms |
| Mumbai | 584ms | 1570ms | 235ms | 546ms |
| Sydney | 668ms | 1980ms | 189ms | 396ms |
| Sao Paulo | 374ms | 1100ms | 359ms | 956ms |
| Vancouver | 230ms | 708ms | 145ms | 636ms |
| Average | 409ms | 1188ms | 200ms | 602ms |
Here is another test using BitCatcha.
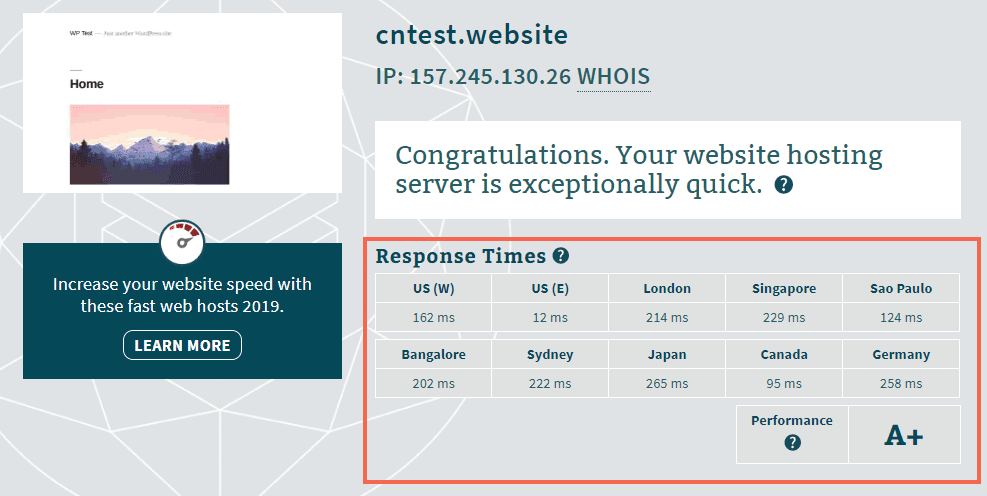
Before implementing Cloudflare
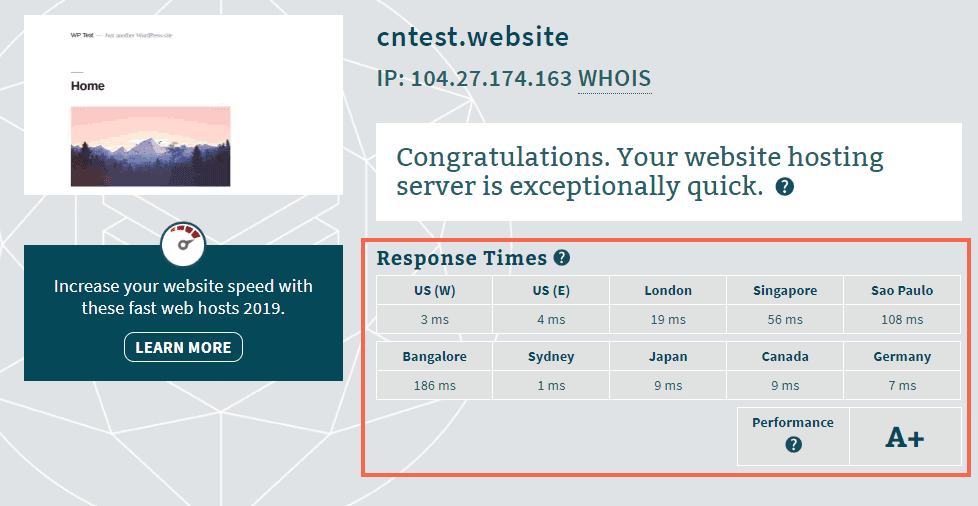
After implementing Cloudflare
Conclusion: Should you Use Cloudflare?
We have seen what Cloudflare is and how to integrate it on a website.
Cloudflare does help to improve a website, albeit a few disadvantages. So, when to use it, and when not to?
Based on my experiences, these are my conclusions:
- If you are on a mediocre host and struggling to improve your site’s performance, look no further, and enable Cloudflare. It will help to make your site faster and secure.
- On the other hand, if you are using a reliable host along with some other CDN, Cloudflare’s free plan may not guarantee faster performance. As you’ve seen, the response times sometimes spikes. Upgrading to a Pro plan may improve it, but I haven’t tried it yet. Still, it helps to enhance security.
What do you think? If you have used Cloudflare, what is your experience?