This article may contain affiliate links. If you buy some products using those links, I may receive monetary benefits. See affiliate disclosure here
You know that a WordPress site involves many parts - the core WordPress software, themes, and plugins (if any).
Keeping these things updated is crucial for properly and securely maintaining your site.
So, that's what we are going to discuss in this short post - how to update plugins and themes.
Before that, let's have a brief discussion on why you need to do it.
Why Update WordPress
- Security fixes: Developers often identify security loopholes in plugin/theme code, which they patch in subsequent versions.
The Wordfence blog has a lot of information about vulnerabilities that had occurred in the past. Hackers always check out for such vulnerabilities in outdated software. In order to prevent any malicious attempt, you should always update to the latest version of all plugins, themes, and WP core.
- Bug fixes: Plugins and themes often contain bugs. Some are serious, while some are minor. Again, developers fix any known bugs by releasing new versions.
- More Features: Plugins improve over time. To get the latest features, you can update to the latest versions, even if it does not involve any security patches or bug fixes.
- Performance improvements: The initial versions of a theme or plugin may not be the best optimized. Overtime, they optimize the code to improve the overall performance.
- Better compatibility: New versions ensure best compatibility with the latest tech.
For example, when a new version of PHP (the programming language used in WordPress) comes out, plugins should keep up with it by releasing an update.
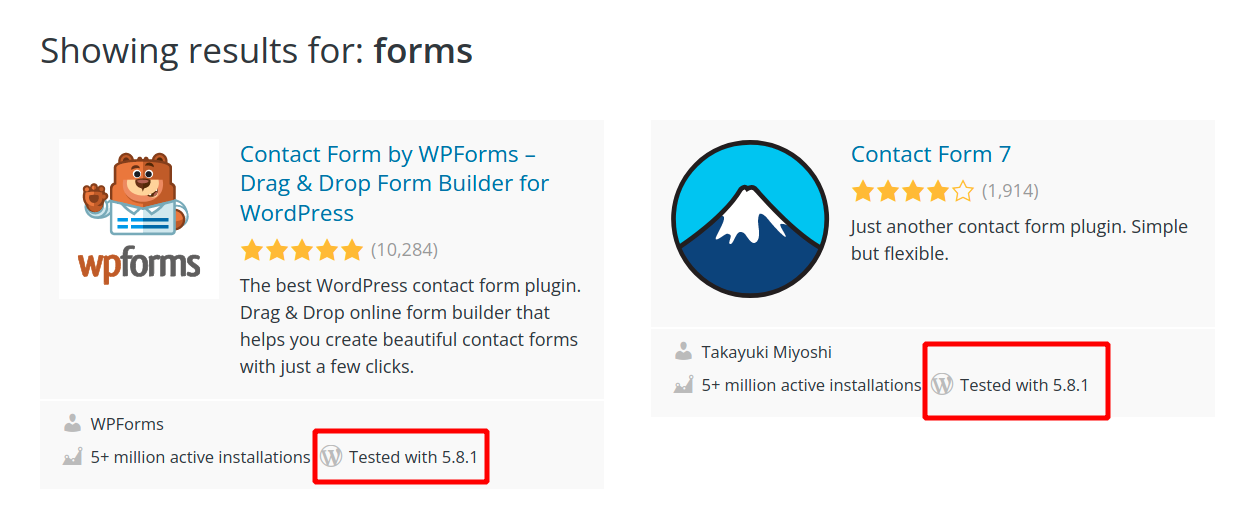
The same is applicable for WordPress core also. Archaic plugins may not work well with the latest WordPress software. If you check a plugin's page in the WordPress repository, you can see something called "Tested with 5.8", which means that particular plugin is tested on WordPress v5.8 and works well.
However, whenever you make changes to a live WordPress website, always take some caution.
Things to Do Before Updating
- Take a full-site backup
Updating always comes with some risk, because it changes the underlying code. So it is always recommended to take full-site backup and store it in a safe place before updating. Even if something goes wrong, or if an update breaks your site (rare but not impossible), you can restore the old site from the backup.
- Test the plugin/theme
Backups can come to the rescue when something happens unexpectedly. But, prevention is better than care. So, it is wise to test an update before installing it on your live website. You can set up a WordPress website on your local machine to do these testings. Or better, set up a staging area on the same web host.
How to Update Plugins & Themes
First, let us look at the plugins.
Updating Plugins
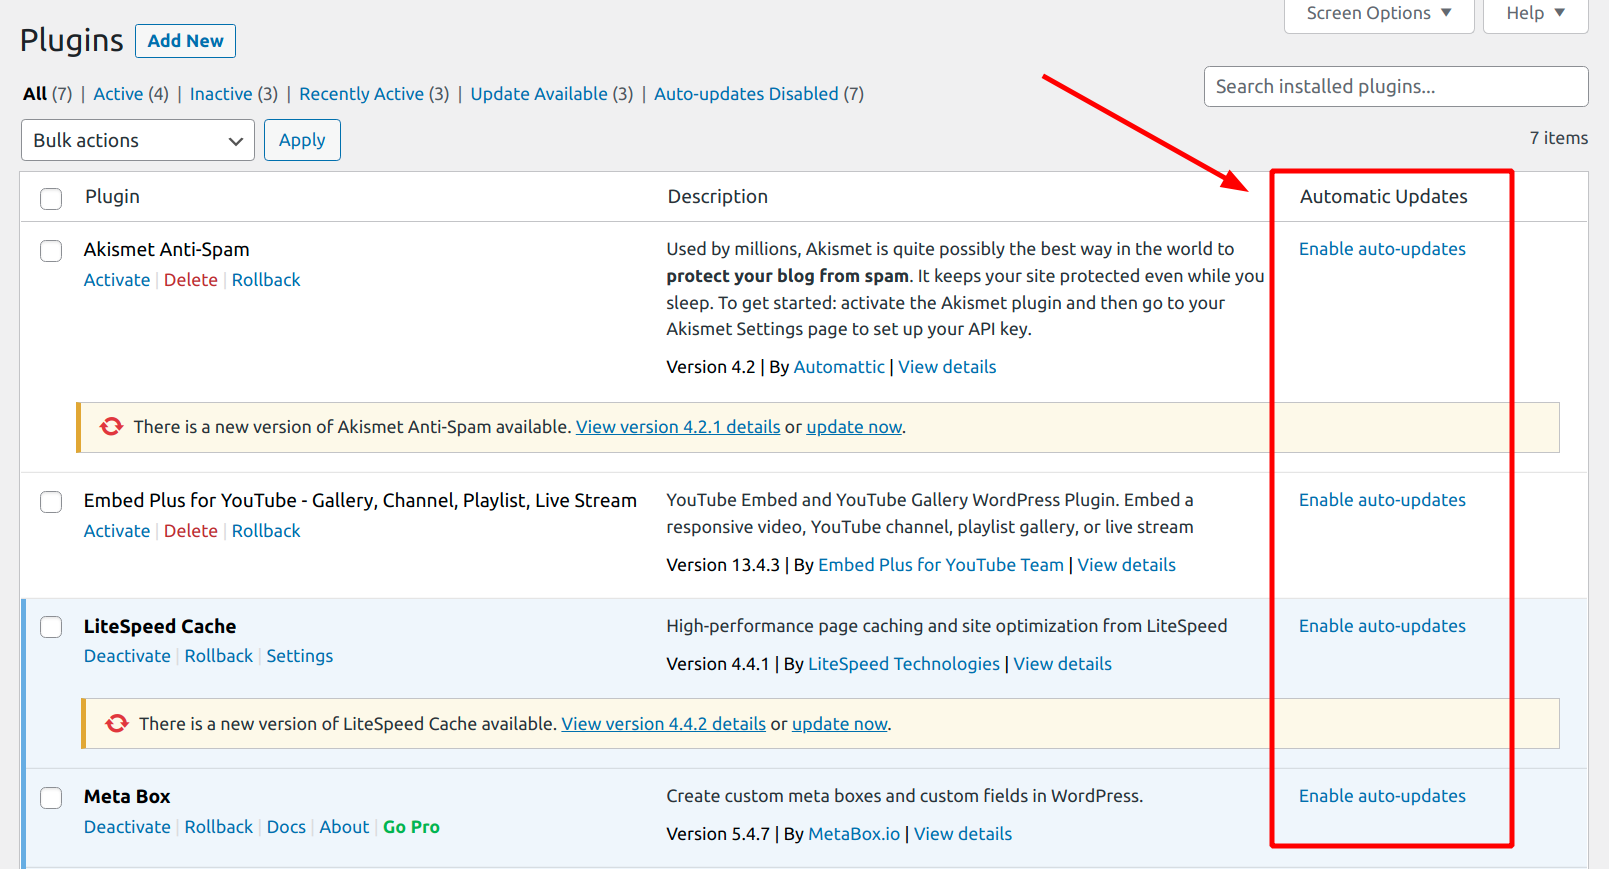
Go to the Plugins page in your WordPress admin, where you can find a list of all the installed plugins on your site, including active and inactive ones.
If a plugin has a newer version available, you will see a message below that along with an 'Update Now' link.
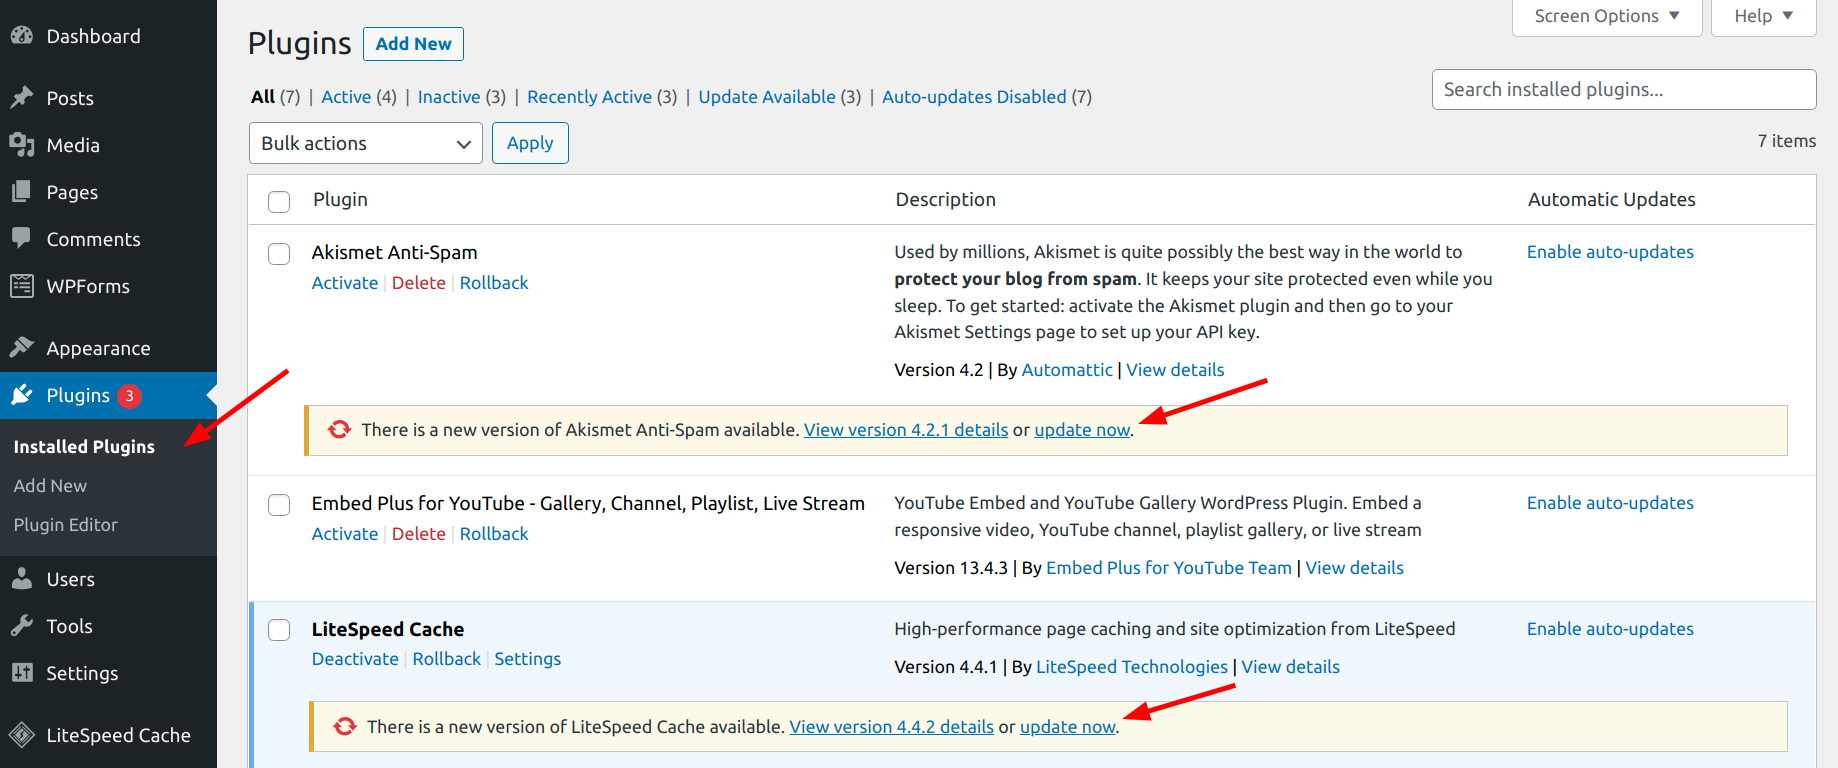
Click on that link to update the plugin. Then repeat for all the plugins that require an update.
Alternatively, you can also bulk select the plugins and update them at once.
However, performing the updates one by one may be a better way. Because, if something breaks, you can quickly identify the problematic plugin.
Updating Themes
Go to Appearance > Themes, where you can find a list of all installed themes with the active theme at the top.
As for plugins, you will see an 'Update Now' link if there's an update available.
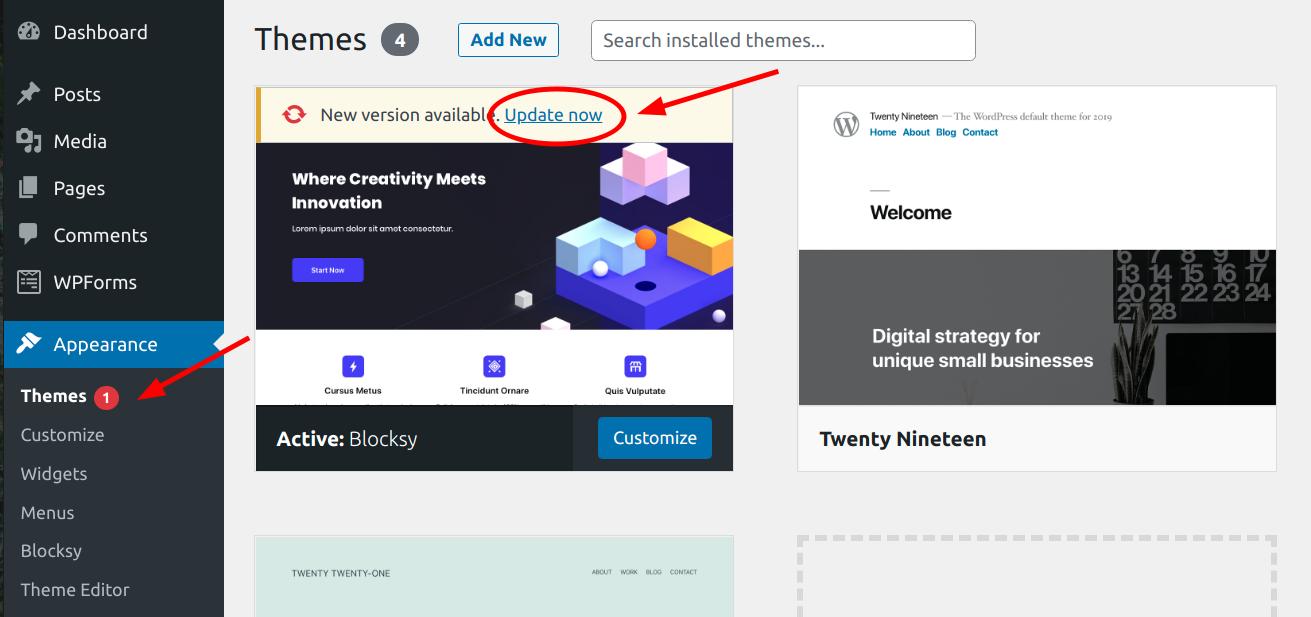
Or, open the Theme Details popup to view the version details, then update.
WordPress Updates Page
Just like most things in WordPress, there are multiple ways to do updates as well.
Instead of going to the Plugins or Themes pages, go to the WordPress Updates page. There you will find a list of all software that needs an update, including WordPress core.
Update them individually, or select them all and update in one click.
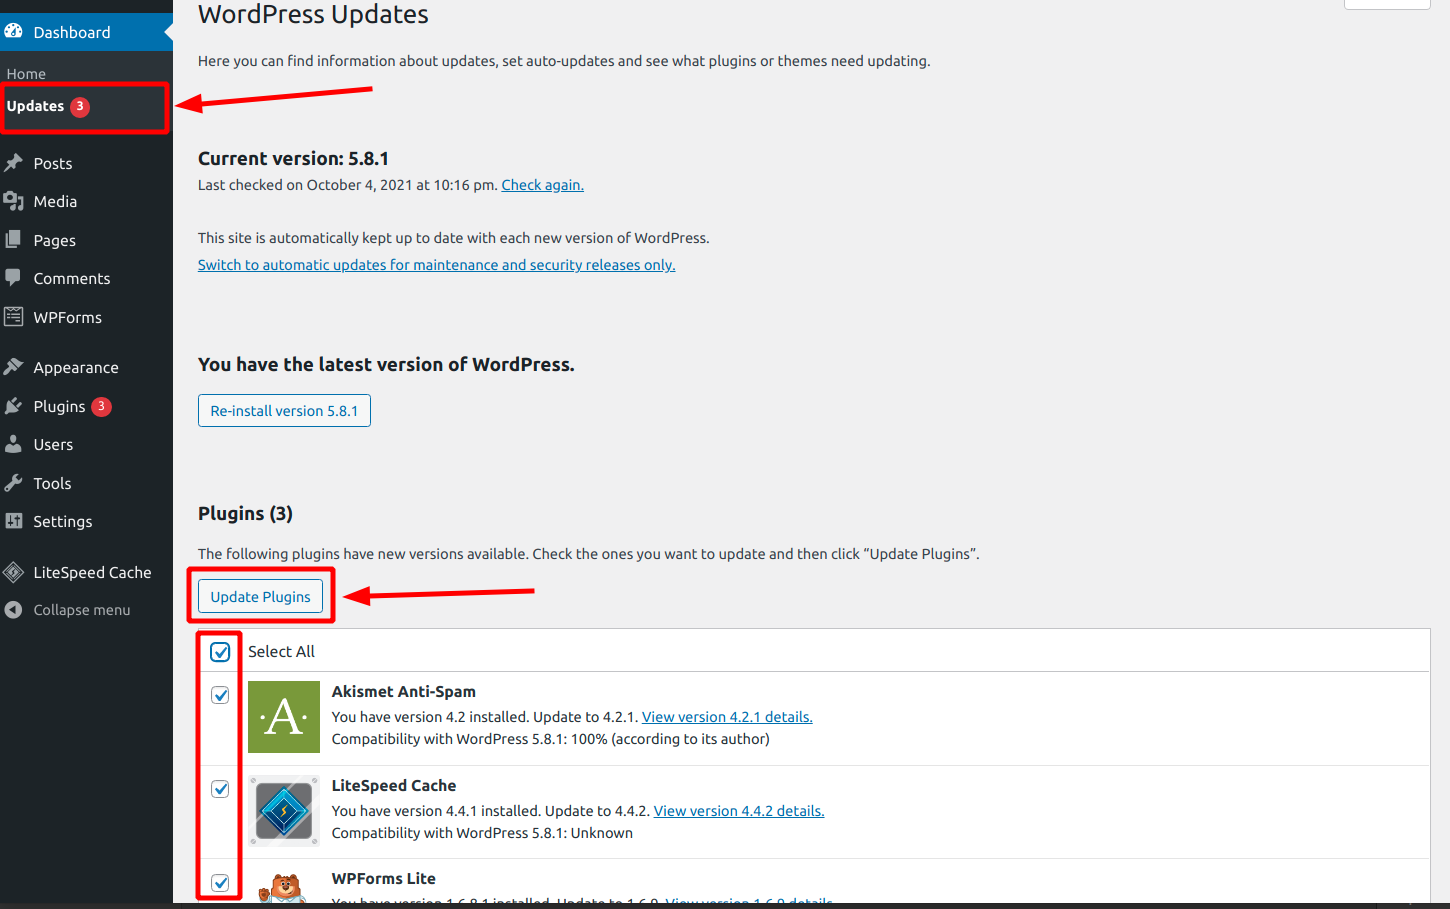
update from WordPress Updates page
Enable Auto-updates
Starting from version 5.5, WordPress supports auto-updates. It eases you from the pain of manually doing the updates daily, weekly, or monthly.
You can enable auto-updates individually for plugins, themes, and the core. WordPress checks for updates twice daily as part of cron jobs. Thereby it reduces the window available for outdated software to stay on your site and cause any harm.
If you are still in doubt about whether to turn it on or off, check out this article as well.
What to do if an update breaks your site?
There are two scenarios here: 1) you can still access the admin area, 2) you got locked out of the admin.
If it's the first case, you can simply roll back the plugin to the previous working version. The WP Rollback is a great plugin to do that. Or else, if you couldn't identify the faulty update, perform a full site restore from the backup, using UpdraftPlus or a similar plugin.
Otherwise, if you can't access the admin area, then the next way is to log in via FTP/SFTP to deactivate/restore the plugin. Here are the steps:
- Connect to your site via FTP/SFTP using a program like FileZilla
- Navigate to the plugins folder (wp-content/plugins)
- Rename the faulty plugin folder to something else. (e.g., wp-content/plugins/faulty/ to wp-content/plugins/faulty.deactivate/)
- Now try loading the admin pages once again.
- If it still doesn't resolve, you can try renaming the entire plugins folder (e.g., /wp-content/plugins/ to /wp-content/plugins.old/). This will deactivate all the plugins.
- Now, you should be able to login back.
- Or, download a working version of the plugin from the WordPress repository, and manually upload it to the /plugins/ folder via FTP.
- Once you've fixed the issue, rename the folders back to their original names.
Note: to manually download the previous version of a plugin, go to the Advanced View section. Then scroll to the bottom, where you will find a section called 'Previous versions'. Select an appropriate version and click 'Download'.