This article may contain affiliate links. If you buy some products using those links, I may receive monetary benefits. See affiliate disclosure here
Even if you are not a developer, having an installation of your website on your local machine can be useful in many ways.
In this post, I will show you how to install WordPress on localhost on Windows 10. The process is almost the same on other operating systems as well.
Advantages
- Learn the inner workings of WordPress from the freedom of your machine.
- Test your plugins, themes, or code snippets before uploading to a live server.
- You can use your favorite text editor to edit or add custom code to your site.
- It is free; you don’t need to buy a staging server.
Steps to Install WordPress on Localhost using WAMP
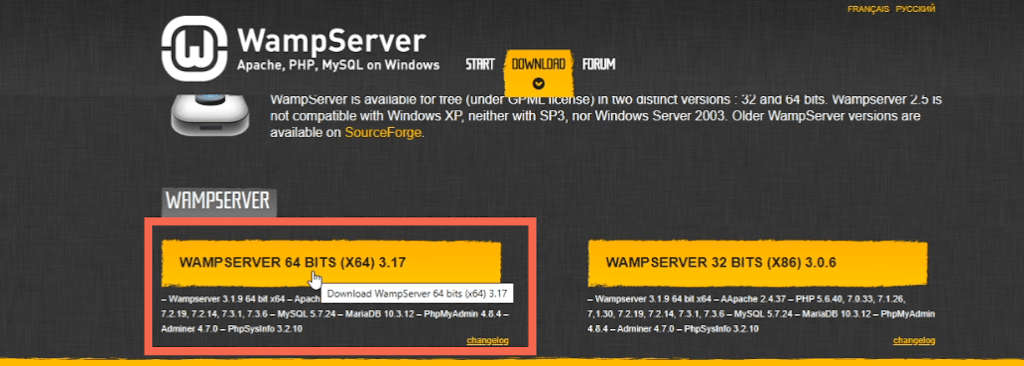
1. Download & Install WAMP
The first step is to download the WAMP package from the official website. Once the download is complete, run the execution file and follow the installation wizard.
First of all, check if you've the required VC packages installed. If not, download & install it using the links shown in the wizard.
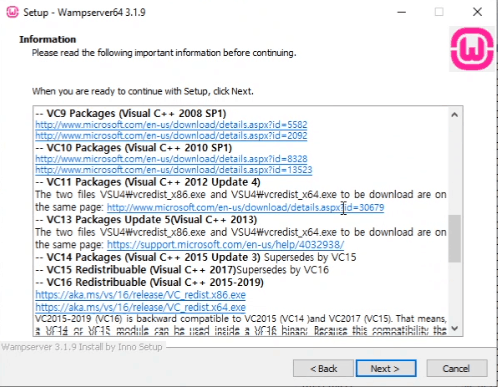
list of Visual C++ packages required to run WAMP

You can check the Visual C++ packages from the Control Panel
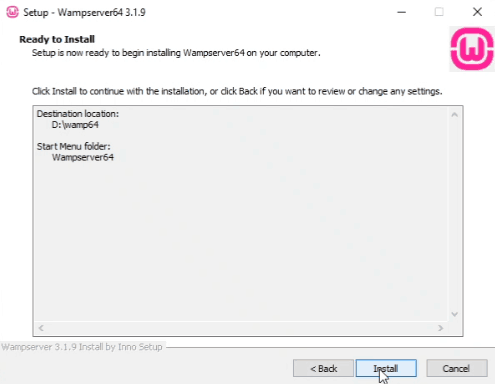
destination location & start menu folder
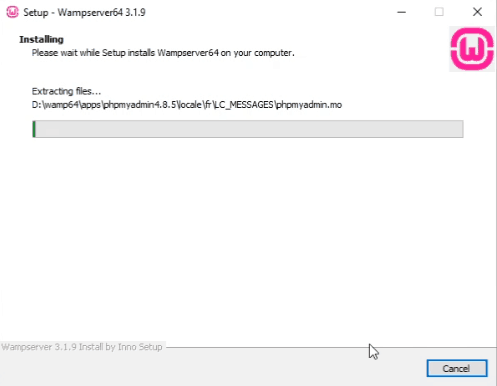
installation going on...
installation about to complete
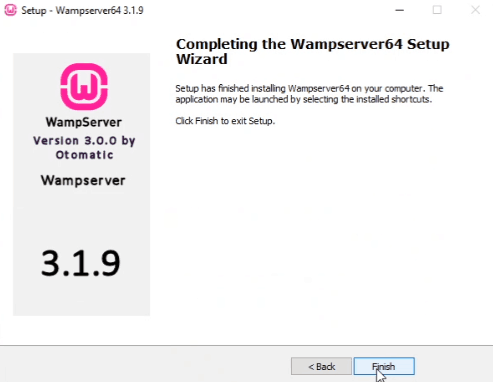
WAMP successfully installed
After that, launch the program. WAMP also gives a handy tray icon to manage all its related services. Click on the tray icon and click Start All Services. As the icon turns from red to yellow and finally green, localhost will start running.
![]()
tray icon is red - WAMP off
![]()
start all services
![]()
tray icon is green - WAMP on, all services running, localhost is live
You can verify it from the browser by going to:
http://localhost
If you can see a page with WAMP’s details, you’ve successfully set up your localhost environment.
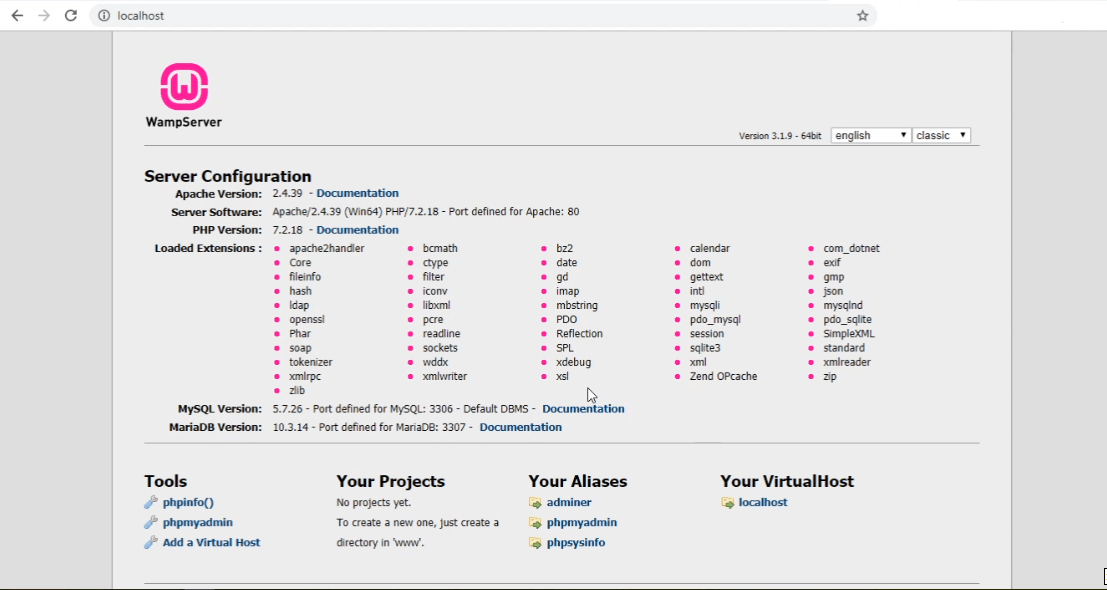
default localhost home page
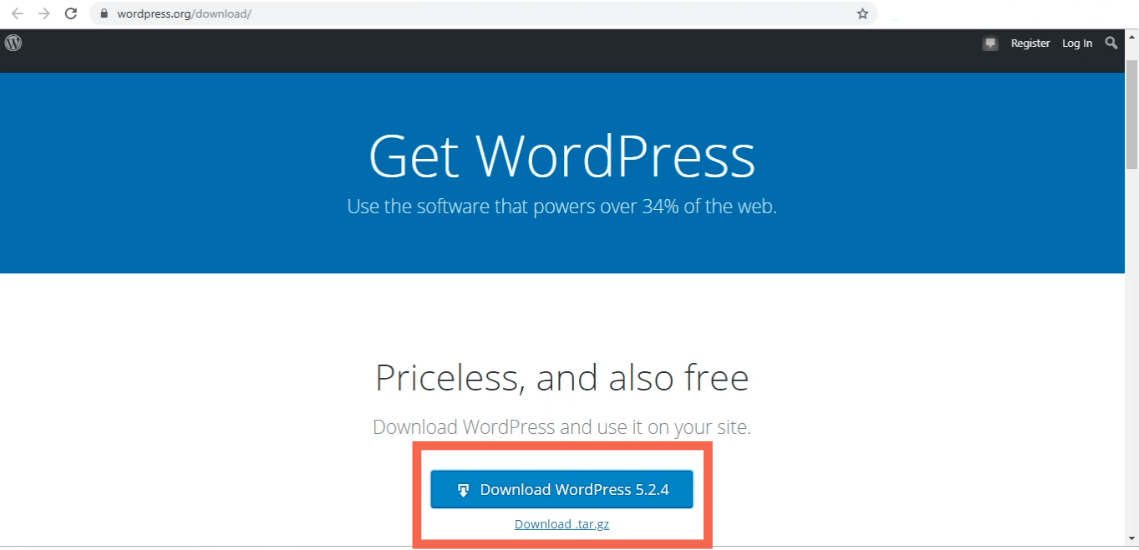
2. Download WordPress
Now, download the latest version of WordPress CMS from the website:
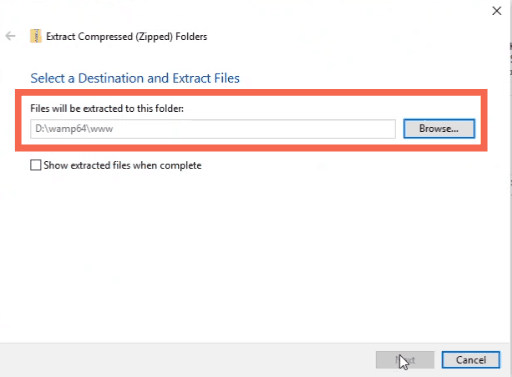
3. Unzip to the www folder
Inside your WAMP installation directory, you can see a folder by the name www. It is where we put all our site files. It is similar to the public_html folder on your web host.
Unzip the WordPress package to the www folder.
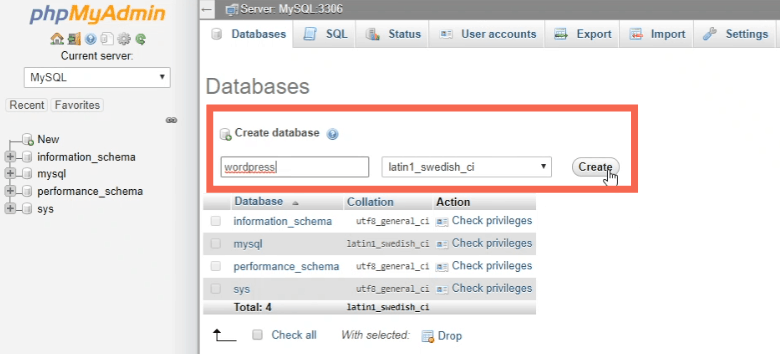
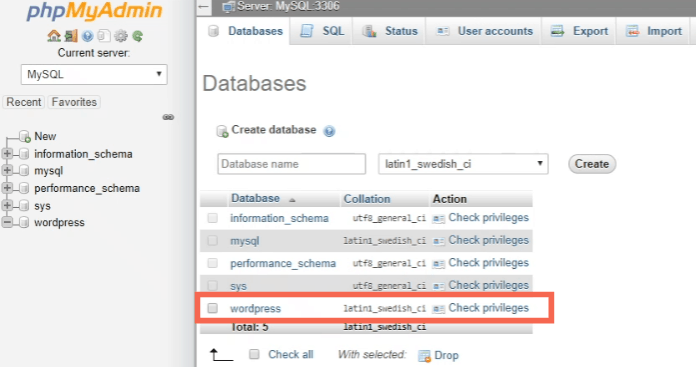
4. Create a database
WordPress needs a database to store all the data. So, creating a database is the next step.
WAMP comes with PHPMyAdmin - a tool to manage MySQL databases. It allows you to create, update, delete, edit databases using a graphical user interface.
To access PHPMyAdmin on your localhost, go to:
http://localhost/phpmyadmin
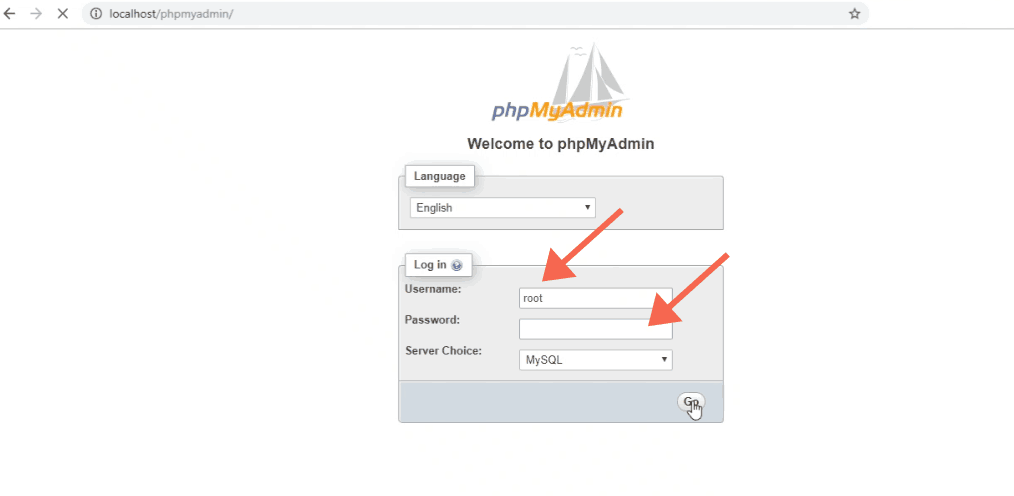
username: root & empty password to log-in to PHPMyAdmin
Now, create a database and give it a name. For now, let it be WordPress.
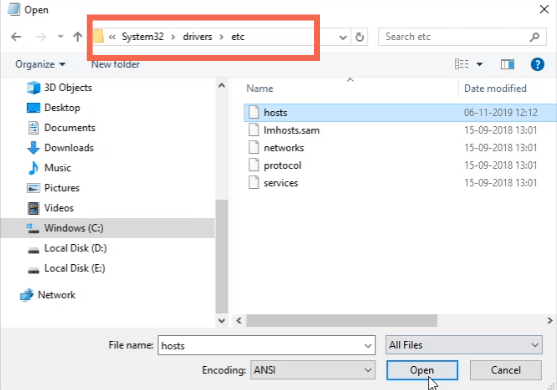
5. Edit hosts file
Although WordPress does not require a separate server name, setting up one is always a good idea.
That means:
http://localhost/wordpress works, but http://wordpress.local looks much better. Also, it resembles a real domain name.
For that, we have to edit the Windows hosts file. By modifying this file, we can map or redirect any name to a specific IP address.
For our use, we will map WordPress.local to the IP address 127.0.0.1. If you are wondering which IP address is it, it is the loopback address. In short, it allows a machine to send the request to itself, rather than sending it over the internet.
You need administrator privileges to edit the hosts file. So:
Open Notepad > Run as Administrator
The location of the hosts file is usually:
C:\Windows\System32\drivers\etc
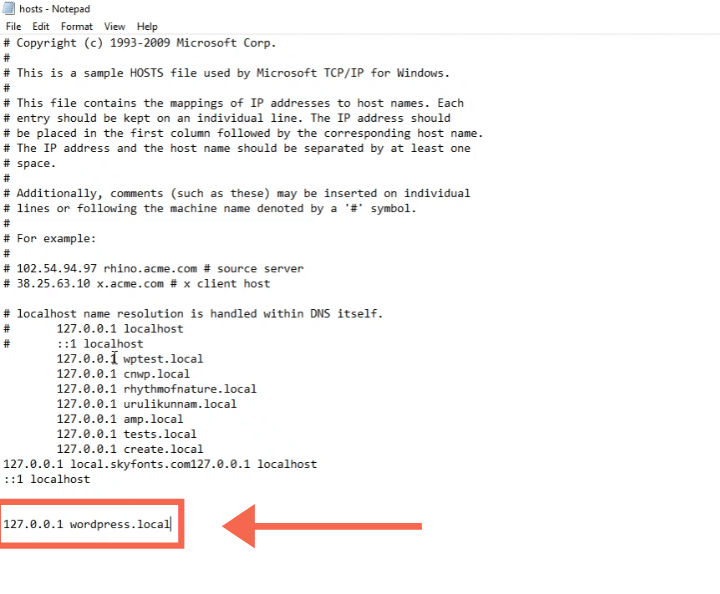
add this line at the bottom of the file
6. Edit Apache vhosts
With that, we have pointed our name to the loopback IP. So when you start WAMP, local Apache will receive the request, but still, it does not know which folder to load.
To inform Apache about the location of our WordPress installation, we have to set a vhost (virtual host).
For that, we have to edit the vhosts configuration file of our WAMP installation.

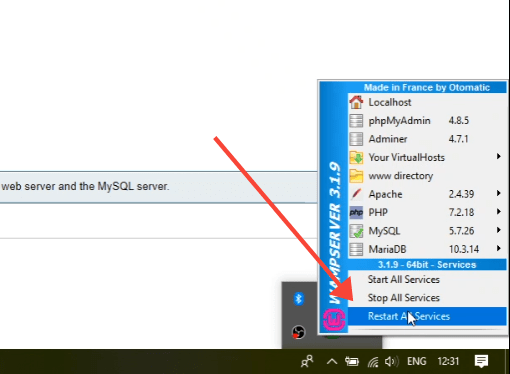
7. Restart Apache & MySQL
Next, we need to restart the Apache and MySQL systems for our changes to take effect.
You can do it from the tray icon - click Restart All Services.
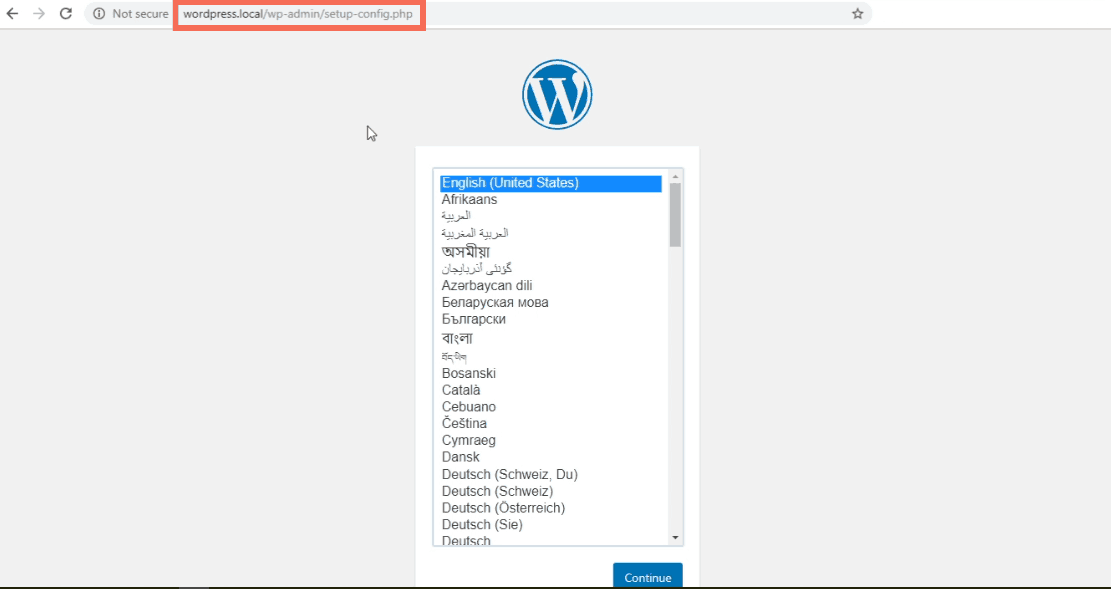
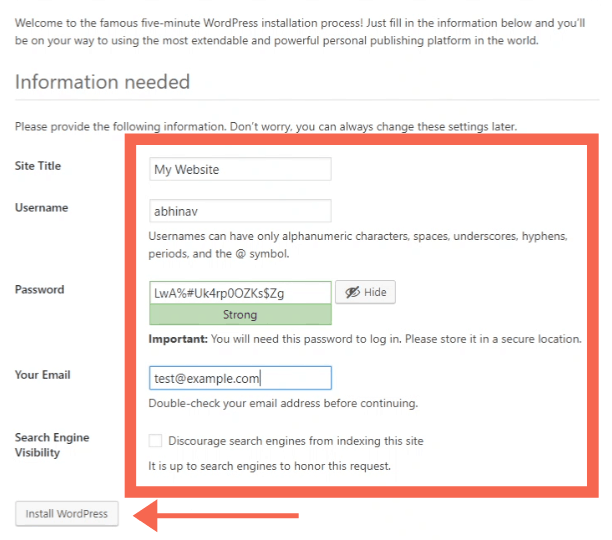
8. Run WordPress Installation
Our WordPress system is still not connected to the database, nor we have configured it.
So, the final step is to run the installation wizard. Go to http://wordpress.local (our vhost) to begin the installation.
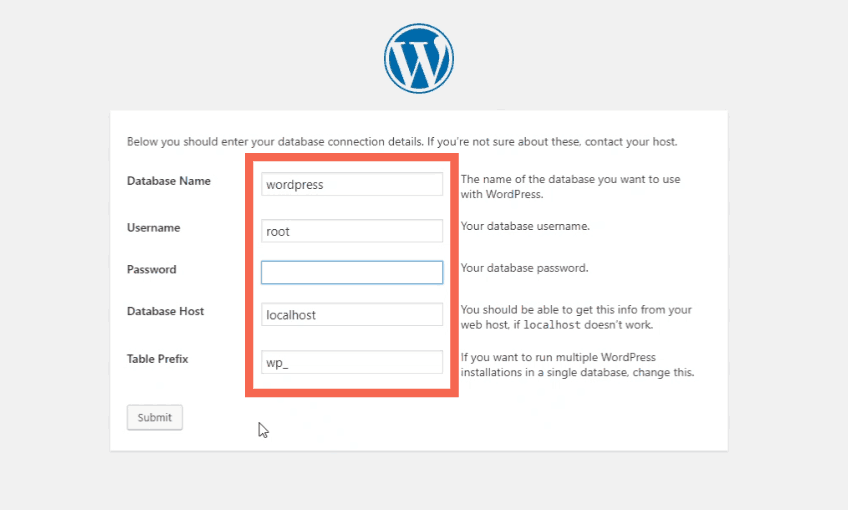
The installation wizard will ask you to enter the database username and password. Since we haven’t set any specific password, you can use the default.
- WAMP MySQL username: root
- Password: (no password - leave the field empty)
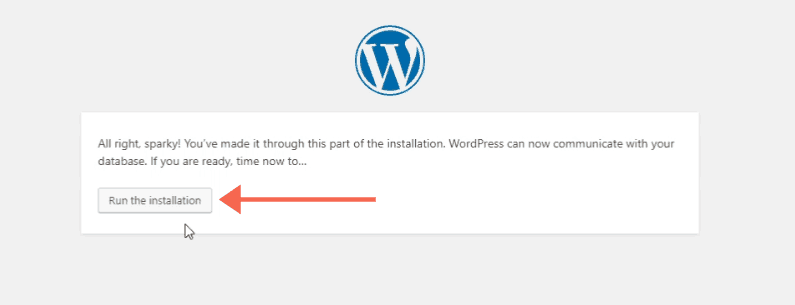

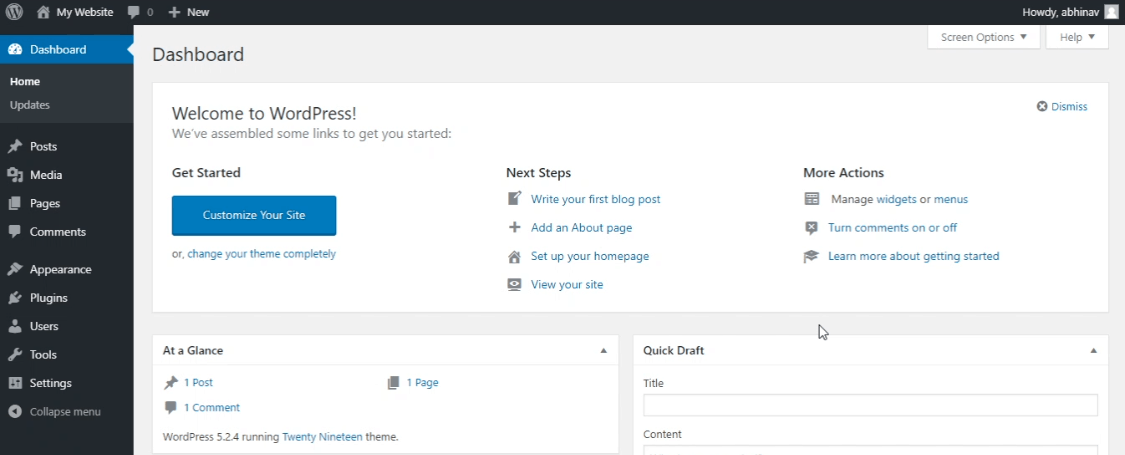
admin panel - we've installed WordPress successfully
On Mac & Linux
Like WAMP, Mac users can use the MAMP (Mac-Apache-MySQL-PHP) package to install WordPress.
Another choice is the cross-platform XAMPP, which you can install on any operating system.
WAMP or XAMPP?
- I’ve used both WAMP and XAMPP, and both are almost the same from a WordPress user’s perspective.
- XAMPP does offer more extensions like Tomcat and FileZilla FTP Server. However, you may not require such features to run and test WordPress.
- Another thing I like about WAMP is that it allows you to switch between multiple PHP versions within a few clicks. It is helpful when you want to ensure that your code is compatible with various PHP versions.
Conclusion
Installing WordPress locally is one of the first steps if you are starting with WordPress development. Even if you have no interest in coding, it still helps if you want to test some features or plugins before using it on your live site.
If you find any of the above steps confusing, ask me in the comments.