This article may contain affiliate links. If you buy some products using those links, I may receive monetary benefits. See affiliate disclosure here
Icons in web design are not just about aesthetics. They help to emphasize certain elements and draw the visitor's attention.
Even while formatting blog articles, icons are relevant. For instance, you can use an arrow for a call-to-action link, or thumbs up/down for a pros & cons list, etc.
In the earlier days, web designers used images (like png) to create these icons. Later, icon fonts became popular.
Font Awesome is one of the most popular icon font providers today. As I am writing this, their collection contains over 1600 free icons and 7800+ premium icons.
If you are trying to use Font Awesome icons on your WordPress website, then this post is for you.
Like for most things in WordPress, there are multiple ways to do it.
There's even a dedicated plugin that directly integrates the service with your website.
However, in this post, we will be focusing only on manual methods.
- First, we will discuss the easiest method, which installs all the icons from the remote CDN provided by Font Awesome. This is the method given on their website as well.
- Second, we'll host the fonts locally and take a fine-tuned approach. We'll try to edit the font files to get rid of all the unnecessary icons and include only the required ones. This reduces the file size, thereby improving page speeds.
Method 1: Use Font Awesome CDN
After signing up for a free account, you can create font kits to embed in your sites.
You'll get a linkable JS resource that you have to add to your WordPress site's head section.

To do that, we'll use a plugin called Insert Headers and Footers.
Install the Plugin, then go to Settings > Insert Headers & Footers, then paste the code that you've got from Font Awesome dashboard.
That's it!
Now you can use any icon in your posts/pages by pasting its HTML code in the editor.
Here's how it works:
- The linked Javascript file dynamically inserts CSS code into the tag.
- This CSS defines all the necessary classes (.fa, .fas, etc) along with the references to the actual font files (using @font-face rules).
Method 2: Optimize the Font Files & Host Locally
The above method is the easiest, but it does have a few disadvantages:
- It loads the font files and stylesheets from a remote CDN, which may not be ideal for everyone. Maybe, you want it to host locally.
- As I've said, the collection contains thousands of icons. You may never use most of them. So why keep them all?
- Also, the above method adds a significant amount of inline CSS into your site's HTML head. This CSS contains class definitions for unwanted icons.
So, let's optimize both the font files and the CSS rules. Here is the step-by-step process I follow:
1. Download Font Awesome
The first step is to download the font package from Font Awesome's website.
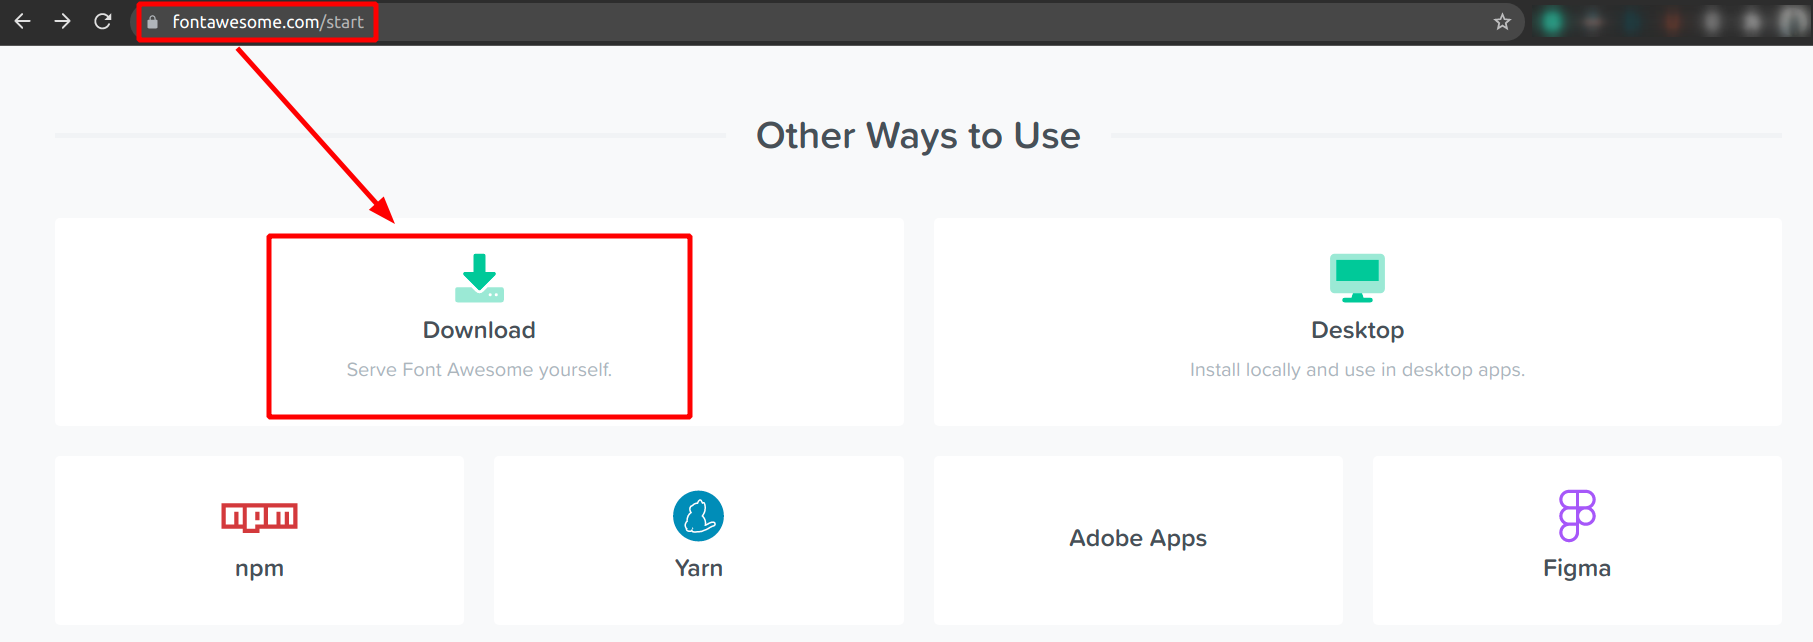
You'll get a zip folder containing all the font files (woff, ttf, etc), CSS, JS, and SVG.
Extract the zipped folder and save it in an appropriate location.
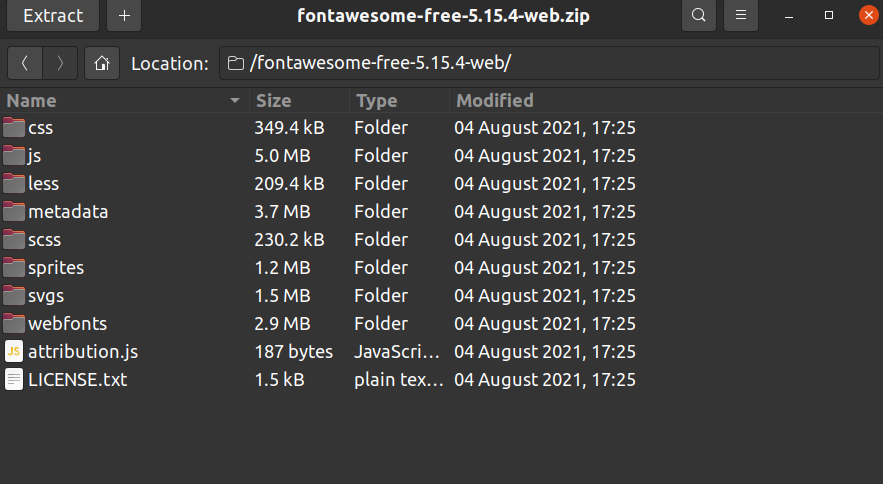
The font files are located in the /webfonts folder in the extracted Font Awesome folder (in my case, it was /home/Downloads/fontawesome-free-5.15.4-web/webfonts).
You will see several files and formats in this folder, fifteen to be precise. To summarize, Font Awesome categorizes the icons into five types:
- Regular: contains black-white-style icons - free & premium
- Solid: contains white-on-black icons - free & premium
- Brands: brand icons for Google, Facebook, and others - free
- Duotone: dual-colored icons - premium-only
- Light: icons with thin strokes, looking sleeker - premium-only
Out of these, Duotone and Light are paid offerings, so they are not included in the free download.
So, you get the rest - Regular, Solid, and Brands. Again, there are five formats for each of these:
- EOT
- TTF
- WOFF
- WOFF2
- SVG
Modern browsers require only the WOFF2 format to work.
We are not going to upload the entire folder to our WordPress server. We'll take only the required files and leave the rest.
2. Edit Font Files using Font Forge
For the purpose of this guide, let us modify one of the WOFF2 files: fa-regular-400.woff2.
We'll be using a small open-source software called Font Forge to do that. It allows editing glyphs for various font formats like WOFF, WOFF2, TTF, etc.
The software is available for Windows, Mac, or Linux. Install the appropriate version for your local machine.
After opening the file, Font Forge displays an array of glyphs. Double-click any one of them to modify the vector. But we're not here to edit the vectors. We only need to remove the unnecessary glyphs.
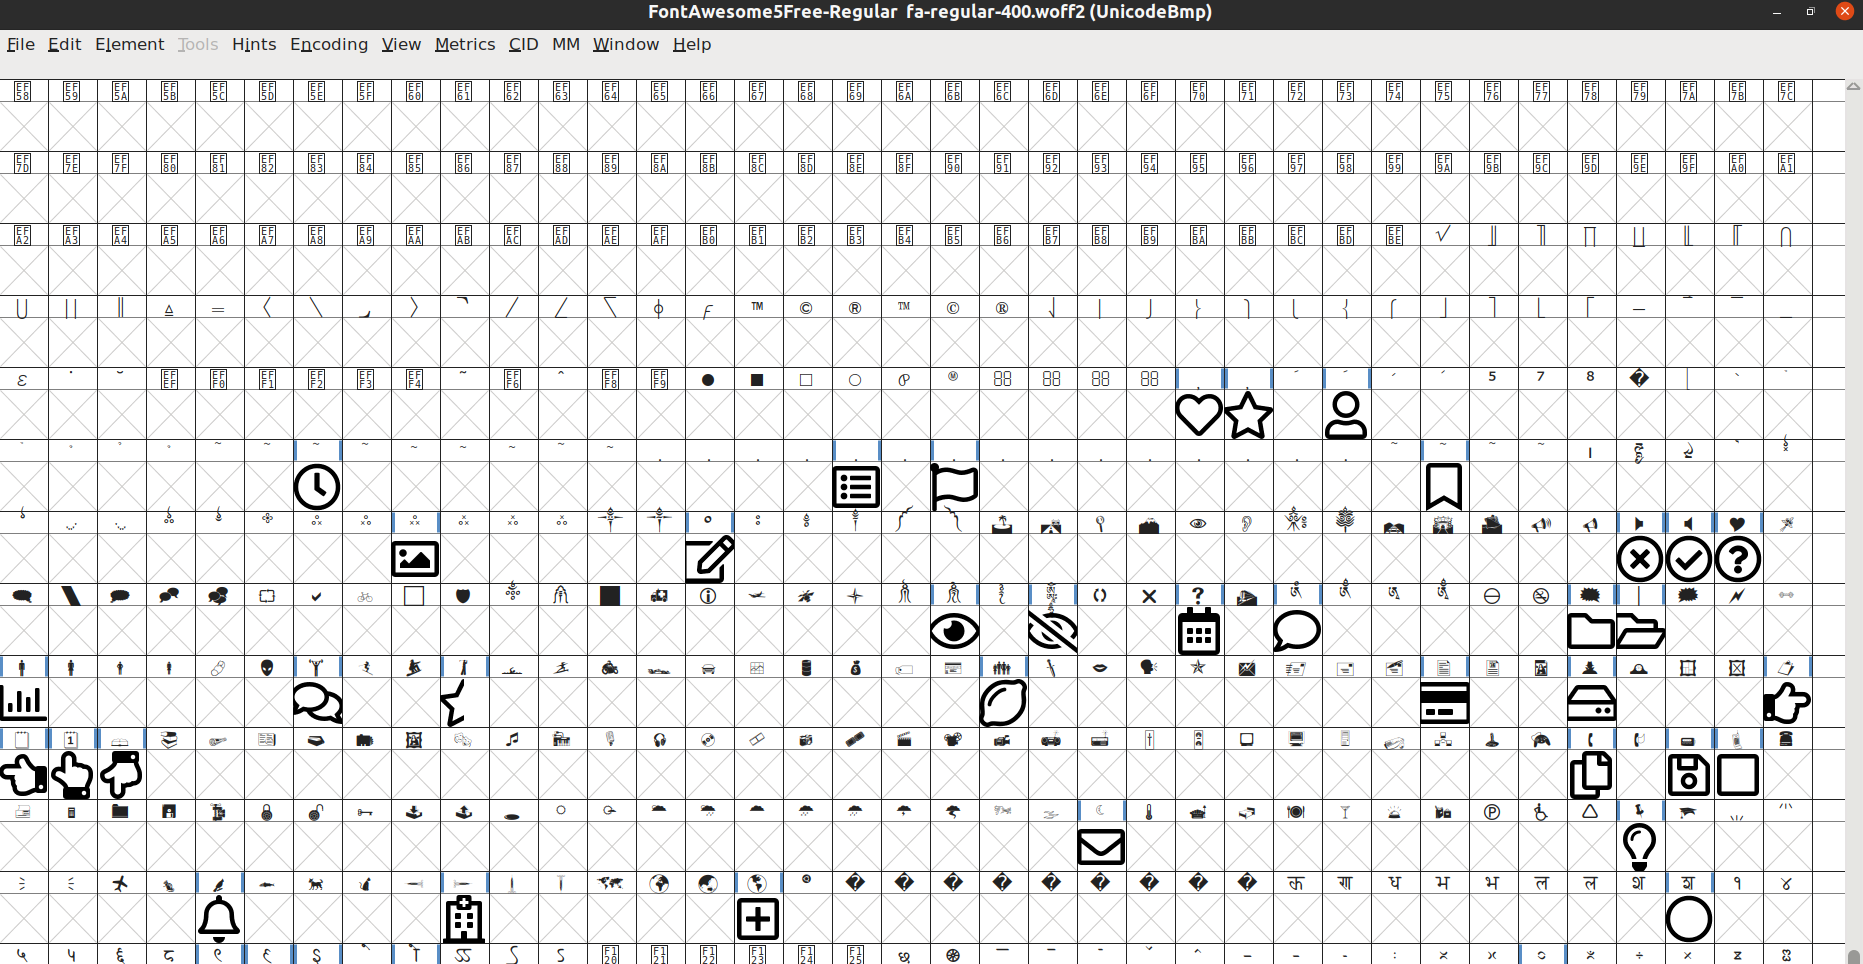
You'll find that majority of the slots are empty. So, go to Encoding > Compact to show only the filled slots.
Use shift+click to select all the glyphs that you don't want. Or the other way round, you can also select all (ctrl+A), then shift+click to unselect the required ones.
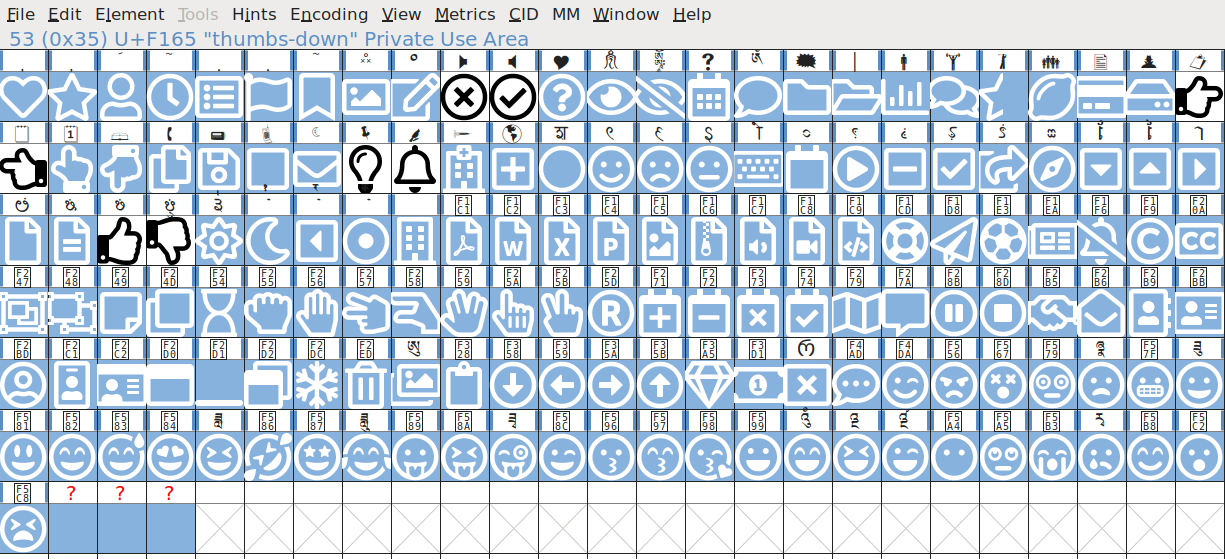
after selecting the unnecessary icons (an example)
Then, right-click > Clear to delete all the selected ones. For now, I am going to include only eight icons:
- times-circle, check-circle, thumbs-up, thumbs-down, hand-point-right, hand-point-left, lightbulb, and bell
Next:
- Go to File > Generate Fonts
- Give a file name - e.g., fa-regular-400-cleaned
- Choose file type as WOFF2
- Click Generate. You may get some warning, but ignore it and continue.
Now, you have the cleaned-up font file on your computer.
The original woff2 file was 13.2KB while the new file is only 1.9KB.
Next, we want to upload it.
3. Upload Font Files via FTP/SFTP
Use a program like Filezilla to connect to the server via FTP/SFTP. Watch this video if you don't know how to use FTP.
Navigate to the /wp-content/themes/yourtheme/, then create a folder called fontawesome.
Then upload the file we'd previously created. Now, you should be able to access the file by going to yoursite.com/wp-content/themes/yourtheme/fontawesome/fa-regular-400-cleaned.woff2.
4. Clean-up the CSS Code
Now, we want to clean up the CSS file as well. We'll remove references to all the icons except the eight icons we've included in our modified font file.
Also, edit the @font-face src to the URL of our modified file. Remove other @font-face rules as well.
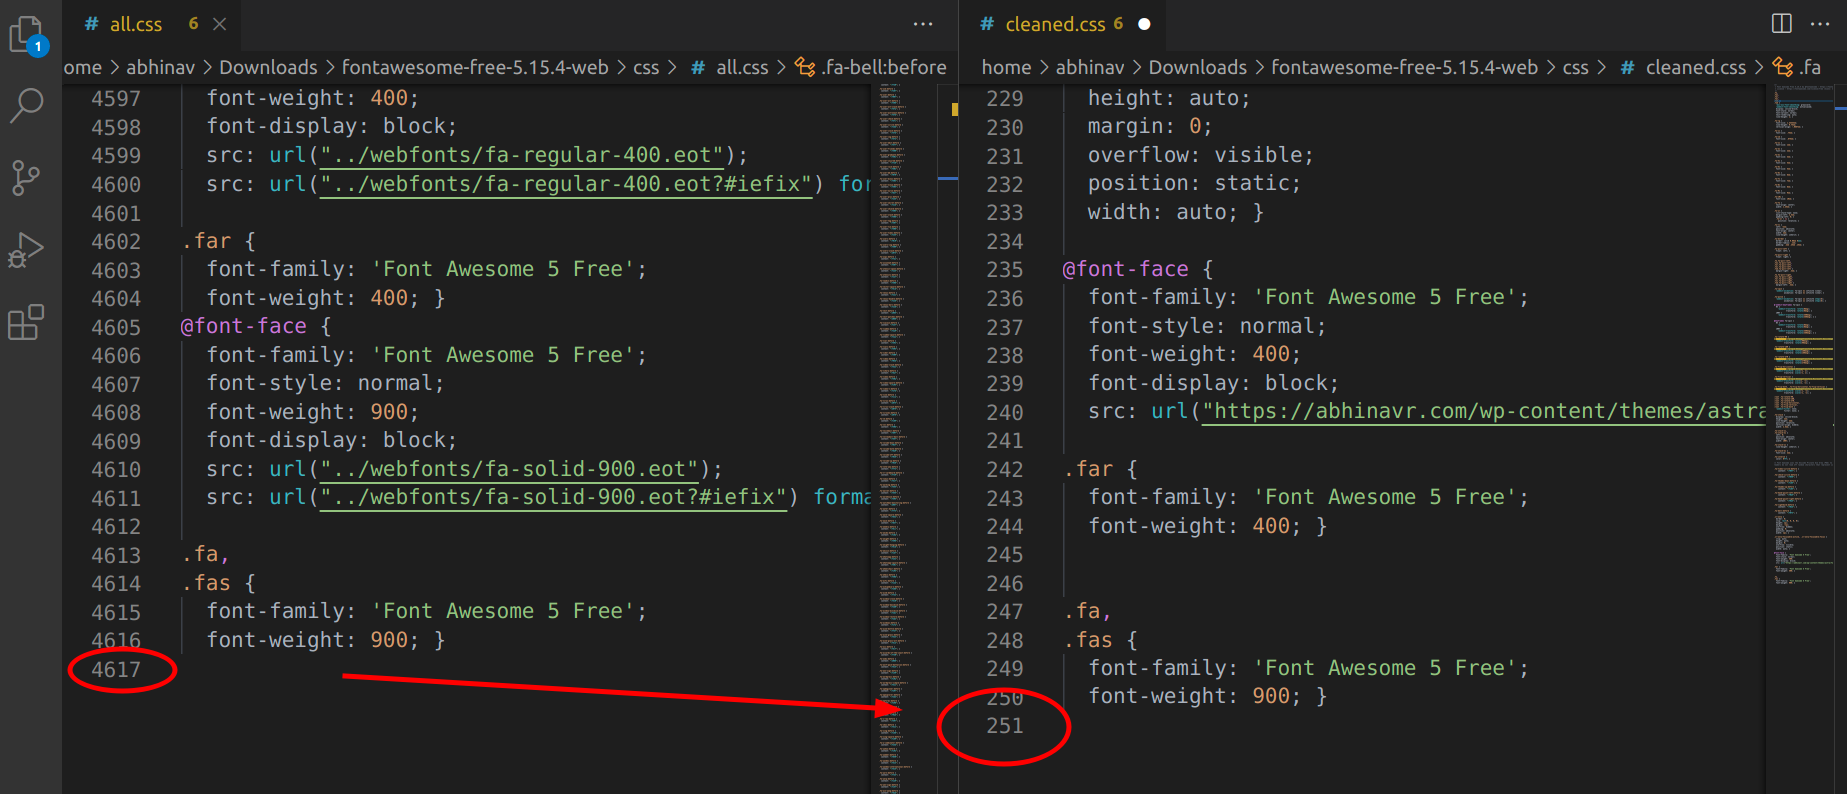
Cleaning up the all.css file - no. of lines reduced from 4617 to 251
Finally, save the stylesheet with a new filename on your computer.
The original all.css file was nearly 73KB while the cleaned.css file is only 5KB.
5. Add CSS Code
We could upload the stylesheet file just like we did with the woff2 file. But that makes things complicated. Because to load a stylesheet, we have to use WordPress enqueue functions, which means adding custom PHP code.
So, instead of that, we'll add the CSS inline.
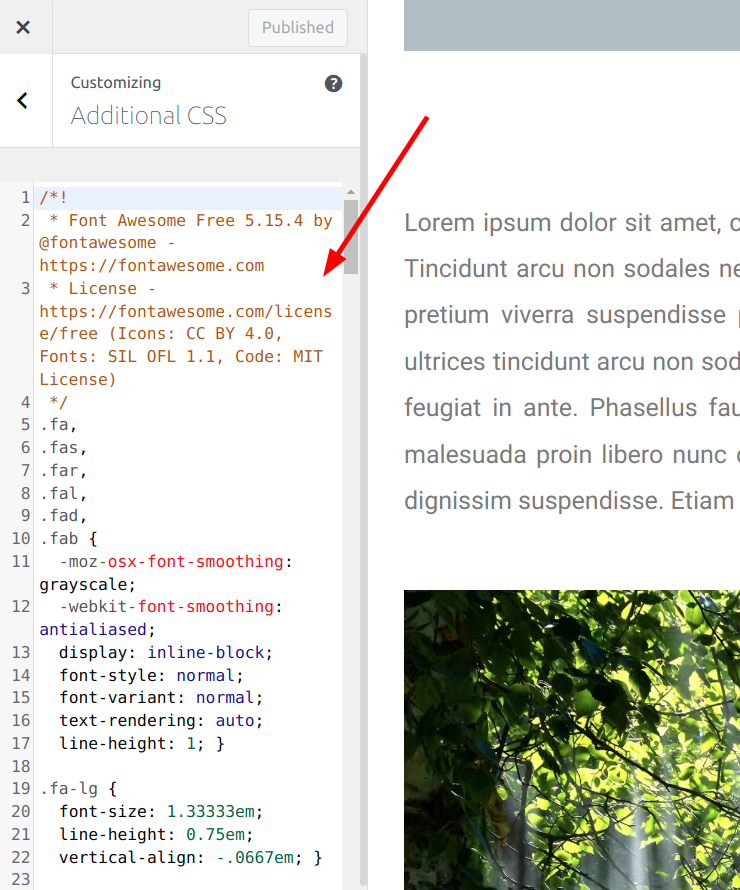
Go to Appearance > Customize > Additional CSS. Then paste the contents of the CSS file directly and hit Publish.
Now, you should be able to use the icons in your posts/pages.
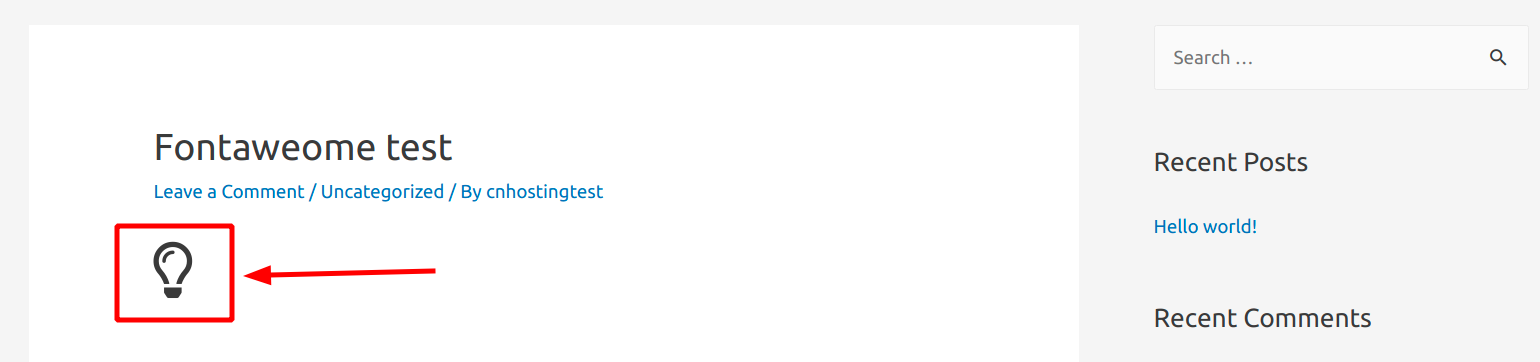
6. Start Embedding Icons to Post/Pages
Let's try embedding the lightbulb icon:
- Open WordPress editor
- Select the Custom HTML block
- The paste:
<i class="far fa-lightbulb"></i>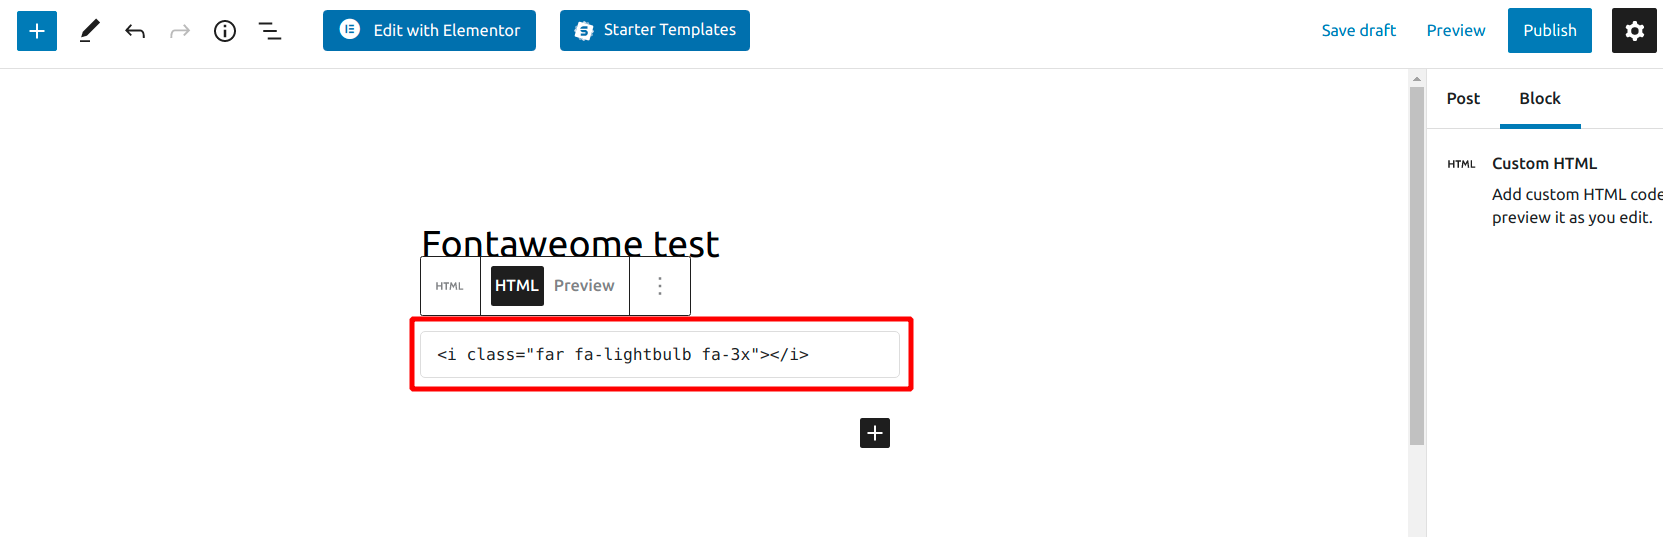
And, it's showing.
Wrapping Up
Similarly, you can modify other file formats too. If you are using a content delivery network like Cloudflare or Bunny, then your icons will be served super fast.