This article may contain affiliate links. If you buy some products using those links, I may receive monetary benefits. See affiliate disclosure here
If you are looking for premium typefaces, then Adobe Fonts is a great place you should check out.
If you have a subscription to any of the Creative Cloud plans, then you already have access to the fonts library. The collection contains 2600+ font families as of now.
One major advantage with Adobe Fonts is the simplified licensing. With many of the other font marketplaces, you need to purchase multiple licenses to use a font on desktops and websites.
Adobe Fonts makes the process easier by allowing you to use any of the fonts on desktop applications or on your websites. It covers both personal and commercial uses.
In this post, I'll show you how to set up an Adobe Font on your WordPress website.
If you prefer to watch the video, then here it is:
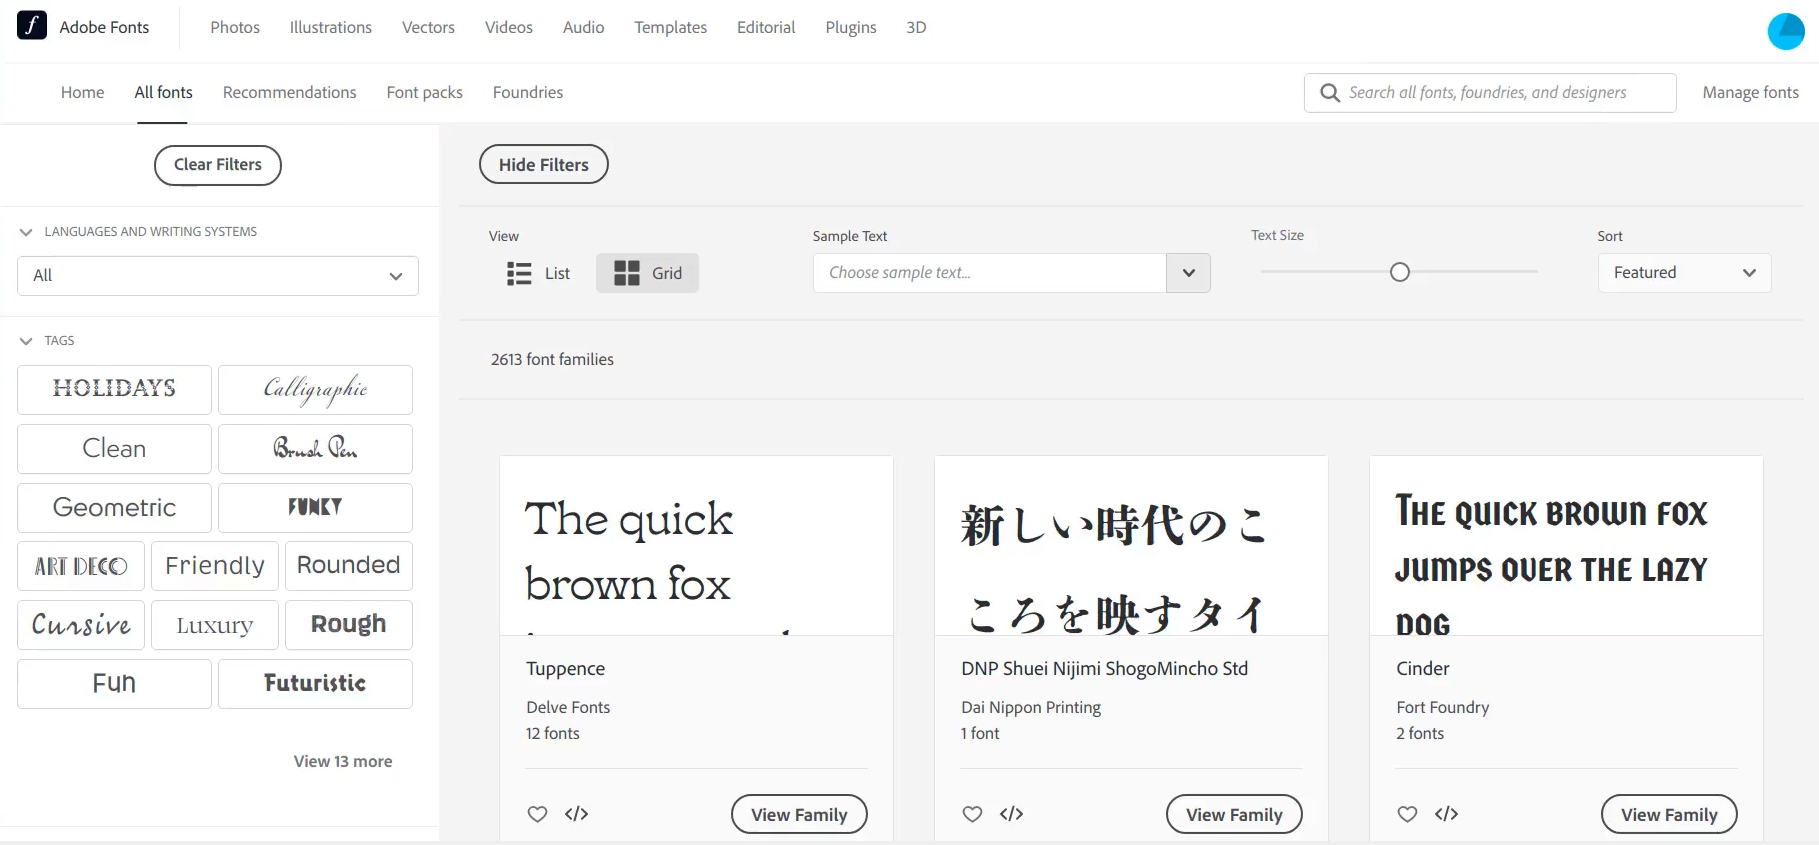
To access all the fonts, you need to subscribe to any of the Creative Cloud plans. Then login to the Adobe account, and go to the Fonts site:
- fonts.adobe.com/fonts
There you can see the list of all the available fonts.
As I am writing this post, there are more than twenty-six hundred font families, contributed by several designers around the world
First, let's take a look at the interface.
How to Use
Searching for Fonts
On the left side, you can see a set of filters, which allow you to filter by tags like:
- geometric
- clean
- rounded, etc
That's followed by classification:
- serif
- sans-serif
- script, etc
And properties:
- font-weight
- width
- x-height, and so on.
For instance, if I set the type to Geometric, the no. of available fonts becomes 65.
Below that, when I set the classification to sans-serif, the number has come down to 51.
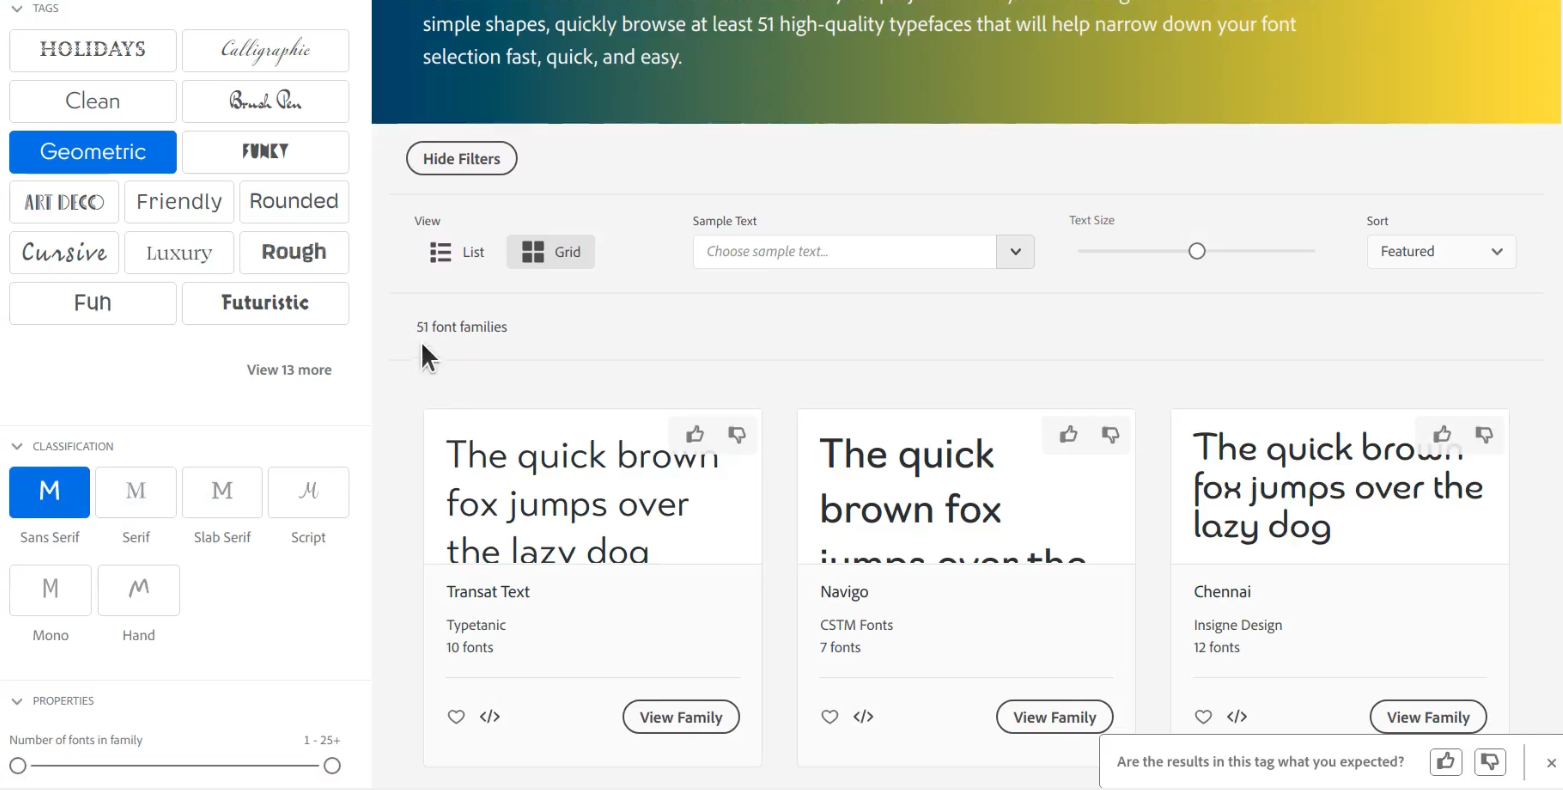
There's also a top bar, where you can change the sample text and sorting type. By default, it shows the featured families at the top.
If you know the name of a particular font, you can also try the search bar at the top.
For this post, I am going to use Proxima Nova - a highly popular typeface.
Creating a Web Project
Below each of these cards, you can find a little code icon. Click it to open a popup where you can select the variants and styles.
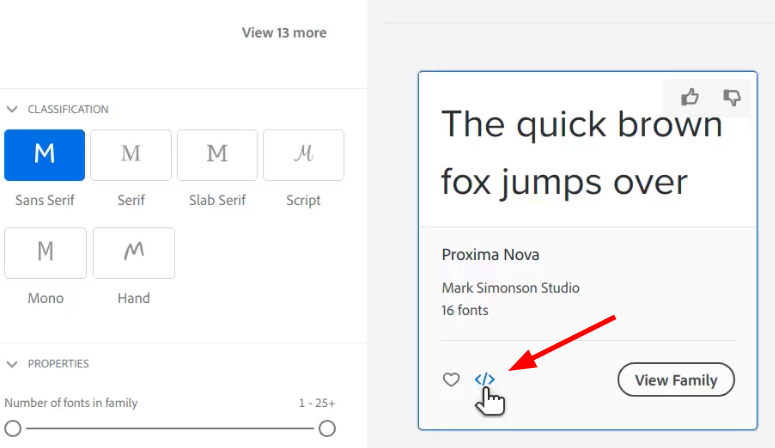
A single font family can have multiple variants and styles under it. You don't need to select all of them. Instead, check only the ones that you require and continue.
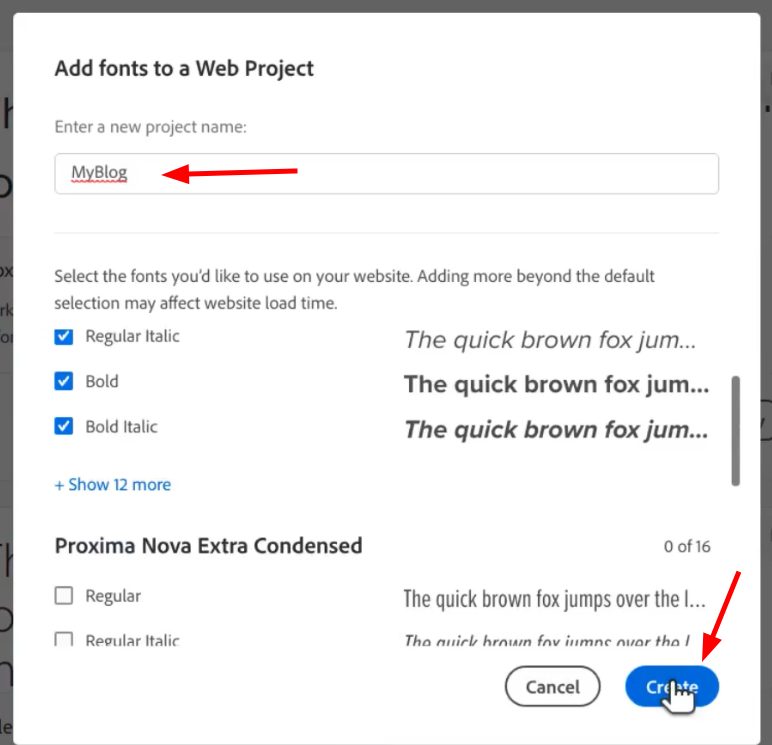
For the Proxima Nova family, three variants are available:
- Proxima Nova, Extra Condensed, and Condensed
And in each variant, there are multiple styles.
Usually, the Regular, Bold, Italic and Bold Italic are the ones you need.
- Next, we want to create a project
- A project can be a website or a group of websites where you want to use the same set of fonts.
- Let me give the project name as MyBlog
- Click Create to continue.
In the next window, you will get a stylesheet link that you can add to the head section of your website's HTML. This CSS file is responsible for loading the necessary font files when someone visits your website.
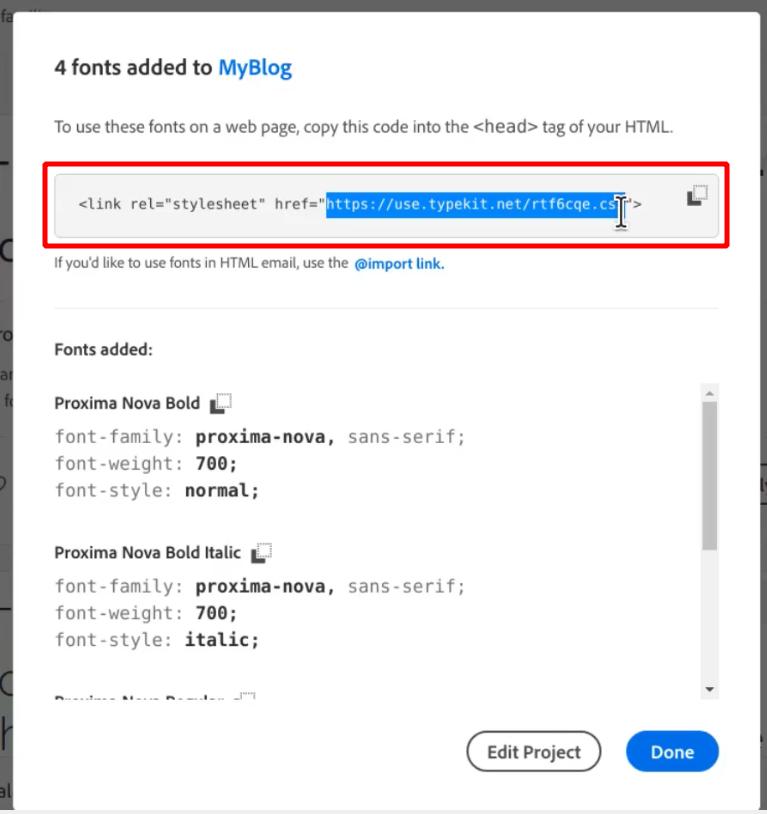
- Below the link, you can also find the CSS rules that we'll use later. Each rule defines the font family, font-weight, and the font-style.
- Next, copy the stylesheet link to the clipboard, and click Done.
Let's have a look at what's included in the CSS file. Select it and open it in a new tab.
Here, you can see that the file contains @font-face rules, which load the files from Adobe's Typekit servers.
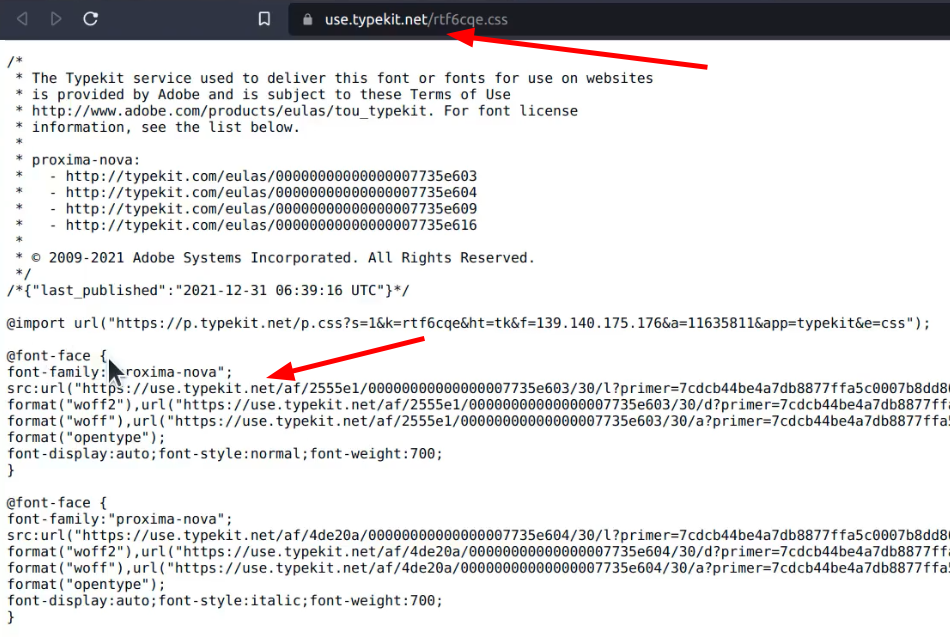
Typekit.net is Adobe's font CDN, from where the appropriate file formats are loaded. Unlike with Google Fonts, there is no direct way to download and host the font files locally. The preferred way to embed any font is from the CDN.
Editing a Project
To view the newly created Project, you can go to the Manage Fonts page. From there, go to the Web Projects section, where you can find the project we have just created.
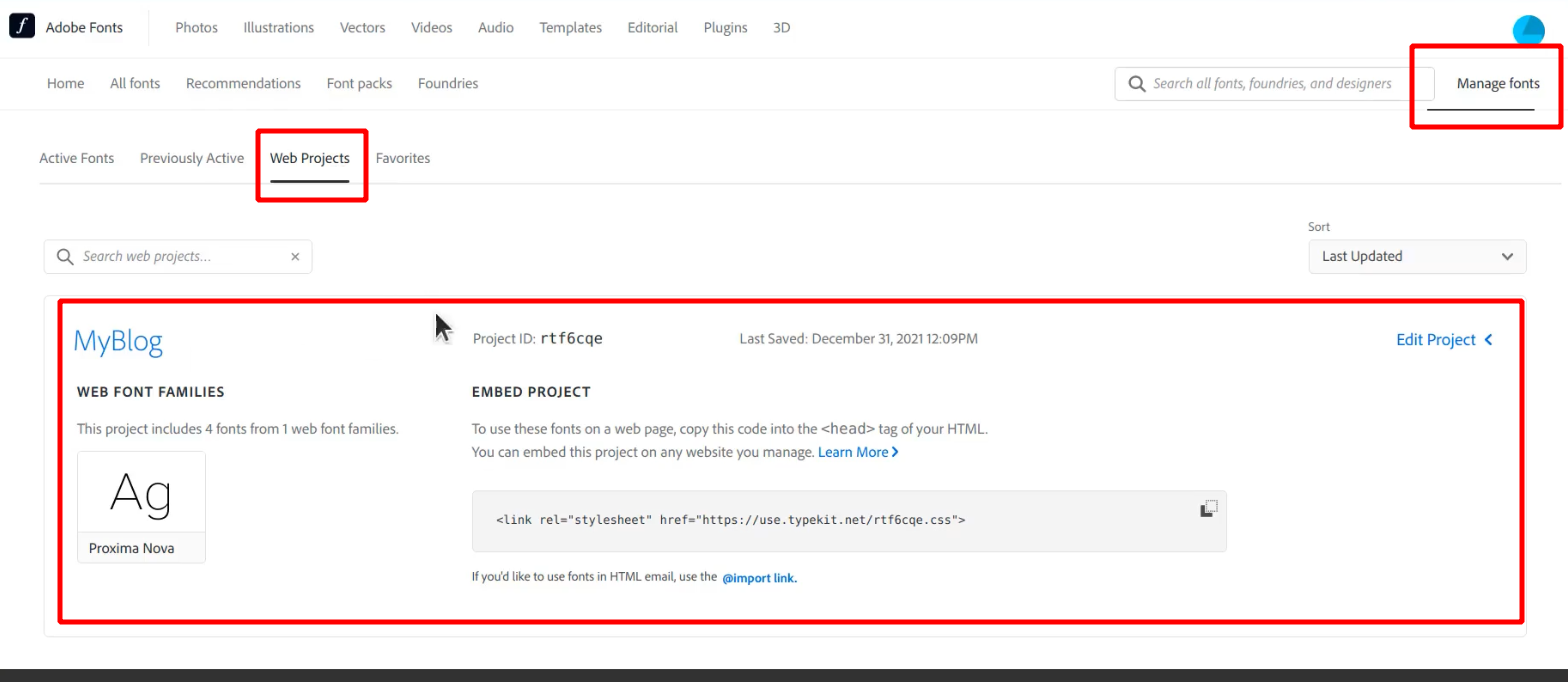
Click on the Edit link if you want to edit the project. Here you can add more styles or remove existing ones, as you like.
On the right side, you can set the character set and font-display settings.
The default font display is auto, you can also select other options like block, swap, fallback, and optional.
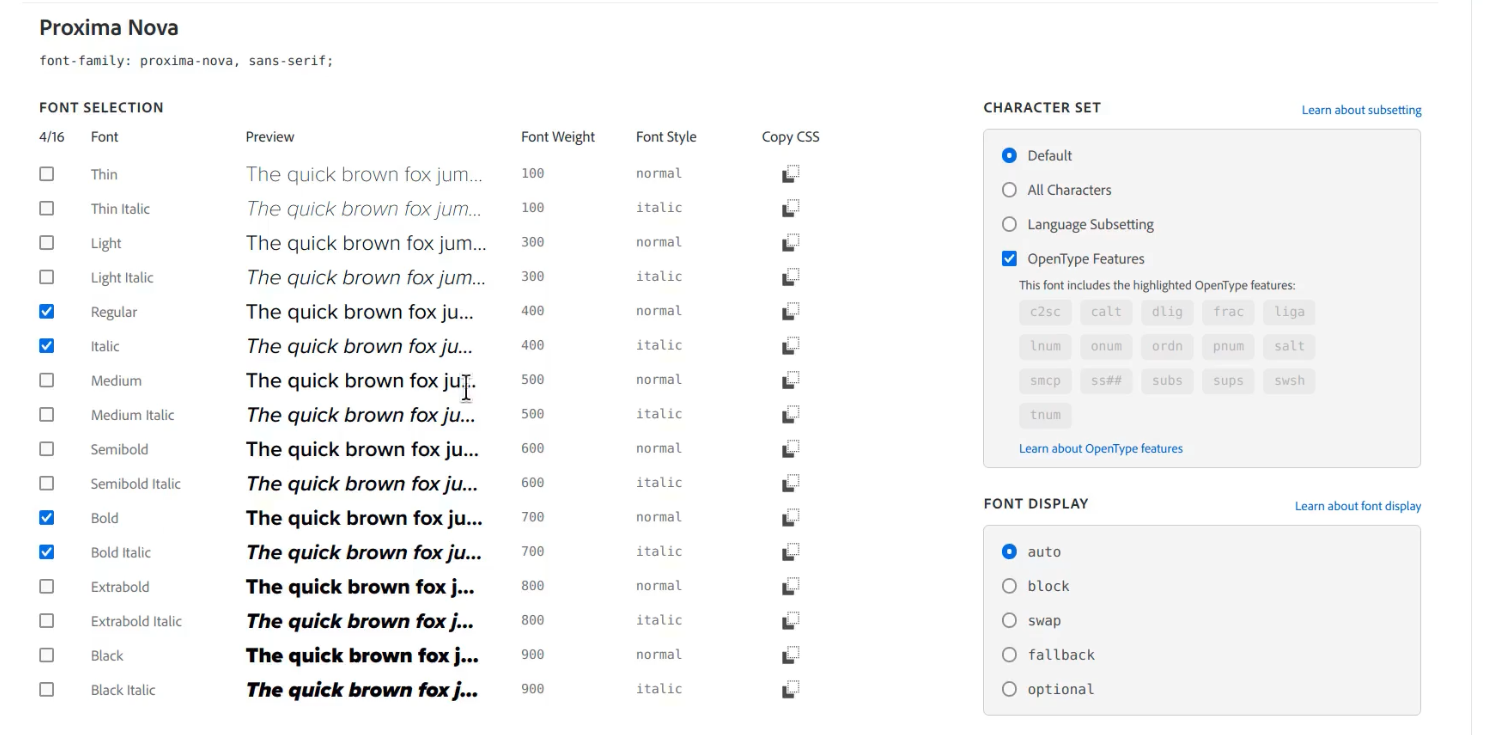
The swap option may be better for performance, although it results in a flash-of-unstyled-content.
For now, let's leave it like that, and click Save Changes.
Now we want to add it to our WordPress website.
Inserting the CSS to WordPress
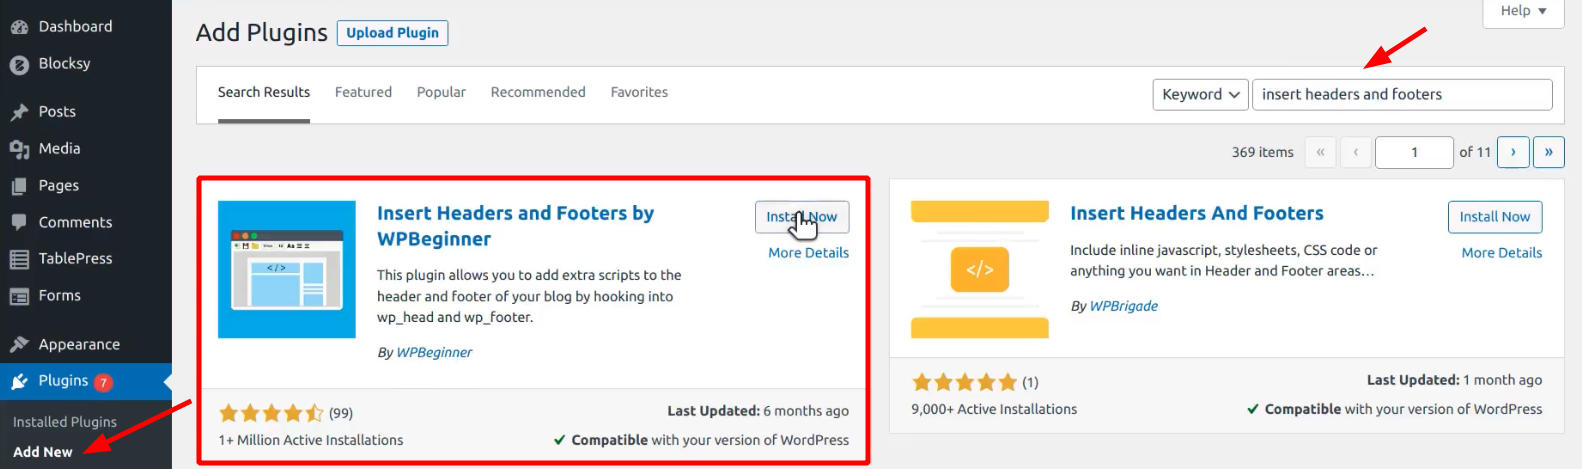
Login to your WordPress admin area, then go to the Plugins section, and click Add New.
We want to add the code to the HTML head. To do that, there's a plugin called Insert Headers and Footers.
Now, under the Settings, you will find a new menu item called Insert Headers & Footers. Go to that page.
Under Scripts in Header, paste the code from the clipboard.
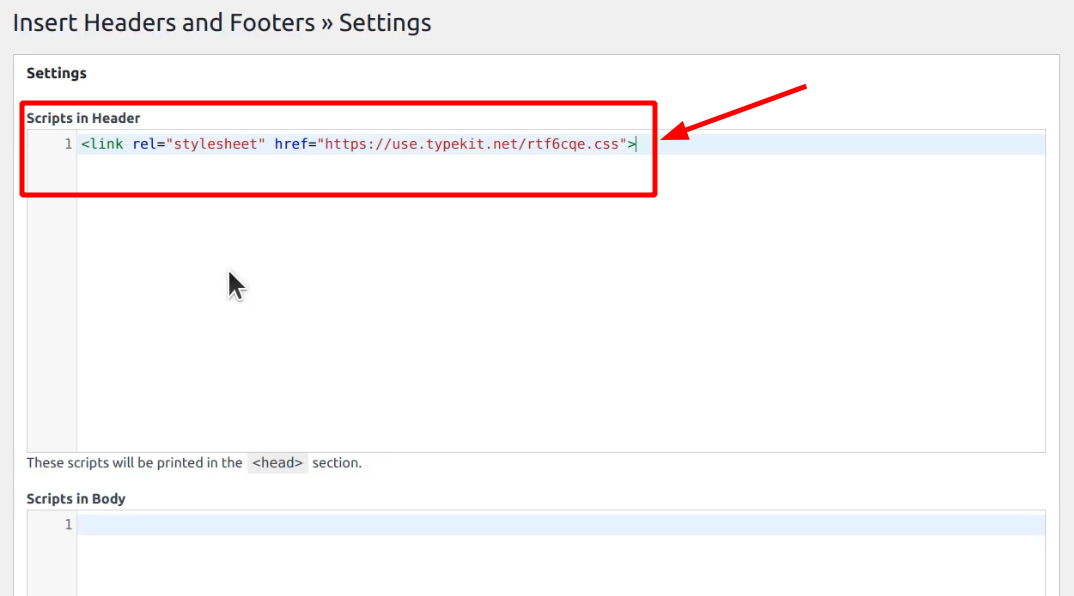
Scroll to the bottom, and click Save.
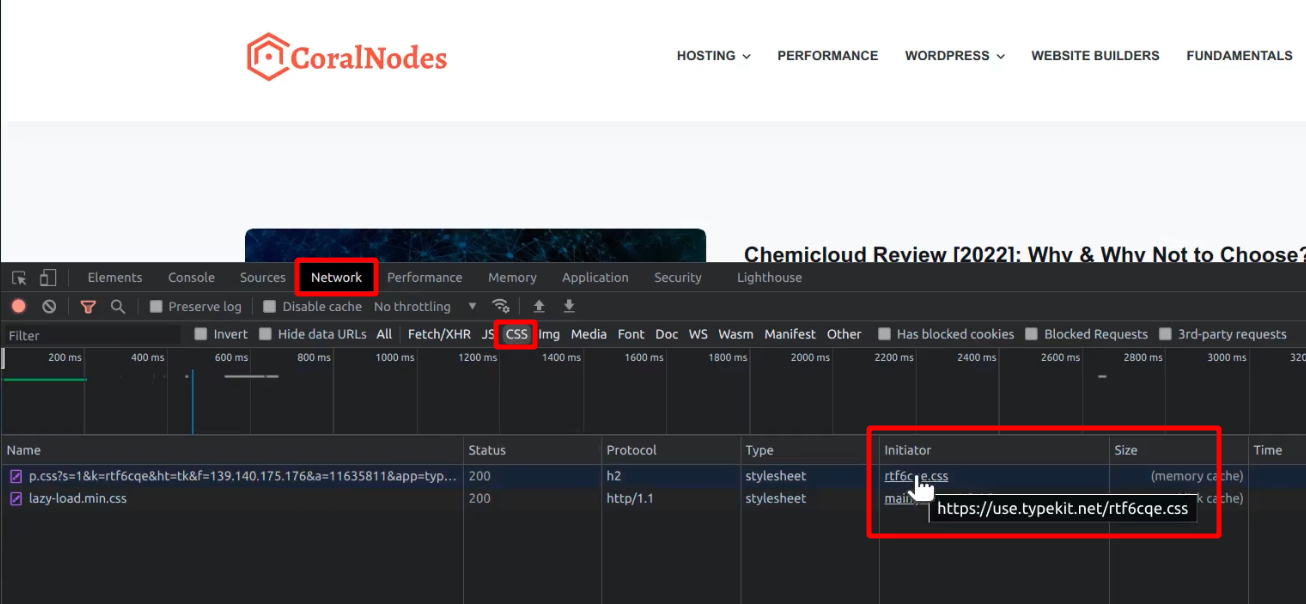
If you want to verify whether the CSS file is loading correctly, open the site in a new tab. Then open the Chrome Developer Tools and go to the Network tab.
Reload the page, and you should see the file listed there.
But still, it's not complete.
Applying the Font
We want to add some custom CSS code to apply the font family to our website.
For that, we want to go to the Theme Customizer. Go to Appearance > Customize.
I am currently using a theme called Blocksy. But this method should work fine for any theme.
First of all, switch all the font settings back to their defaults. In case you're currently using one of the Google Fonts, this step ensures that you don't unnecessarily load any of them.
Now, go to the Additional CSS section, and add the following CSS:
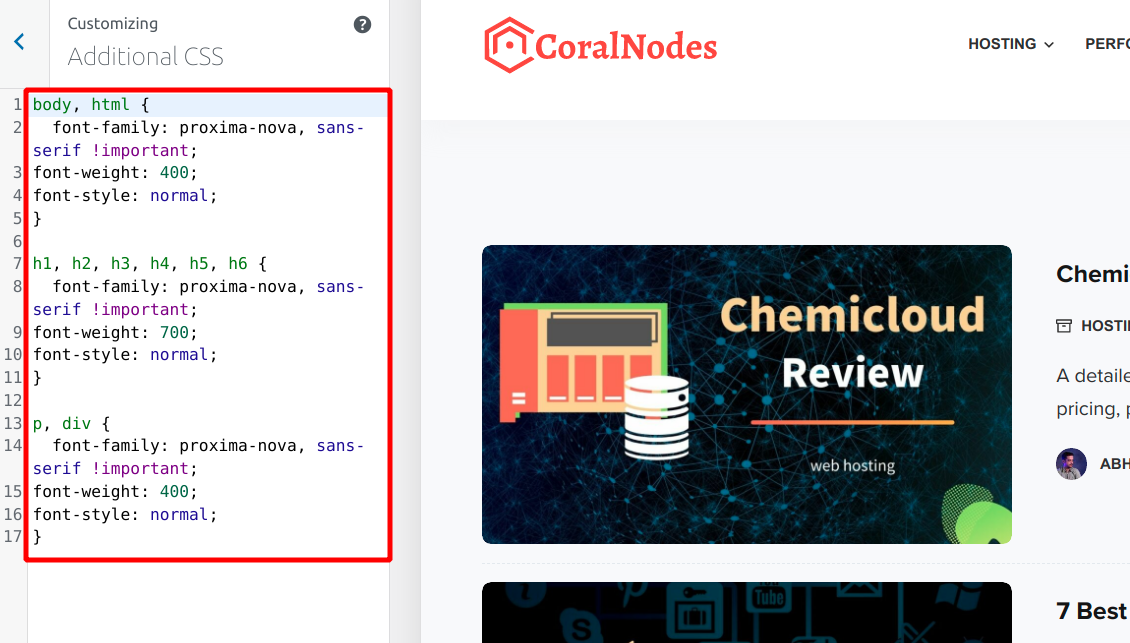
There are a few things to remember here:
- There aren't any strict rules on how you write the CSS.
- Depending on the theme you use, you may need to modify the rules slightly.
- Use the Chrome Developer Tools to inspect the elements as you write the CSS.
- Use the !important property wherever necessary to override theme defaults.
Once you are satisfied, click the Publish button to make the changes live.
Wrapping Up
Reload the site, and you should see the new font in action.