This article may contain affiliate links. If you buy some products using those links, I may receive monetary benefits. See affiliate disclosure here
Scheduling is a crucial feature for planning your content ahead and keeping consistency in your blogging journey. If you are looking for ways to schedule your WordPress posts, then in this post, we will discuss a couple of ways.
These are the methods:
- Scheduling individual posts from the Posts Edit page
- Using the Quick Edit link to modify post date and status
- Bulk scheduling using a plugin - here we use the Editorial Calendar plugin
If you prefer watching a video about the same, here it is:
Before Beginning: A Note on WordPress Post Statuses
WordPress supports eight different Post Statuses:
- Publish
- Future
- Draft
- Auto-draft
- Inherit
- Pending
- Private
- Trash
As you might expect, 'Publish' is the status assigned for a post when you publish a post. And 'draft' means the post is just saved in the database, it's neither published nor it has a publish date associated with it. When you hit the Publish button, the status changes from 'draft' to 'publish' along with the DateTime.
WordPress stores all this data under the wp_posts table in the database. To be more specific, WordPress saves the post status values under the column _poststatus against each post ID. You can read more about the different post statuses on this documentation page.
Here, we are interested in the second option - 'Future'. It's the status WordPress assigns for posts scheduled to be published on a future date.
Schedule from the Post Edit page
Open Settings Panel
This guide assumes that you are using the new Gutenberg Block Editor. Go to the edit page for any draft post you want to schedule. Or you can do this for a new post as well.
Then click on the cog wheel button at the top bar (towards the right side of the Publish button) to open the Settings panel one the right, if it's not already opened.
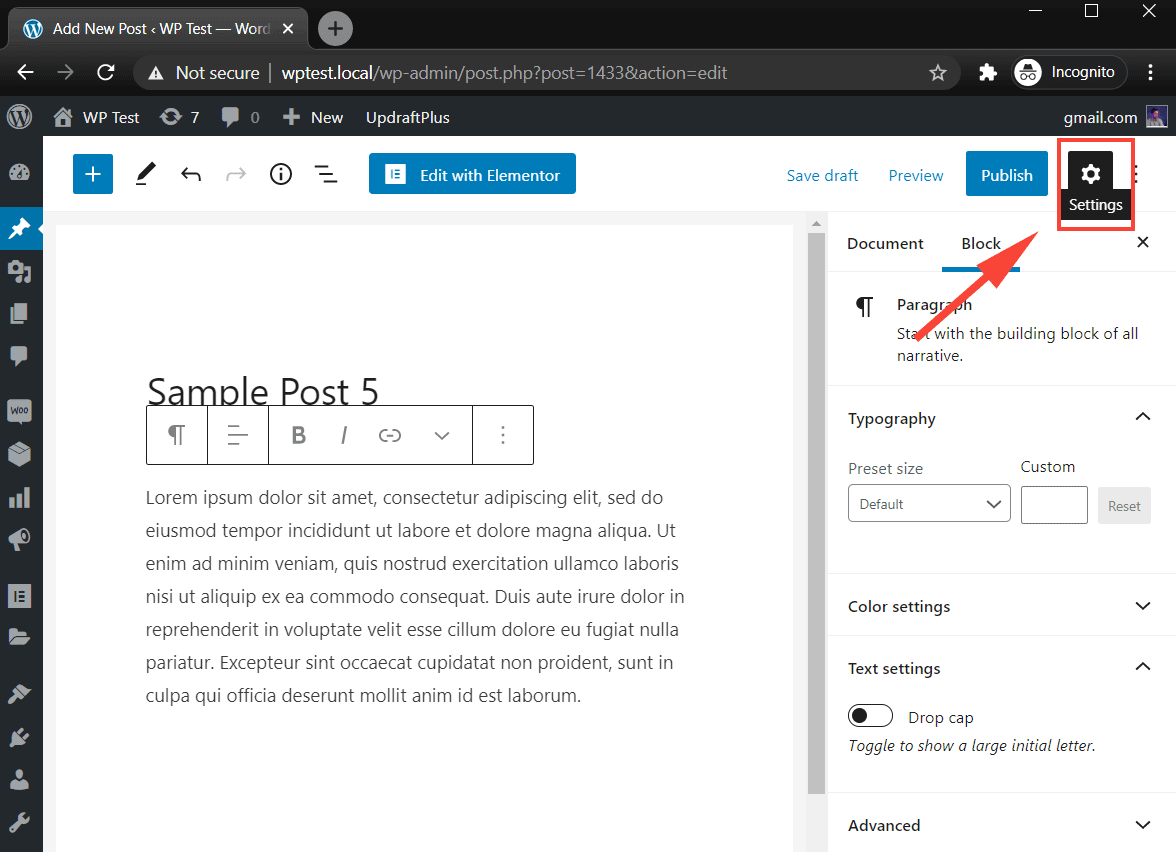
Go to Document > Status & visibility
In the settings panel, there are two tabs:
- Document
- Block
Go to the Document tab. There you can find the different settings arranged in accordion-style menus. Expand the first one - Status & Visibility.
Here you can find the following options:
- Visibility
- Publish
- Post Format
- Checkboxes to make the post sticky or mark for review
- Trash/delete the post
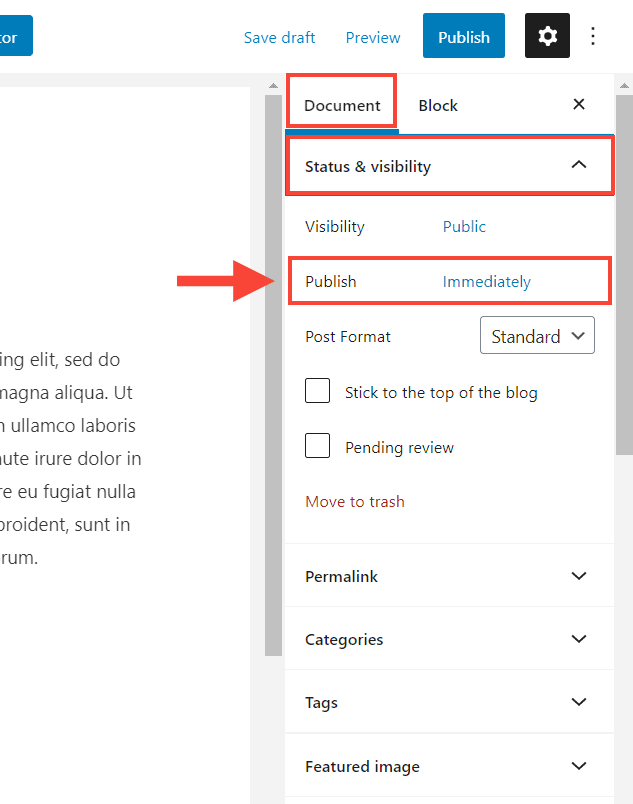
Change the Publish value from Immediately to a Future date/time
The default value for the Publish setting will be - Immediately. That means the post will go live immediately if you click the Publish button.
Instead, to schedule the post for another date, click on the word 'immediately', which opens a calendar. In that calendar, you can set the date and time for the post.
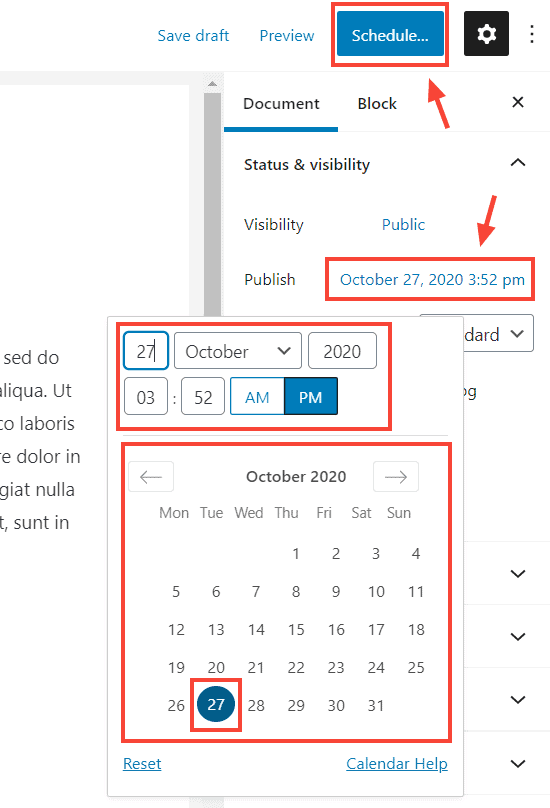
When you select a future date:
- The Publish button changes to Schedule
Note that you can also select past dates from the calendar, which is useful if you want to backdate any post.
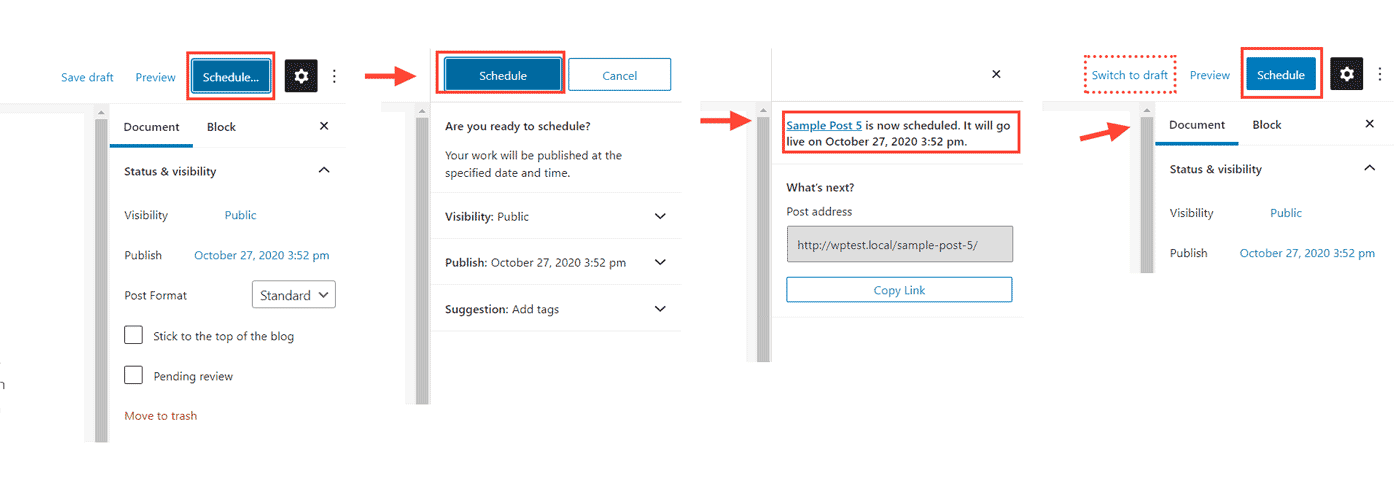
Click Schedule
After picking a desired date, click on the Schedule button on the top bar. Now the post is scheduled. Also, note that:
- 'Save draft link' changes to 'Switch to draft', which reverts the post back to a draft if you click it.
Using the Quick Edit Link
In the above section, we discussed scheduling posts from the editor. You can do the same thing from the Posts list page also.
Under each post title, you can find a Quick Edit link. Click on it to expand it.
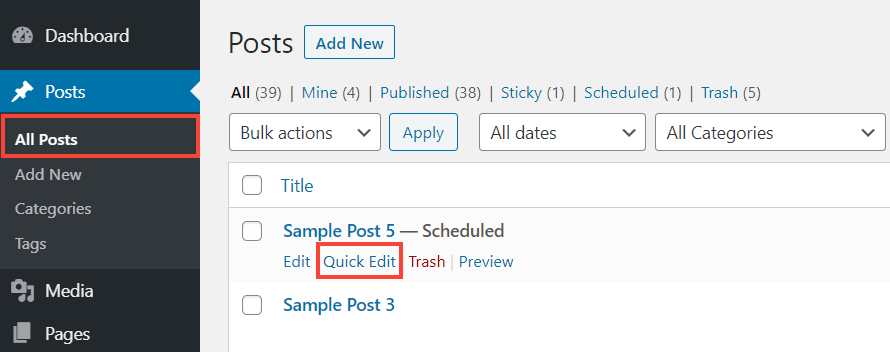
From the Quick Edit box, you get the options to set the date, time, and status of each post.
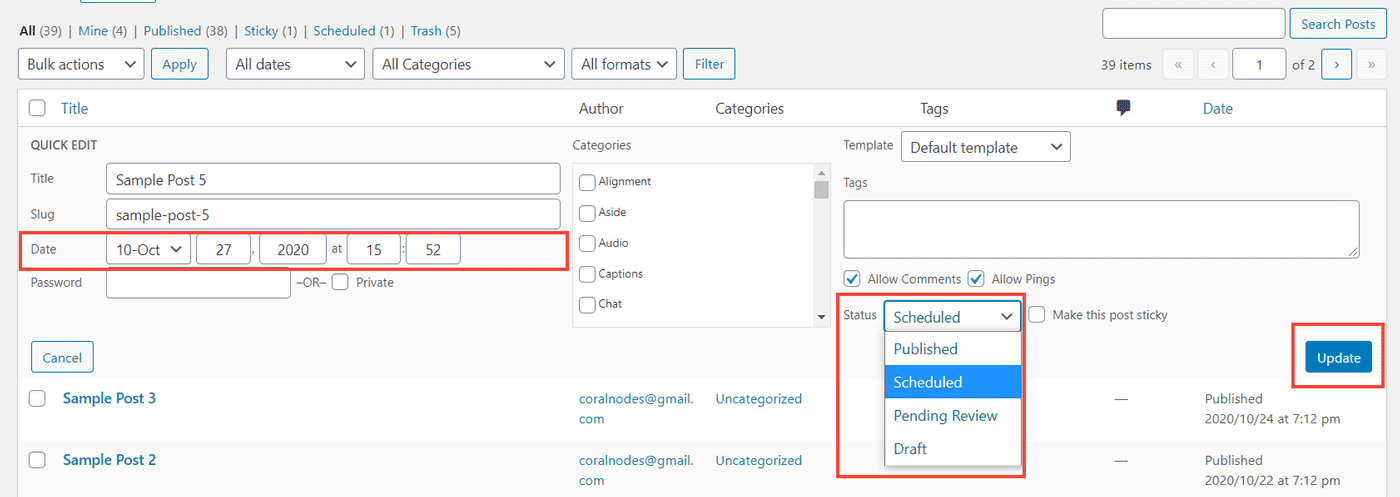
This method would be easier if you have multiple posts to schedule or backdate. Since it's Ajax-powered, you don't have to wait for the post editor to load either.
Bulk Scheduling using the Editorial Calendar Plugin
But still, if you have tens of posts to schedule for future, it's not convenient to do it from the editor or posts page. For example, if you want to schedule posts for the next week, the week after that, next month, etc., then a calendar is essential.
By default, WordPress does not provide a calendar to organize your posts. So, for that, we will use the Editorial Calendar plugin.
Go to the Add Plugins page, and search for the keyword - 'editorial calendar', then install it, and activate it.
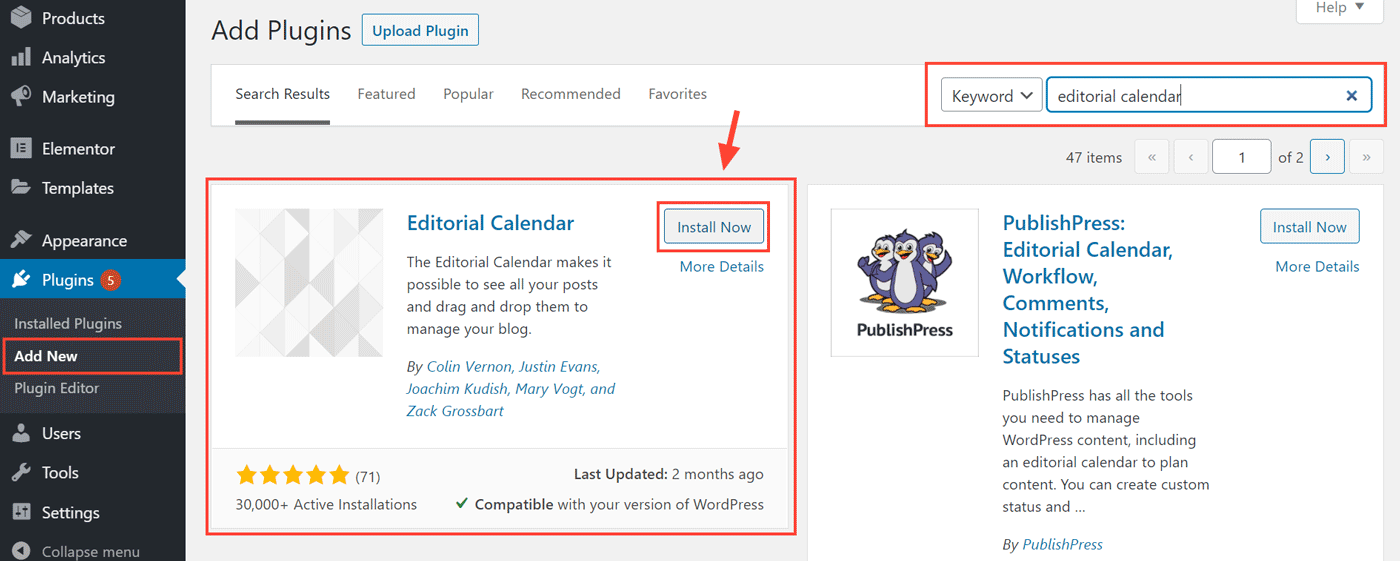
Once you have activated the Editorial Calendar, you will see a new menu item called Calendar under Posts. Open that page.
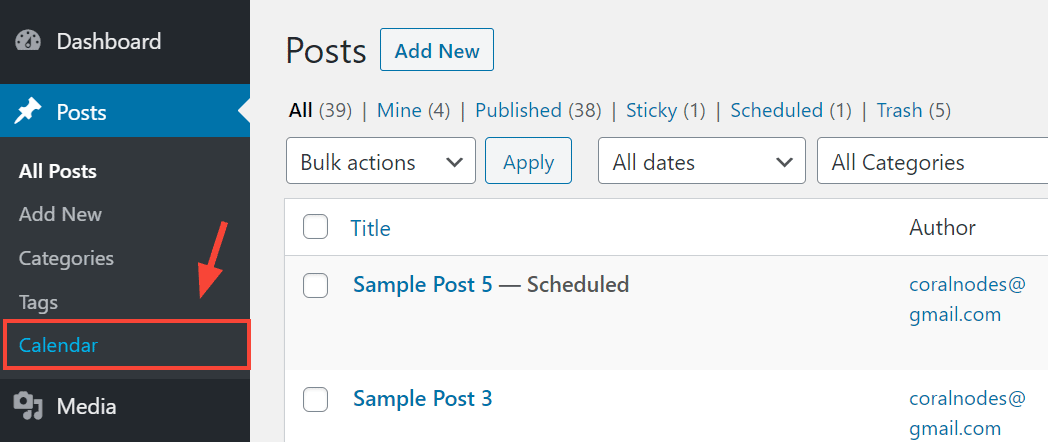
Now you should see a calendar. Scroll up to go to the previous month and scroll down to go forward. You should also see the posts you have already published/scheduled previously.
On the right side, toggle the option - show unscheduled drafts. Now on the right side, you see all the draft posts you've created.
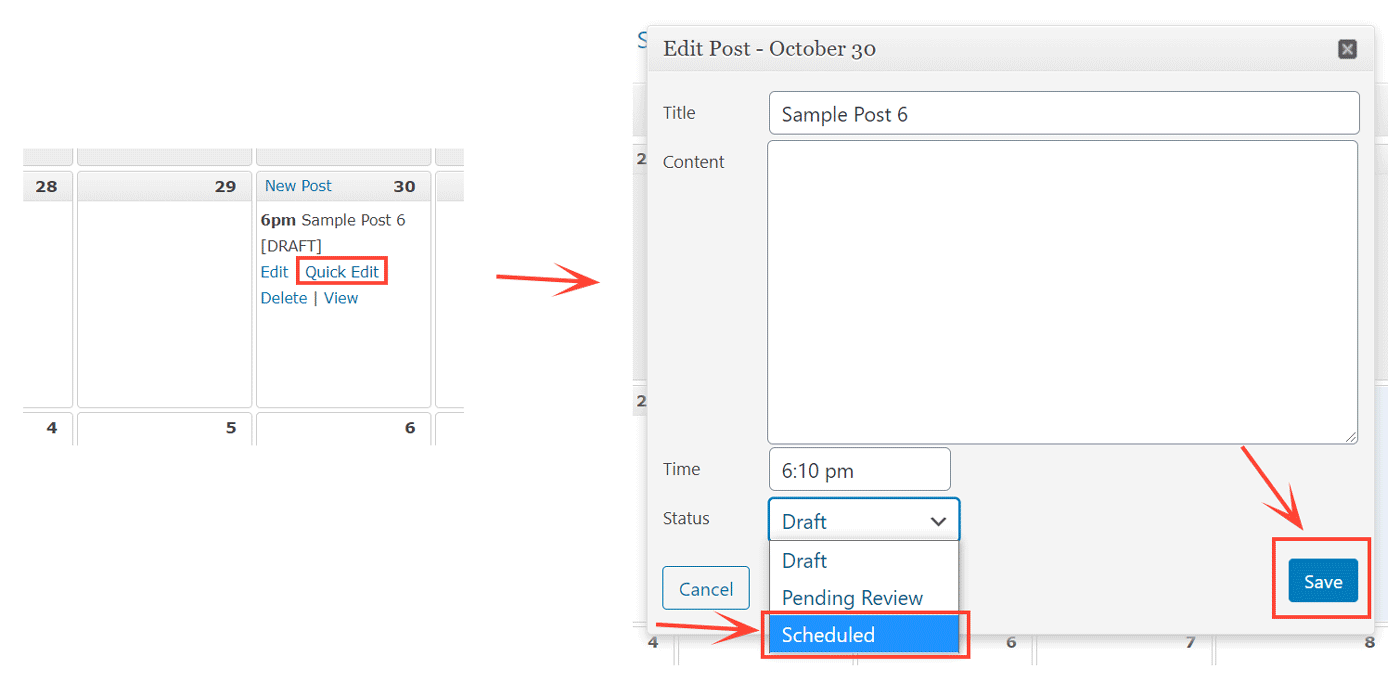
To schedule one of them, just drag it to the required date cell in the calendar.
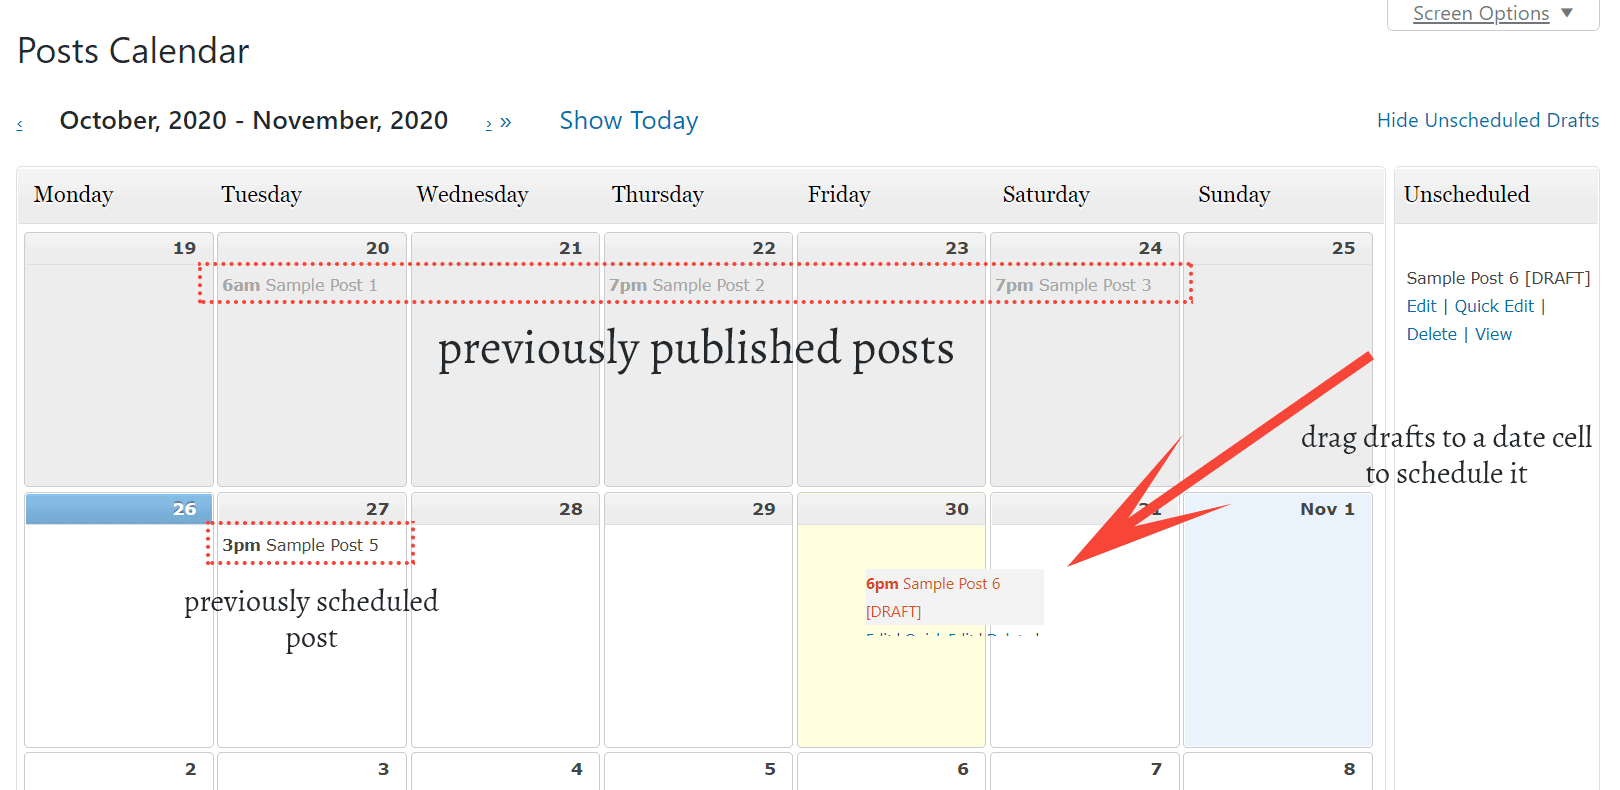
Then change the post status from Draft to Scheduled. That's all.
Now repeat the same process for all the drafts you want to schedule.
Conclusion
Editorial Calendar may not be the only WordPress plugin that allows calendar-based post-scheduling. I have heard about other options like PublishPress, but I haven't tried it yet.
Hope this post helped you.