This article may contain affiliate links. If you buy some products using those links, I may receive monetary benefits. See affiliate disclosure here
Have you ever encountered an issue that your WordPress site is not sending emails? Maybe, you have set up a contact form, but you don't receive any notification emails.
Why does this issue happen? How to solve it? This post will help you to find the answers.
First of all, you should understand that the problem is not with your WordPress installation. It indeed sends out emails. Then what happens?
Reasons Behind the Problem
By default, WordPress uses the wp_mail() function to send emails, which relies on PHP’s mail() function.
The mail() function uses the system's sendmail path or the built-in SMTP server to send out emails. That means it requires no authentication and can result in faulty headers.
Another issue is the lack of proper SPF or DKIM records. These two DNS records help to verify the originality of the sender.
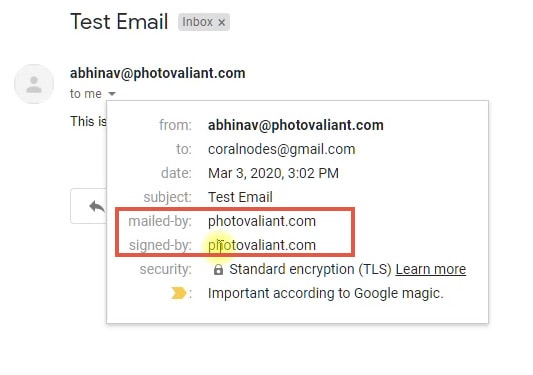
You might have noticed two labels - mailed-by & signed-by - attached to most emails you receive. With SPF, your domain authorizes the mail server to send out emails (mailed-by), while DKIM specifies the public key to sign your messages (signed-by) cryptographically.
Without either of these records, the recipient has no way to make sure it is you who send the emails. Anybody can spoof a message on behalf of your domain.
So, it often ends up in the spam folder. Or even worse, programs like Gmail completely block such emails, so that they never arrive.
Lastly, if your IP or domain is blacklisted, then also it gets blocked. You can check it with this tool at MXToolBox. If it is the IP, changing your host may solve the issue. Otherwise, if it is the domain, you need to remove the blacklisting before proceeding further.
So, let us summarize the causes:
- Faulty or unpredictable headers sent by PHP's mail() function
- System's sendmail being unreliable, which needs no authentication
- Lack of proper DNS records
- Your domain or IP is blacklisted for spamming
The Solution
Unless it is a blacklist issue, the solution is simple.
- Set an SMTP server to send emails from your address
- Authorize WordPress to send emails from that SMTP server instead of PHP mail()
Set Up an SMTP Email
There are many ways to set an SMTP server to send emails from your custom email address. The best way is to use a dedicated email hosting solution like G Suite. SMTP providers like Mailgun or Sendgrid will also work.
However, if you are looking for a free solution, then a simple cPanel email is the easiest way. But before that, you have to check if your host offers cPanel.
Also, both your site and the email should be on the same server for it to work. The server might reject the connection if the request is from a different IP.
That means, SMTP authentication may fail if your cPanel email is on one host, and website on another.
Whatever the solution you chose, the only requirement is that it should support secure (SSL/TLS) SMTP authentication, SPF & DKIM records.
In a previous post, I had written about how to create a domain-based email address using a cPanel. So, please check it out.
If you are using email for only contact forms and admin notifications, then a cPanel-based email will suffice - no need to go for paid solutions unless you plan to send out a large number of emails.
Find SMTP Details
To connect your email with your WordPress website, you have to know a few details.
- Username (your email address)
- Password
- Outgoing mail server
- Outgoing mail port number (usually 587 for secure SSL/TLS connections)
If you currently don't know these credentials, ask your hosting or email provider to get it.
Install WP Mail SMTP Plugin
As you now know your SMTP credentials, the next step is to install an SMTP plugin on your WordPress website.
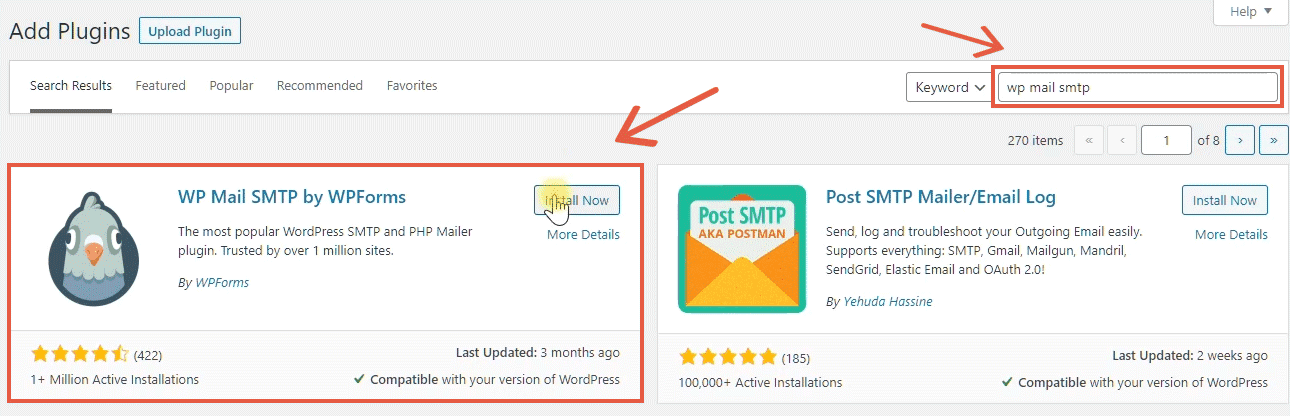
WordPress plugin directory offers a couple of SMTP plugins for free. However, today we will be looking at the WP Mail SMTP Plugin. The plugin is from the same folks behind the popular WPForms plugin.
Go to the Plugins page on your WordPress dashboard and click Add New. Then search for WP Mail SMTP and install it.
Configure WP SMTP Plugin
Configuring the plugin is pretty straightforward.
Set From Email & From Name
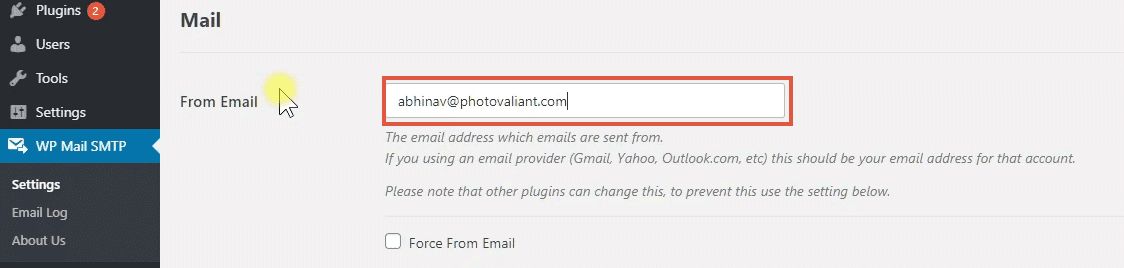
use your custom email in this field
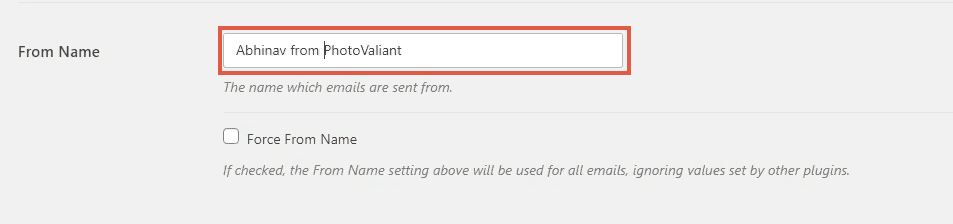
give a from name - You from Your Company
Select Mailer
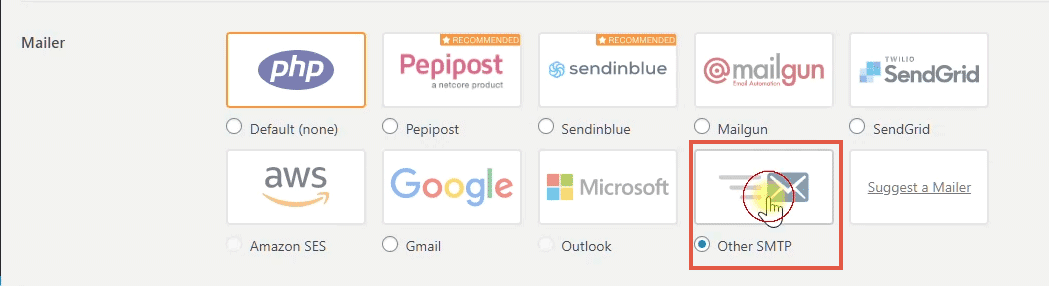
WP Mail SMTP supports several integrations - here we select Other SMTP option for our cPanel email
Configure SMTP Host, Protocol, and Port Number
The next step is to provide the mail server details.
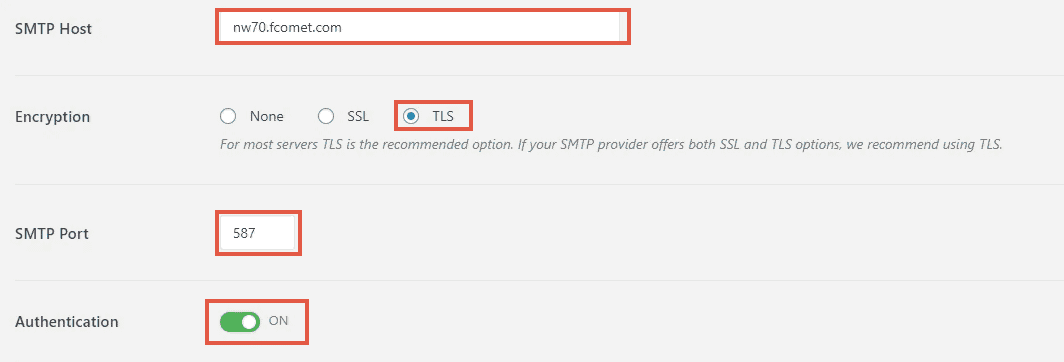
Note: enter your Hostname in the first field
Enter SMTP Username & Password
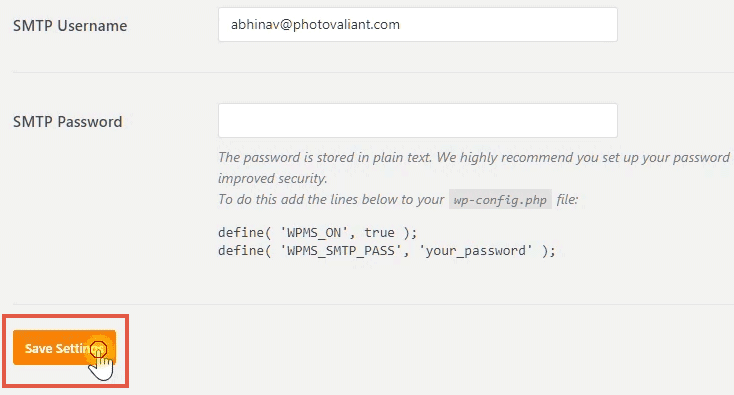
enter your new email ID for the username field and leave the password field empty
Finally, click Save.
Although the plugin allows you to store your email password in the database, it is not the safest way.
So, you need to edit the wp-config.php file in your WordPress site's root directory to store the password safely. For that, add the following lines and save the file back to the server.
You can use FileZilla or any other FTP program to open the wp-config.php file.
define( 'WPMS_ON', true );
define( 'WPMS_SMTP_PASS', 'your_smtp_password' );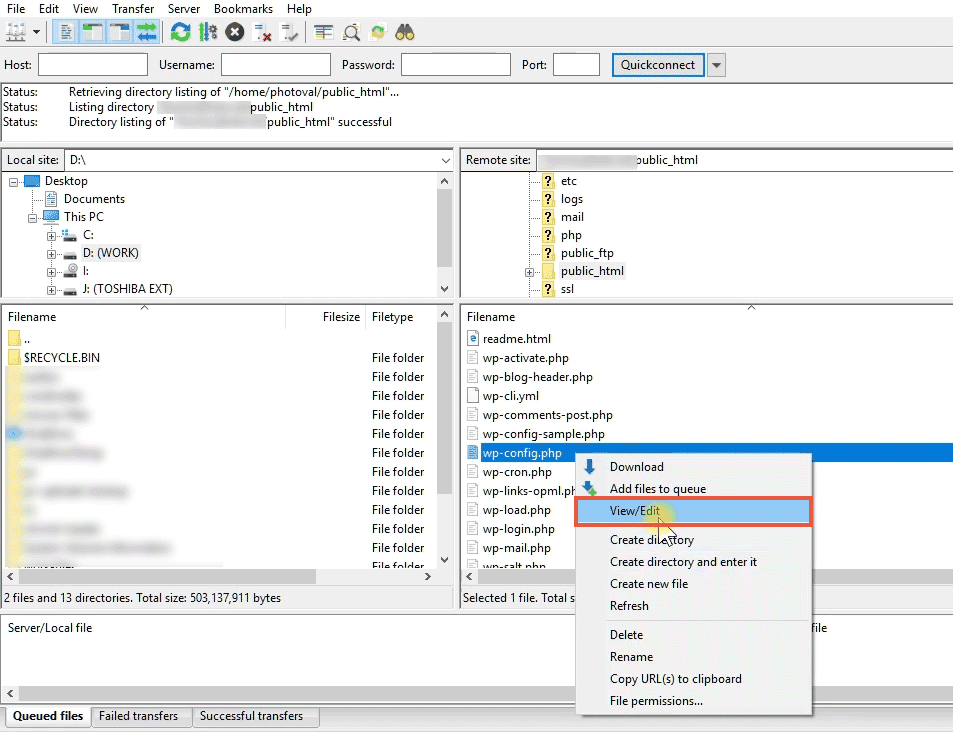
Opening wp-config.php file with FileZills
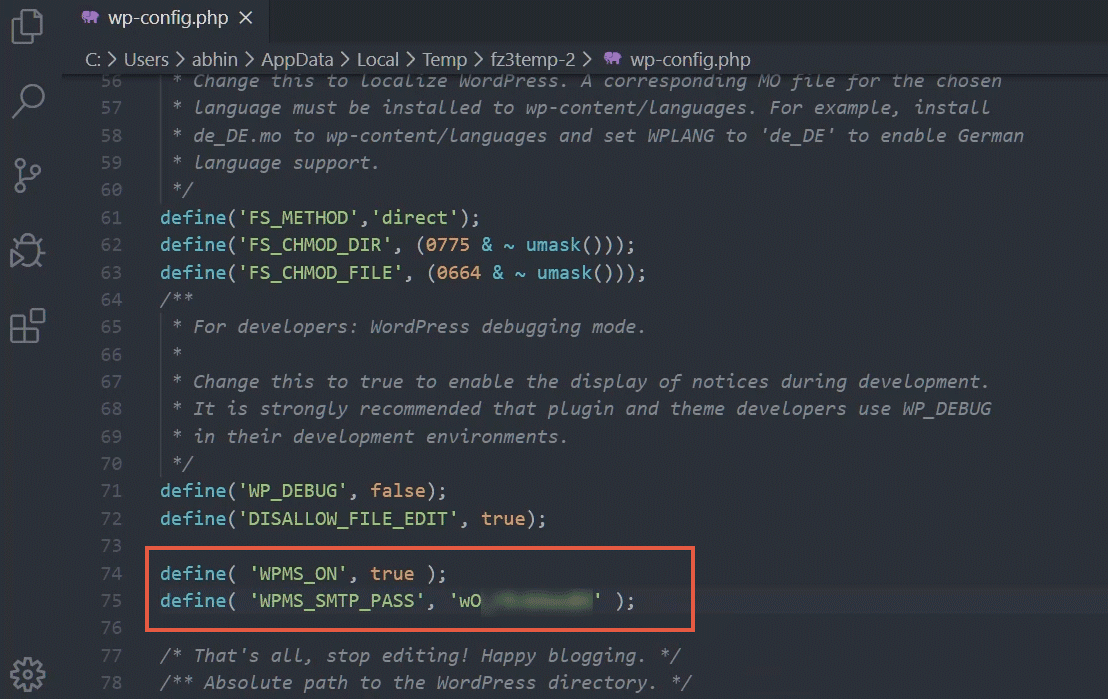
adding the SMTP password in the file
Send a Test Email
You can send a test email from the plugin's page itself. If it works, then you've successfully set up an SMTP email on your WordPress site.
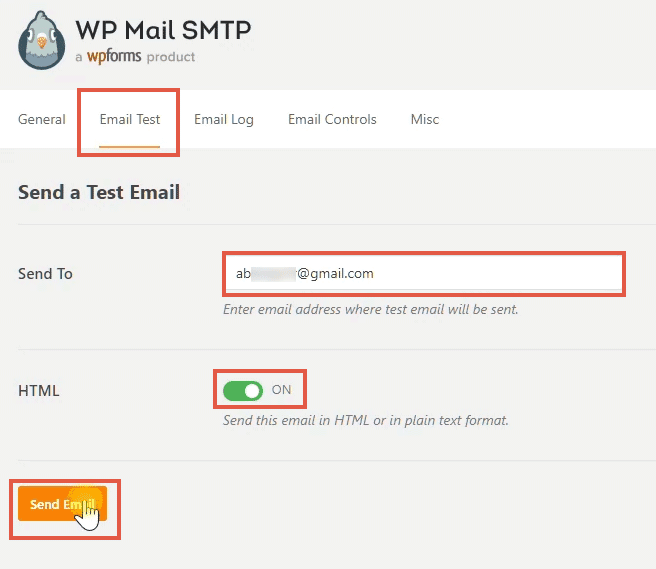
give another email ID for the Send To field for testing

test email received at the other end
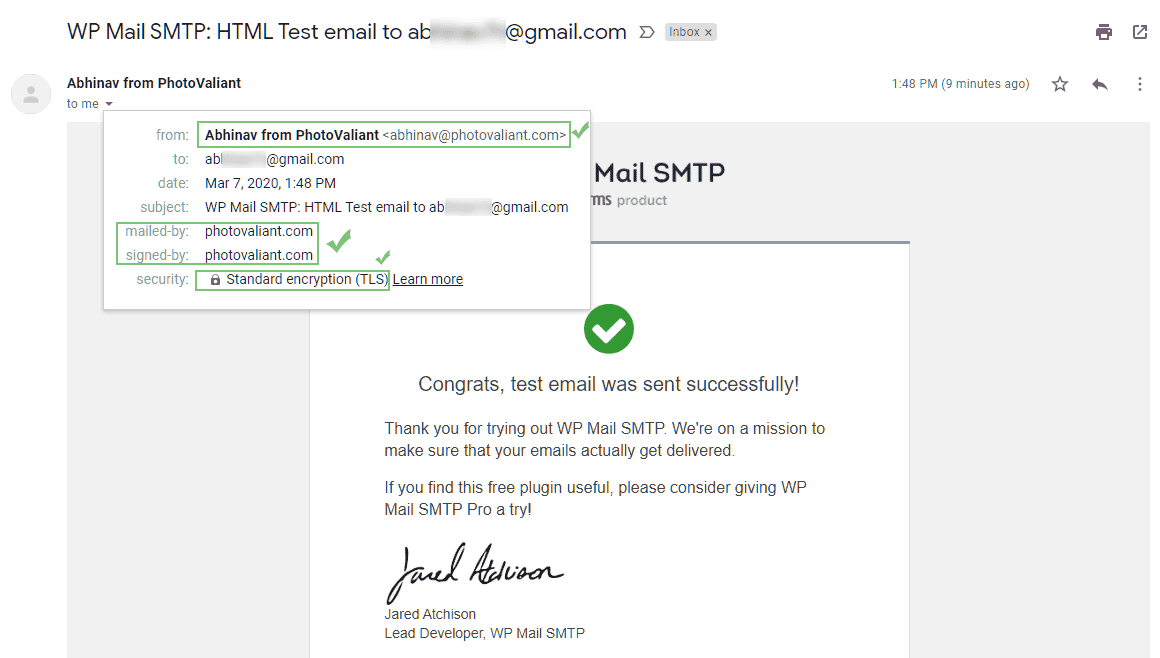
it has all the required headers set correctly
From now on, WordPress will use your SMTP authentication to send emails instead of the default PHP mail() function.
Although it can be a bit slower, you can rest assured that your emails will reach its destination.
What does this plugin do?
In short, this plugin allows your site (the client) to authenticate with an SMTP server. That's how email clients like Hotmail also work.
Under the hood, the WP Mail SMTP plugin uses the PHPMailer library for SMTP authentication.
There are several methods to perform authentication, like PLAIN, LOGIN, CRAM-MD5, etc. If you are interested in the technical details, check this article.
Configure Gmail to Prevent Spam
Do you want to receive contact-form notifications to your Gmail address?
Then you can take a few more measures to ensure message deliverability from your domain.
- Create a Gmail filter
- Add your domain to Gmail contacts
Create a Gmail Filter to Prevent Spam
With a filter, you can whitelist specific addresses so that Gmail will never mark them as spam. Here, you can add your custom email address to the filter.
Earlier, contact form emails from my blog sometimes ended up in the spam folder of my Gmail address. But after setting this filter, all the emails started arriving in the inbox itself. None gets flagged as spam.
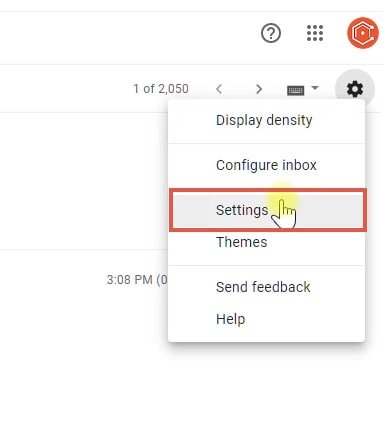
Go to Gmail Settings
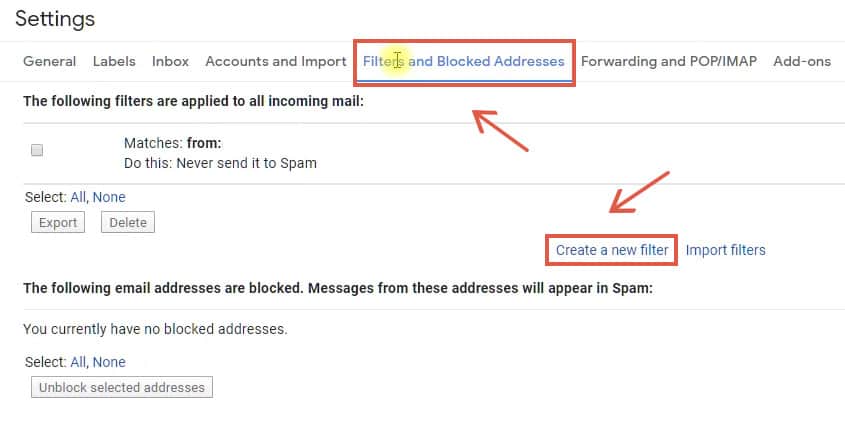
Go to the Filters and Blocked Addressed tab > Create a new filter
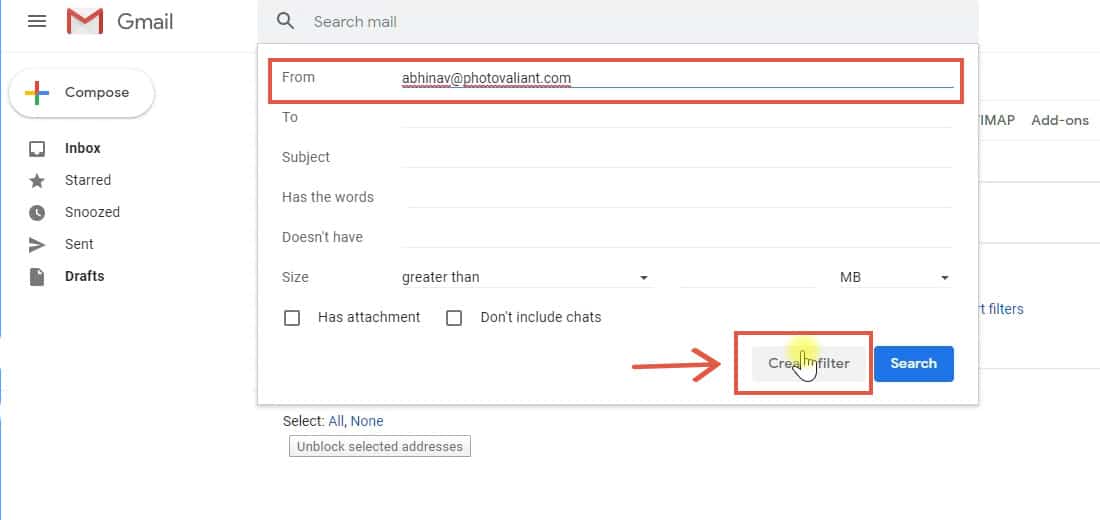
Enter your from email ID and leave other fields empty
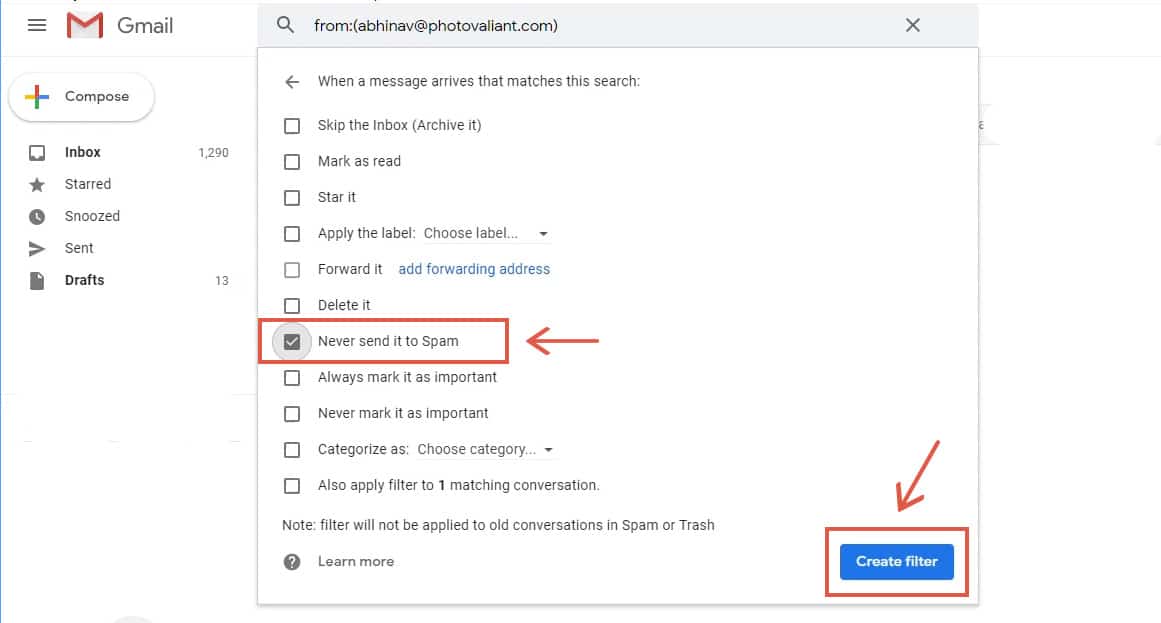
Check the box - Never send it to spam
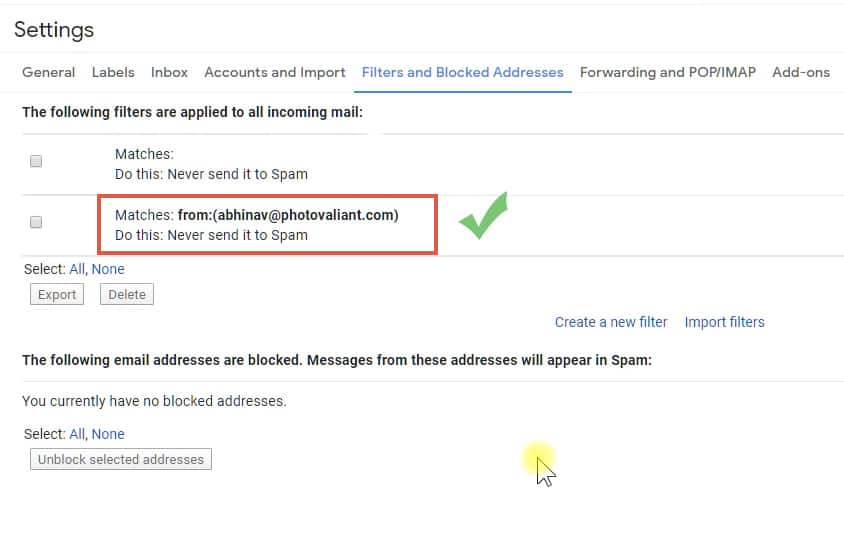
Filter is now active - Gmail will never mark this address as spam
Conclusion
If you had a problem with WordPress email deliveries, I hope this guide helped you in solving it.
Have any other questions about email configuration? Please ask it in the comments.