This article may contain affiliate links. If you buy some products using those links, I may receive monetary benefits. See affiliate disclosure here
Do you still use the generic Gmail or yahoo email addresses for your business? Then it may not be a great idea.
If you don’t plan to invest in a professional email hosting providers like G Suite or Hover, I will show you another way, without spending more money.
So, in this post, you’ll learn how to set up a custom email address in cPanel. However, it requires that your hosting provider supports it.
Why use a custom email address?
The two main reasons to use a custom email address for your website are:
- Branding
- Better email deliverability for newsletters
A custom email address ends with your domain name. So, it feels professional when you send messages to your clients from a custom email address.
For example, [email protected] looks better than [email protected], right?
Moreover, if you send newsletters from a personal email address like Gmail, most likely, it will end up in the spam folder of the recipient. So, that is another reason to use a domain-specific email address.
With these points in mind, let us continue to the steps to create it.
Steps to set up Email in cPanel
1. Log in to cPanel
In this tutorial, I am using FastComet to create an email address for one of my blogs. However, you can use any other host that supports cPanel.
If it is the first time you are logging in to cPanel, check the welcome message you received from your hosting provider. It usually contains the username and password to access the cPanel.
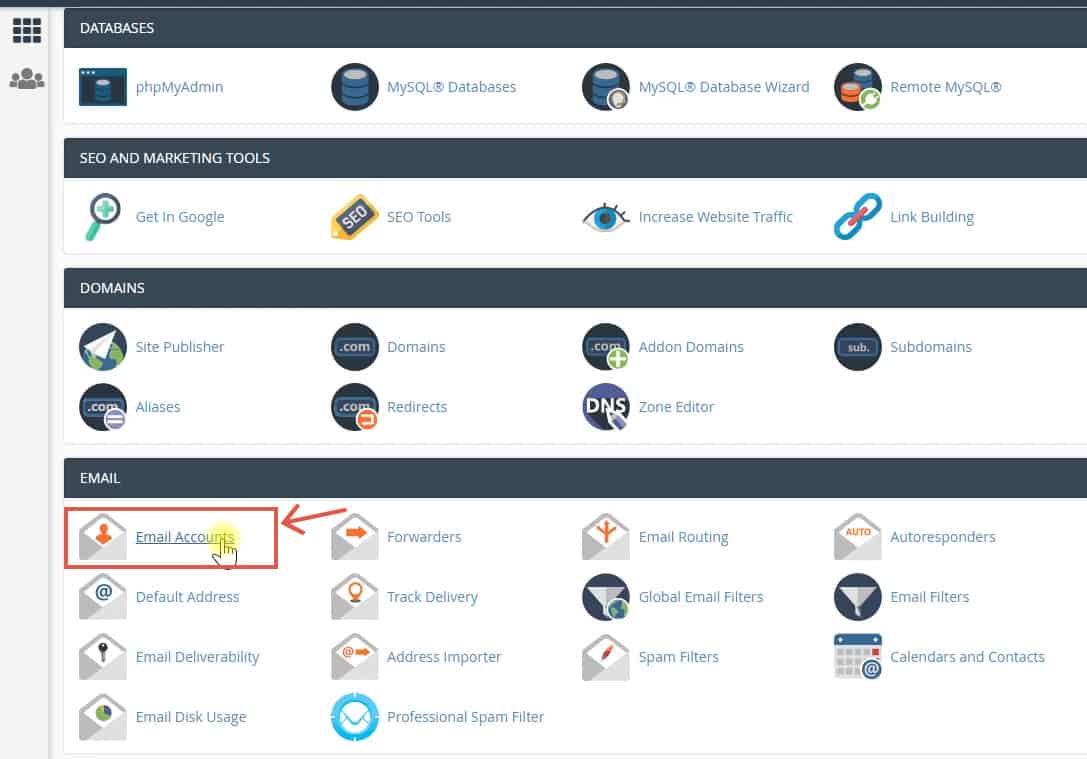
2. Open Email Section
Although the design of the cPanel differs slightly with different hosts, the functionality is almost the same.
Usually, under the Emails tab, you can find a link that says Email Accounts. Open it.
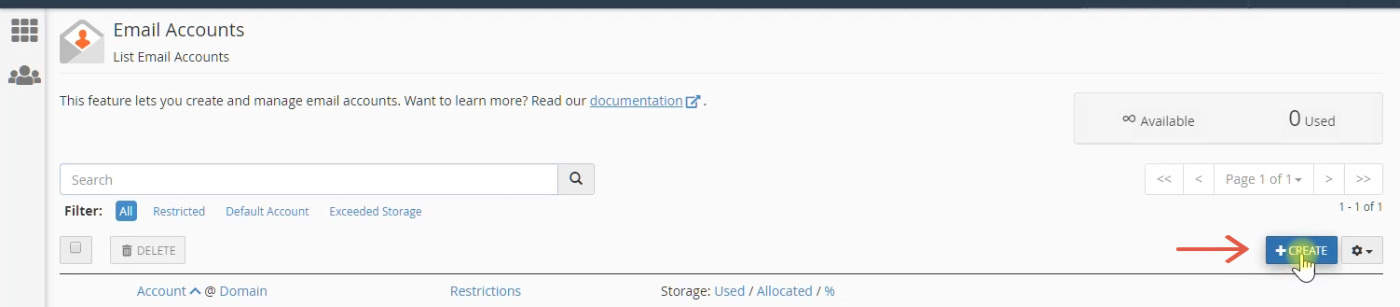
3. Create a new Address with a Username & Password
In the Create An Email Account page, you can see the form to create a new email address.
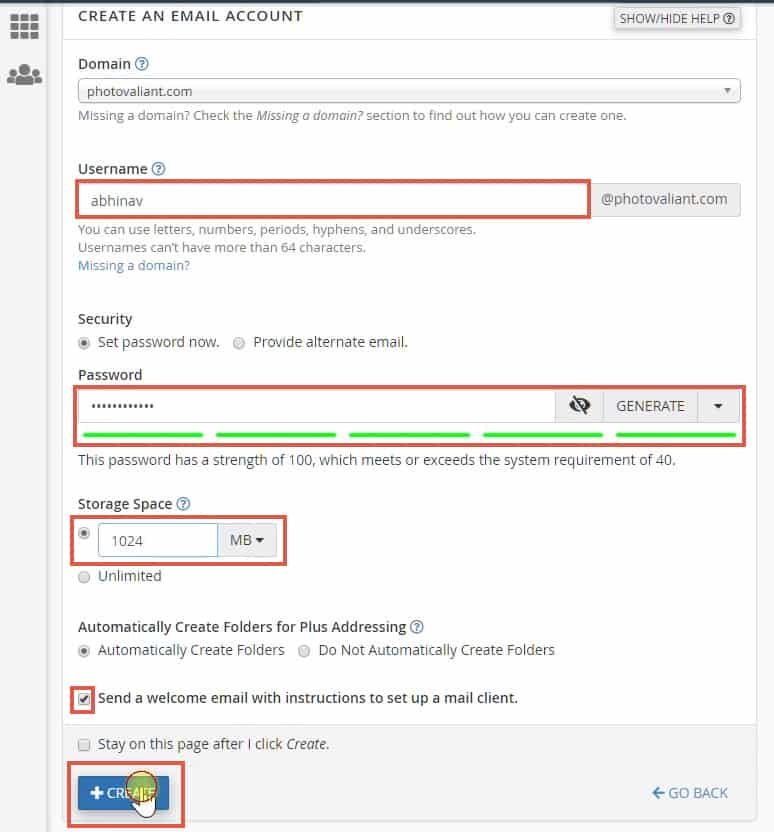
Enter the username you like to use with your site’s domain. Here, I entered my name itself, so that the address looks like [email protected].
After entering the username, you have to set a strong password. The recommended way is to use the built-in password generator. Also, remember to store this password in a safe place like a password manager.
Then select a memory quota. On shared hosts with limited resources, set the mail quota to a maximum of 500MB or 1GB. Otherwise, if you set it to unlimited, you might end up overusing the server resources.
Finally, click Create.
4. Check for Proper DNS Records
For your Email to work correctly, ensure that you have the following DNS records set for the domain:
- Mail Exchange (MX) Record
- SPF & DKIM Records
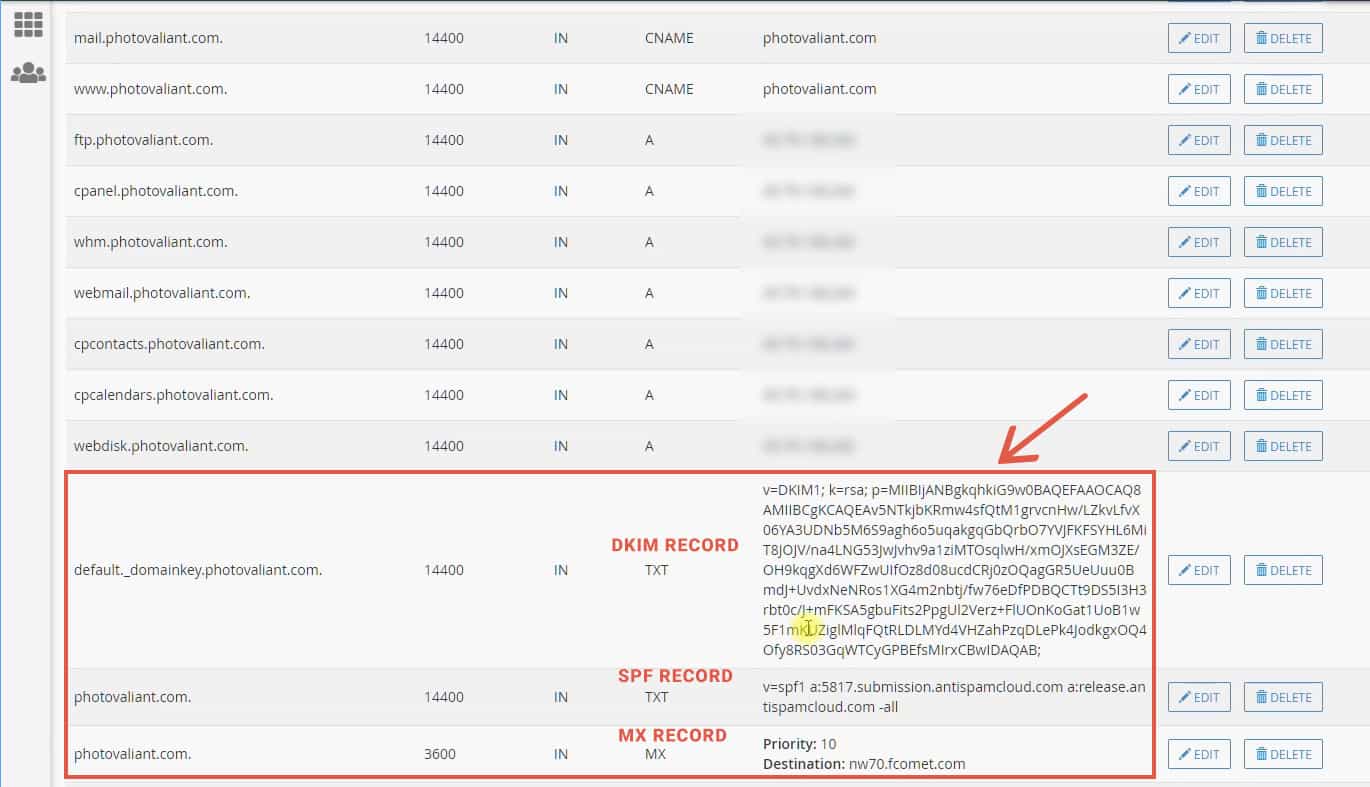
Usually, cPanel automatically sets these records when you create an email address. You can verify it by going to the Zone Editor section under Domains.
You don’t need to manually add any records if you are using the nameservers provided by the web host. Otherwise, if you are using a third-party nameserver, you will have to copy these records for your Email to work.
Now let us see what these records do.
When someone sends an email to your address, the sending mail server checks for the MX record of your domain to determine the destination, if it does not exist, the email delivery may fail.
Unlike the MX record, SPF and DKIM records are not a must for the Email to work. However, these records help to increase the genuineness of your emails so that it will less likely end up in someone’s spam folder.
While checking emails on Gmail, you might have noticed two headers - mailed-by & signed-by. SPF and DKIM headers, respectively, are responsible for these headers.
Both these headers are measures to fight address spoofing. SPF record tells the recipient that your domain has allowed your mail server to send emails on your behalf. In contrast, DKIM signs the message with a cryptographic key so that the recipient can verify its originality.
So, the combination of SPF and DKIM helps to improve the deliverability of emails.
5. Login to the Webmail
Now we have successfully created the new email address. But how to access it?
That’s why cPanel has a Webmail section. Click the manage button against the newly created address.

Here, you can see that RoundCube is the default webmail client used by my web host. Open it.
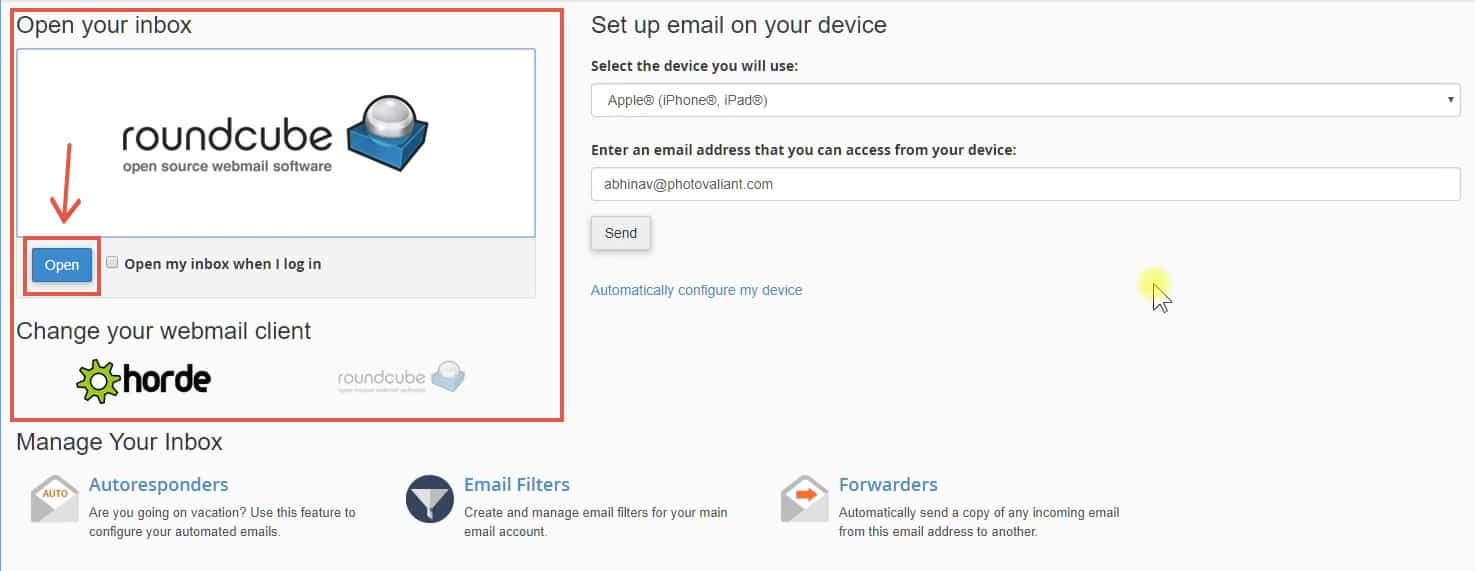
It may not look as stylish as Gmail or Hotmail, but includes all the functionalities to send and receive emails. Later in this post, I will show you how to set up a mail client to send and receive messages from the new email address.
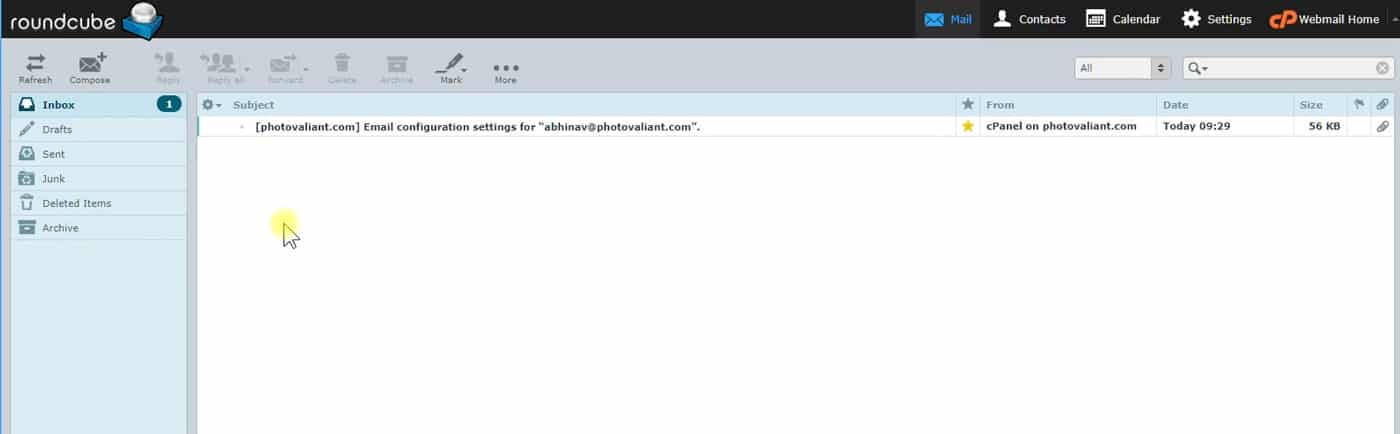
6. Send a Test Email
To verify that our Email works appropriately, let us send a sample message to another Gmail address.
Compose a message within RoundCube and send it.
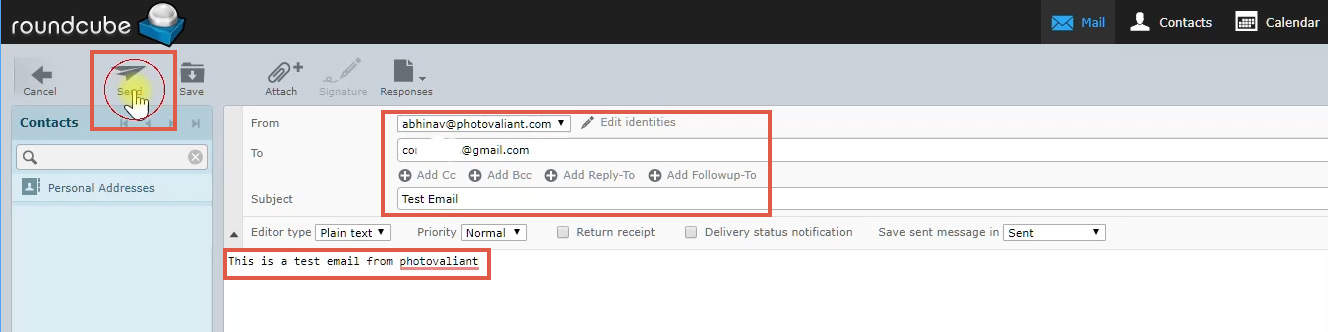
Then log in to the corresponding Gmail and check if the mail has arrived in the inbox.
If yes, then our custom email address is working as expected.

Additional Steps:
Set up a Mail Client
Logging in to the webmail frequently to check your inbox is painful, and it wastes time. So, we can set up an email client to automatically fetch new messages as they arrive.
It can be a mail app on your mobile or a desktop-based software like Outlook or Thunderbird.
For example, you can integrate any POP3/IMAP accounts with your Gmail mobile app by providing the username and password. After that, you will automatically receive email notifications, so that you don’t have to check the inbox manually.
If the username & password authentication fails, you can also try manual set up if your mail client supports it. For that, you have to know the details of your mail servers (incoming and outgoing), and the port numbers.
Ask your hosting provider if you don’t know these details.
Set a display name
By default, the recipients will see your username as the sender’s name. With a display name, you can set it to a custom value, like Abhinav from CoralNodes. It helps the receiver to identify your emails better.
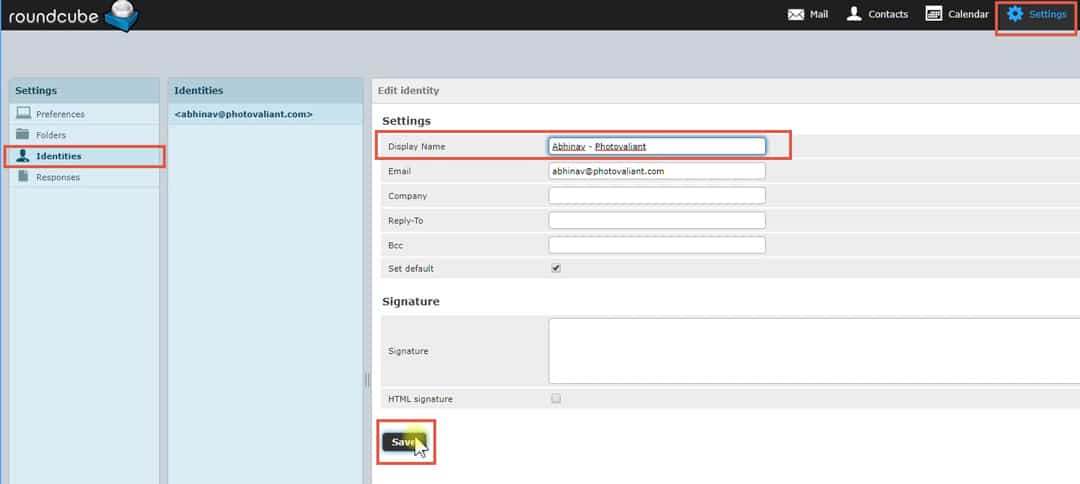
you've to set display name with each email client you use
Disadvantages
Although cPanel email is the easiest way to go, it has a few downsides too.
Most importantly, keeping both your website and emails on the same server is not a great idea. If one goes down, the other goes down too. Imagine a client trying to send you an email while your web host is down. He/she is going to have a hard time contacting you.
Secondly, cPanel emails are not that fast in my experience. It is common to experience delays.
The solution to both these problems is to use a dedicated email hosting provider like G Suite. Another one is GoDaddy’s Business Email, which I have been using for a while. To be honest, although it is fast, their support is a hit or miss.
Conclusion
So, in this post, we have looked mainly at three points:
- Why use a custom email
- How to set up Email with cPanel
- What are its disadvantages, and how to solve them
I hope that this tutorial has helped you if you are trying cPanel Emails for the first time. Otherwise, what is your experience with it? And, which cPanel email hosting provider do you prefer?