This article may contain affiliate links. If you buy some products using those links, I may receive monetary benefits. See affiliate disclosure here
Last day, while watching a video on YouTube, I noticed someone saying:
If a picture is worth a thousand words, then a movie is worth ten thousand (maybe more) pictures.
That can't be more true, especially in the context of blogging, or content creation in general.
When I write about a topic on this blog, I usually try to explain everything in words. While that is still important, you can see that I add lots of screenshot images between paragraphs to make things clearer.
But videos were something that I overlooked until recently. And I realized I should have started doing it earlier. Especially when it comes to step-by-step instructional posts, a video can be much more efficient and useful.
So in this post, I will share the different methods I have tried for embedding videos in my WordPress blogs. This includes YouTube as well. But that's not the only way.
Let's begin.
Embedding YouTube Videos in WordPress
WordPress already comes with oEmbed support for various platforms. This includes YouTube as well.
So, you can just copy any YouTube video URL and paste it into the block editor. WordPress will automatically convert it and loads the YouTube player on the web page.
Why not watch it in a video itself?
It's that simple.
As you have seen, WordPress automatically detected that it's a YouTube video link and inserted the YouTube Block into the editor. Alternatively, you can also directly select the YT block and paste the URL.
Not just single videos, you can also insert playlists also with the same method.
However, embedding YouTube videos like this can pose a few issues:
- Performance
- Privacy
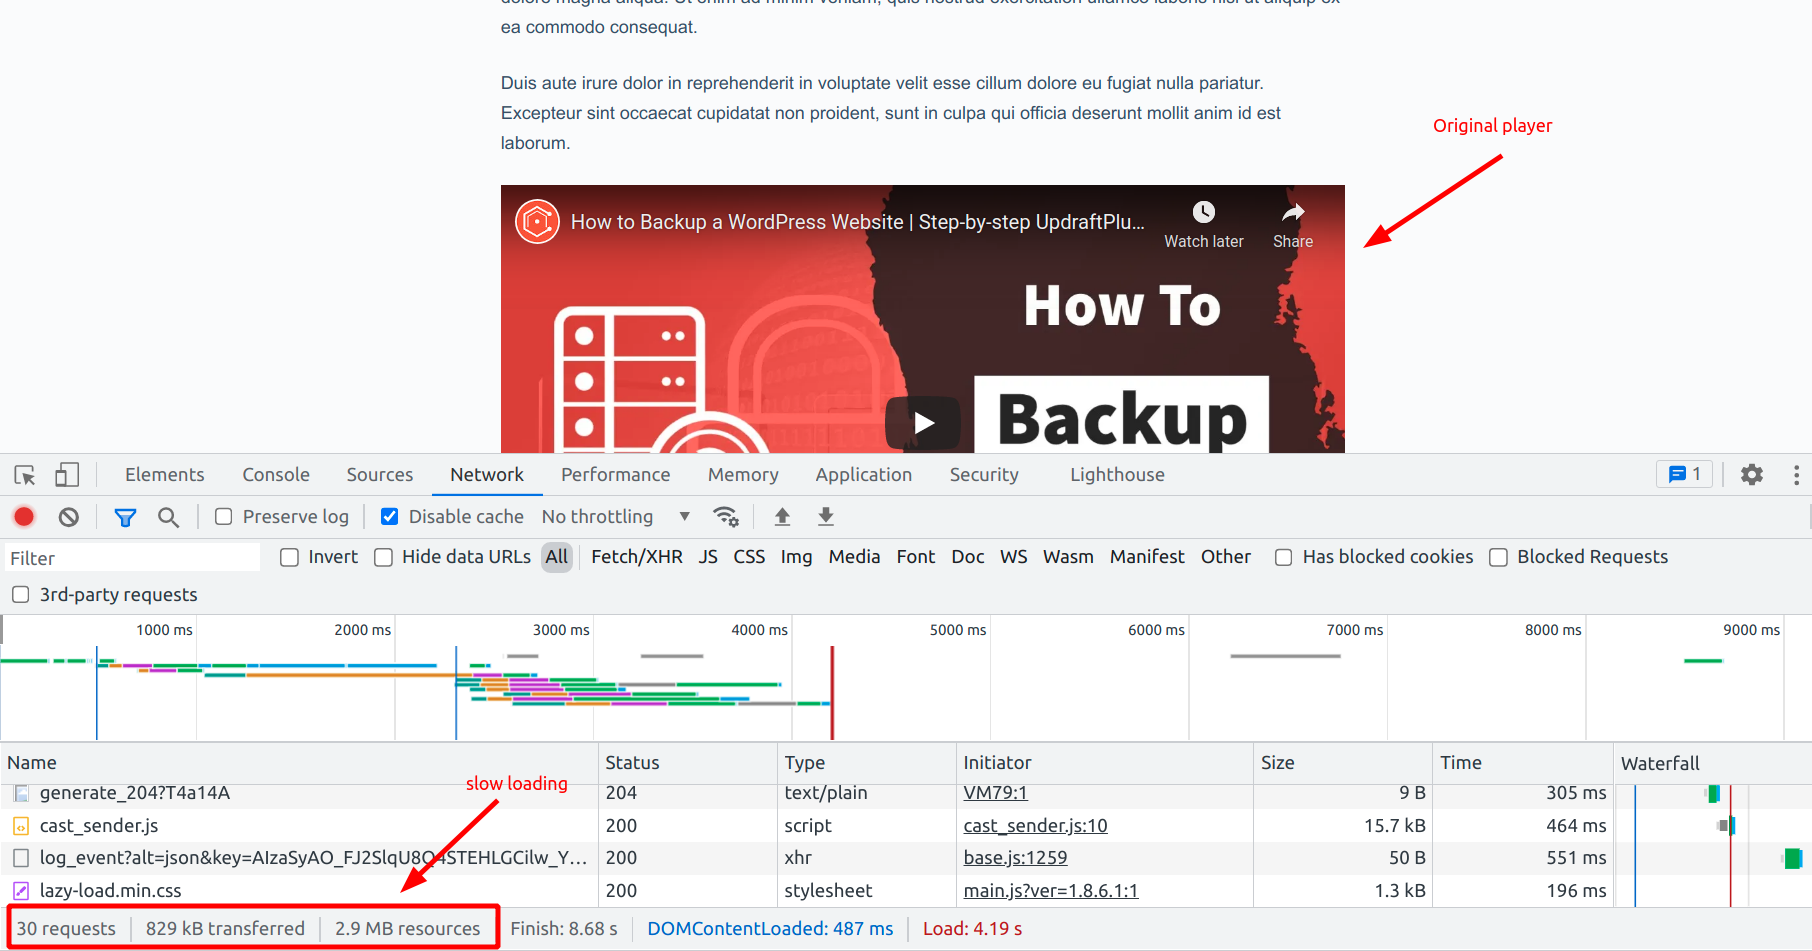
Embedded YouTube videos make several requests to the YouTube server, which can slow down the page loading.
Another concern is privacy. YouTube places tracking cookies on the user's device if your page has a directly embedded video. This can be a privacy issue in some countries. You might require to ask for cookie consent before loading the embedded video.
So, how to do it properly?
Load only the video thumbnail with a custom play button. Then load the actual video only when the user has explicitly clicked the play button. Not only the initial page load becomes faster (by deferring the call to YT), but you also solve the privacy concern.
Luckily, there are plugins to do that as well.
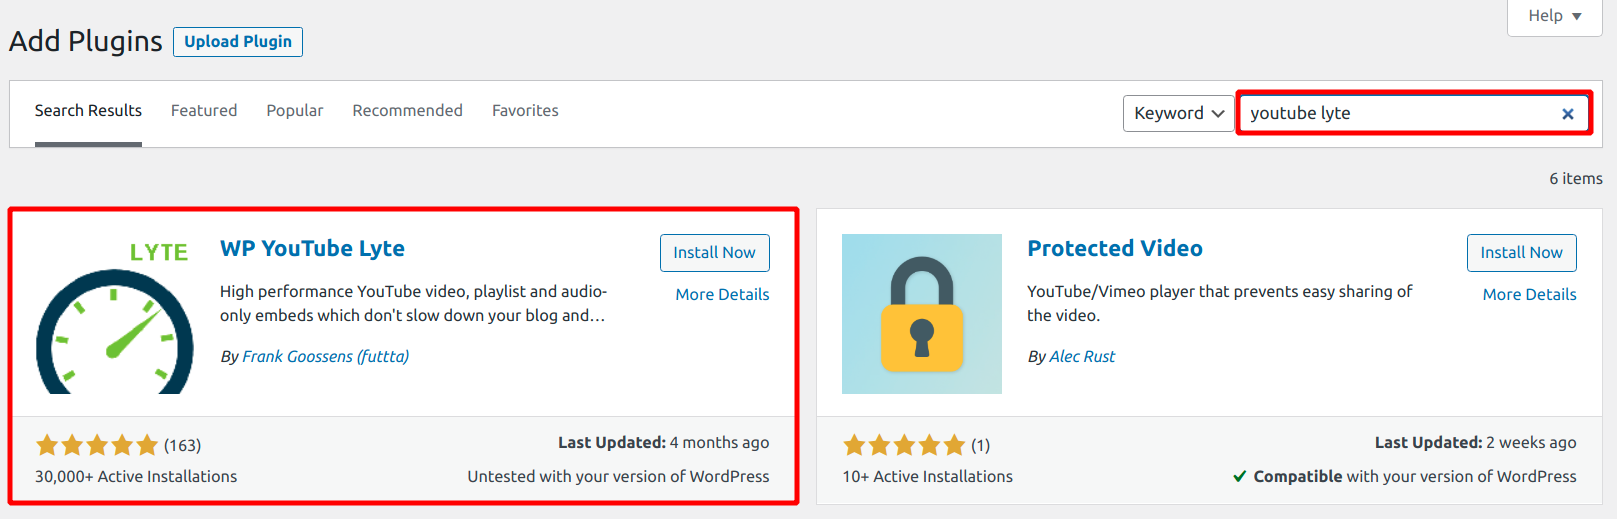
WP YouTube Lyte is one such plugin that can parse all normal YouTube embeds in your site and convert them into faster, privacy-focused embeds.
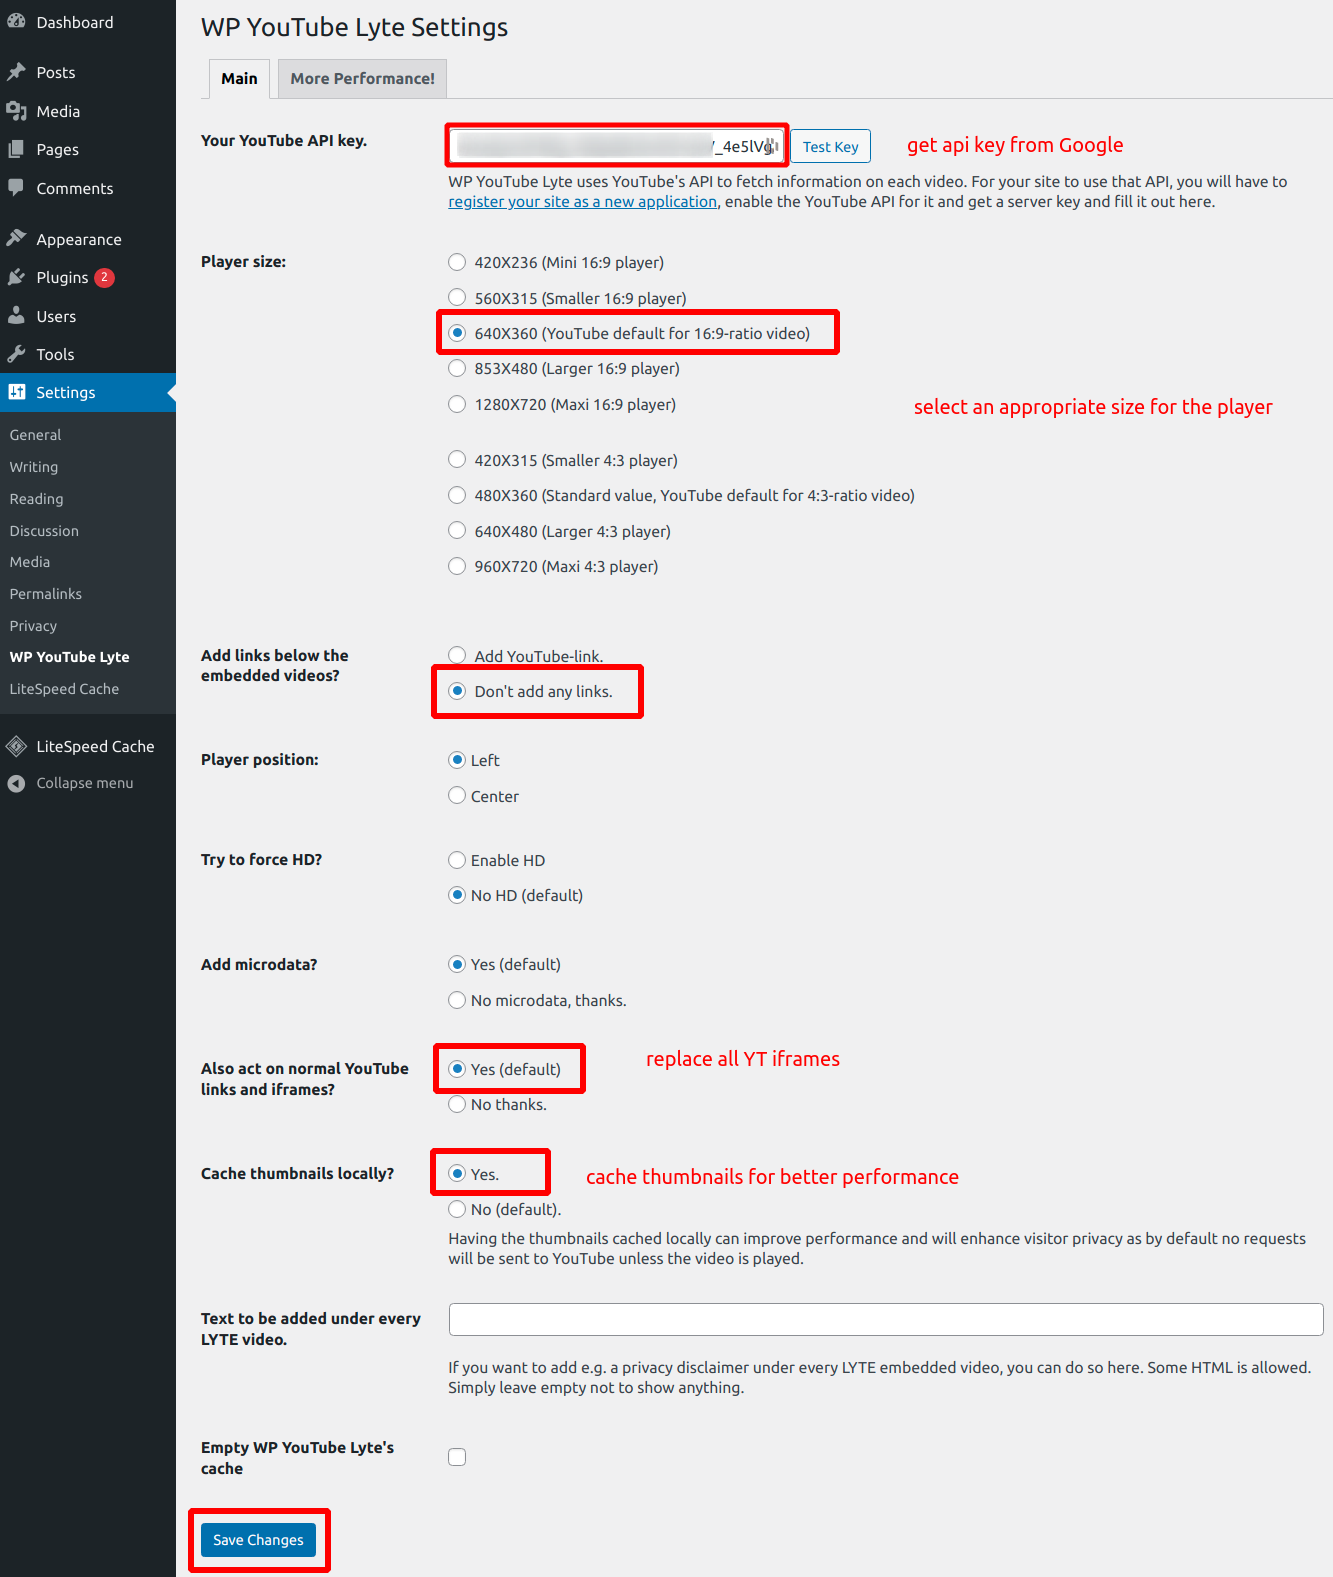
Before going to the plugin's settings page, create a YouTube API key for your website.
Then enter the API key along with other settings.
Before activating the plugin:
After activating WP YouTube Lyte:
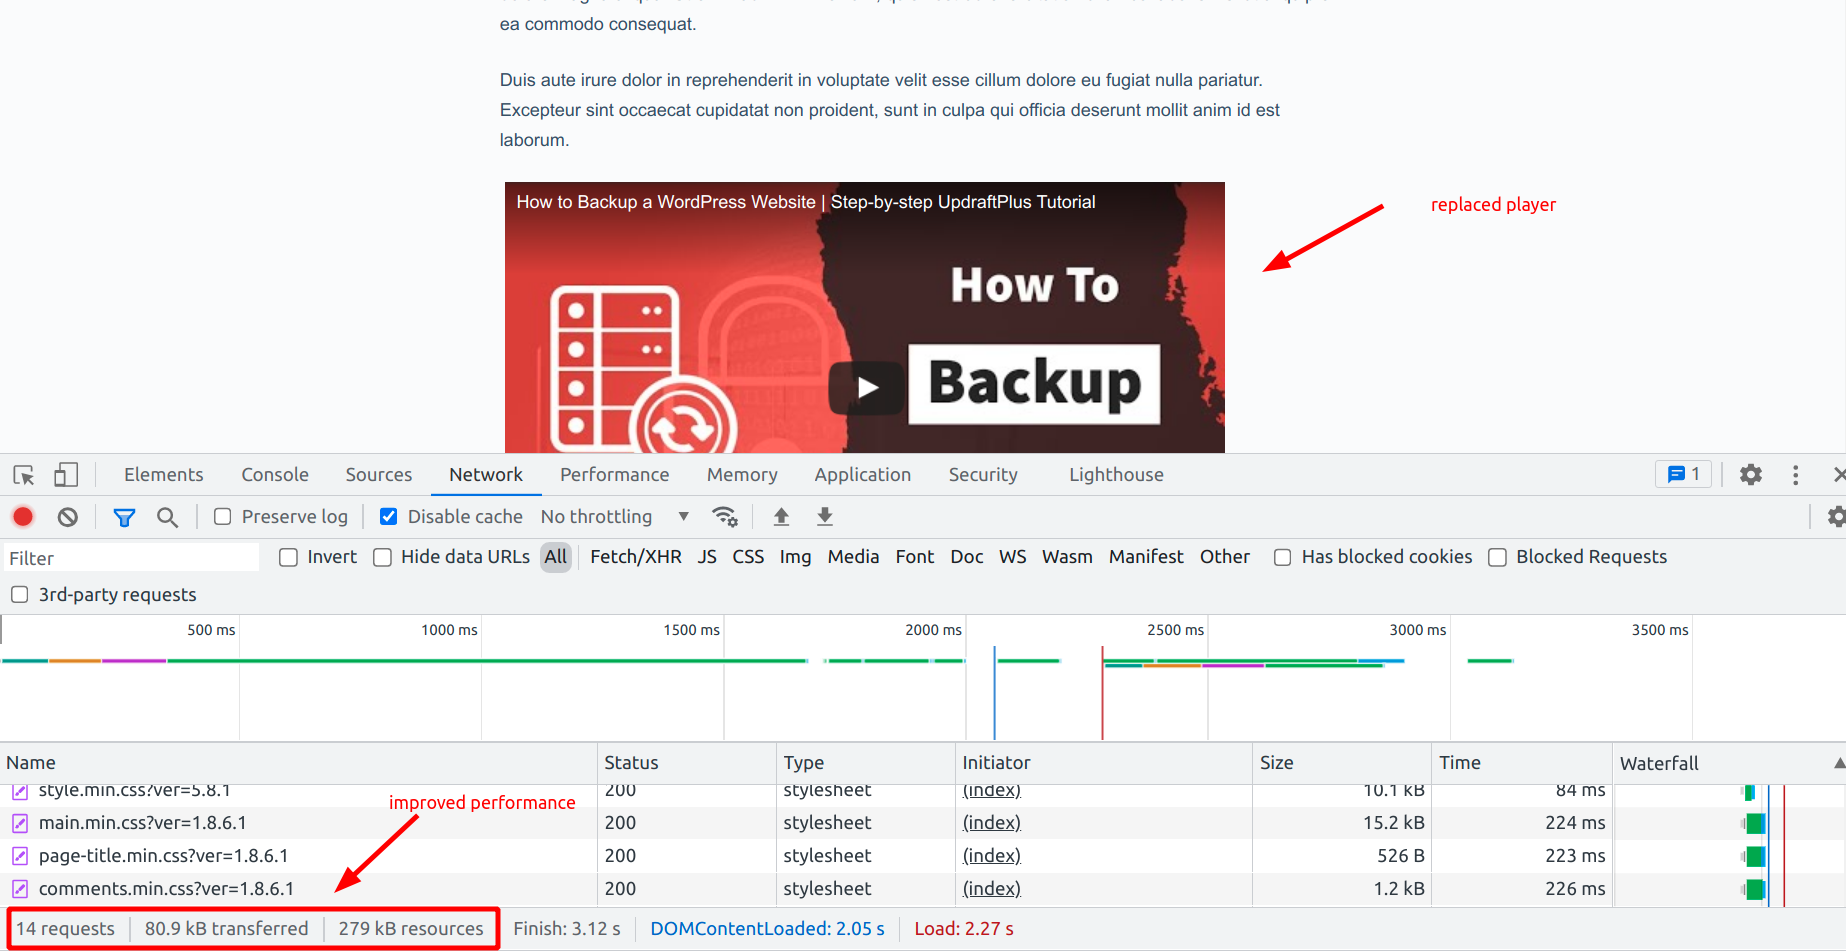
After activating WP YouTube Lyte, the no. of requests came down to 14 from 30, while page size reduced to 279KB from 829KB (almost 1/3rd).
Embedding YouTube Playlists as Galleries
Now, what if you want to display playlists as galleries?
The above method works for playlists as well, but it works inside the player only. It won't show thumbnails as a gallery.
For that, you can use a plugin called YouTube Embed Plus. It can connect your WordPress site with the YouTube API to get information about videos, then display them as galleries. It works in the Block editor as well as the Classic Editor.
Like the WP YouTube Lyte plugin, Embedplus also requires an API key to work fully. After installing the plugin from the Add Plugins page, follow as in the video below:
And here is how it looked after the setup:
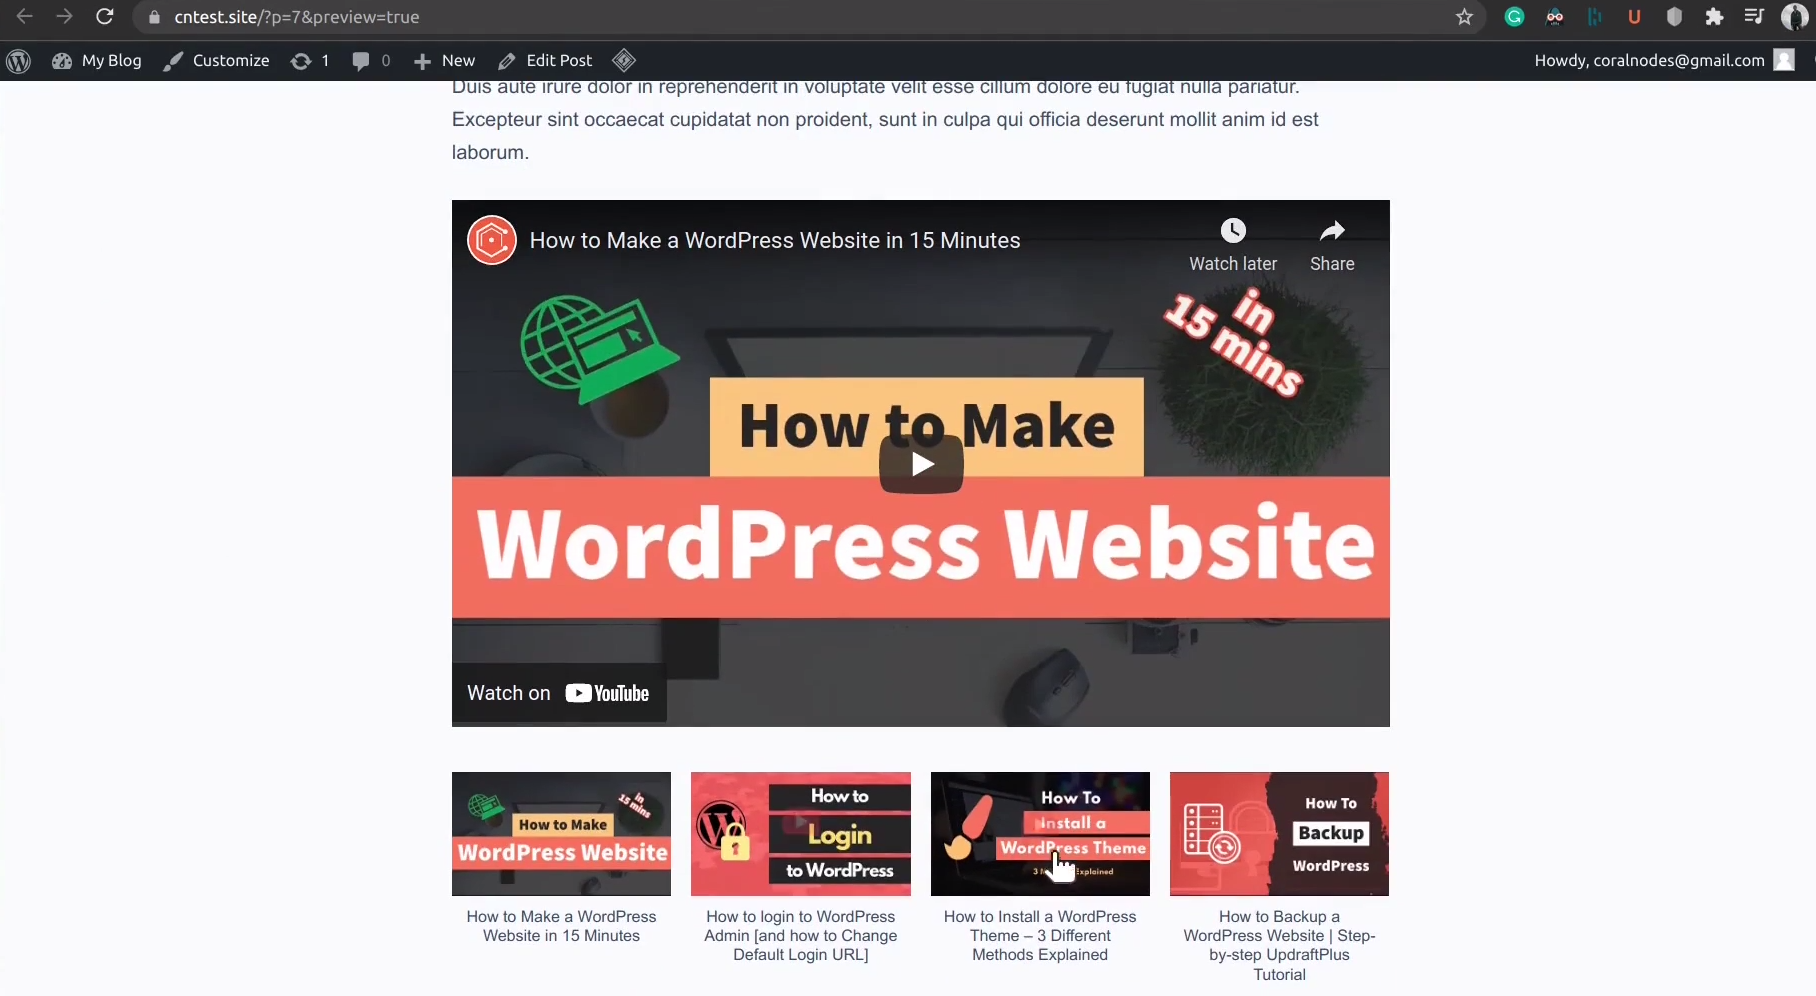
clicking on a thumbnail opens that video in the player above
Similarly, you can even embed your YouTube channel feed as well.
However, remember that YouTube API has quotas and limits. If your usage is very high, you can easily cross those limits. So, always have caching enabled. The paid version of Embedplus comes with performance enhancements, including caching.
With that, let's move on to the next method.
Embed using WordPress Video Block
The WordPress editor has a built-in video block. If you are not planning to share your videos on YouTube or other platforms, then you can use this built-in embed.
I don't know if you have noticed, I've been using the video block to embed all the videos in this post.
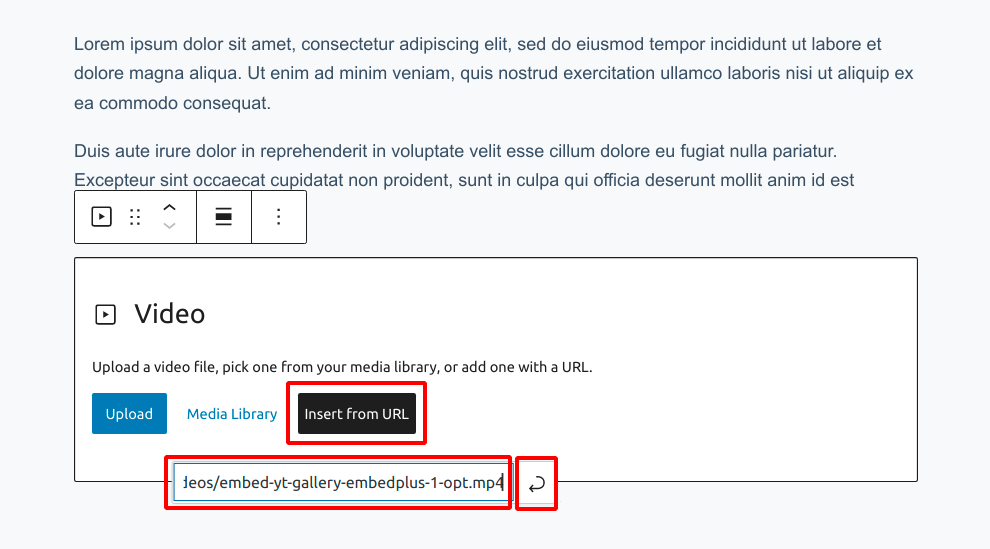
Click the little plus icon, then search for 'video' to select the Video Block. It gives two choices:
- Upload a video to WordPress Media Library & insert
- Insert from a URL
I don't recommend the first option - upload to WordPress - since video files are usually very large. You can easily cross the storage limits of your web hosting.
Then where to host video files?
Here's what I do:
- Upload videos to a CDN provider (currently using Bunny.net)
- Get the public URL of the video file
- Select the 'Insert from URL' option, then paste the URL
Uploading to a CDN storage has an added advantage. Most CDN allows replicating files to multiple edge locations around the world. So your users experience much faster download times.
Custom HTML (Iframe) Embeds
The last option is to use the Custom HTML block to insert an iframe. This method can work for any platform that provides an Iframe API, including YouTube.
I'll show how to embed the same YouTube video above, using Custom HTML instead of oEmbed.
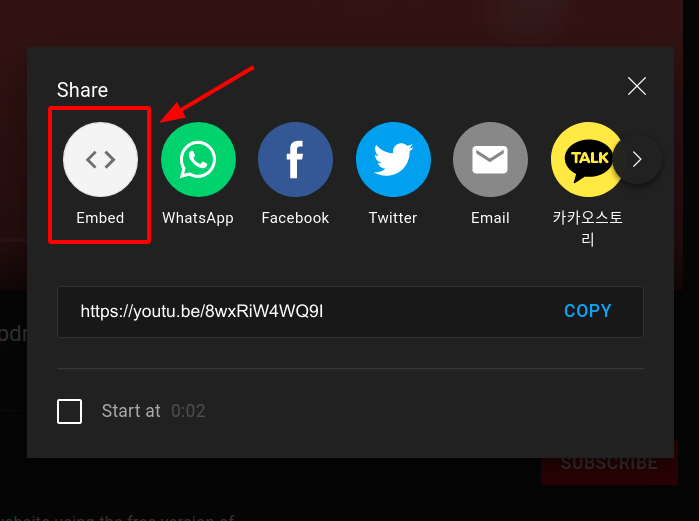
Open the video you want to embed, then click the Share button:

In the popup, click the 'Embed' option.
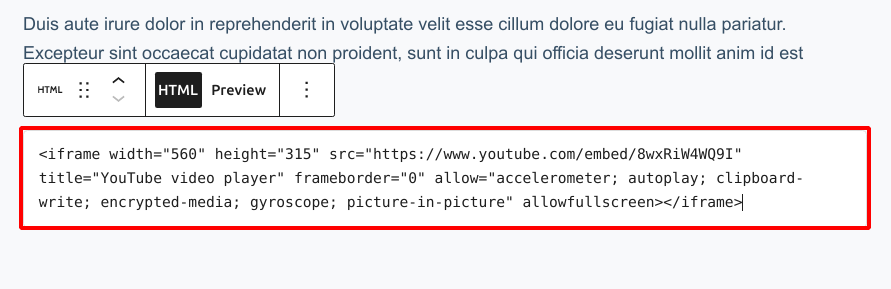
Copy the Iframe HTML code to the clipboard.
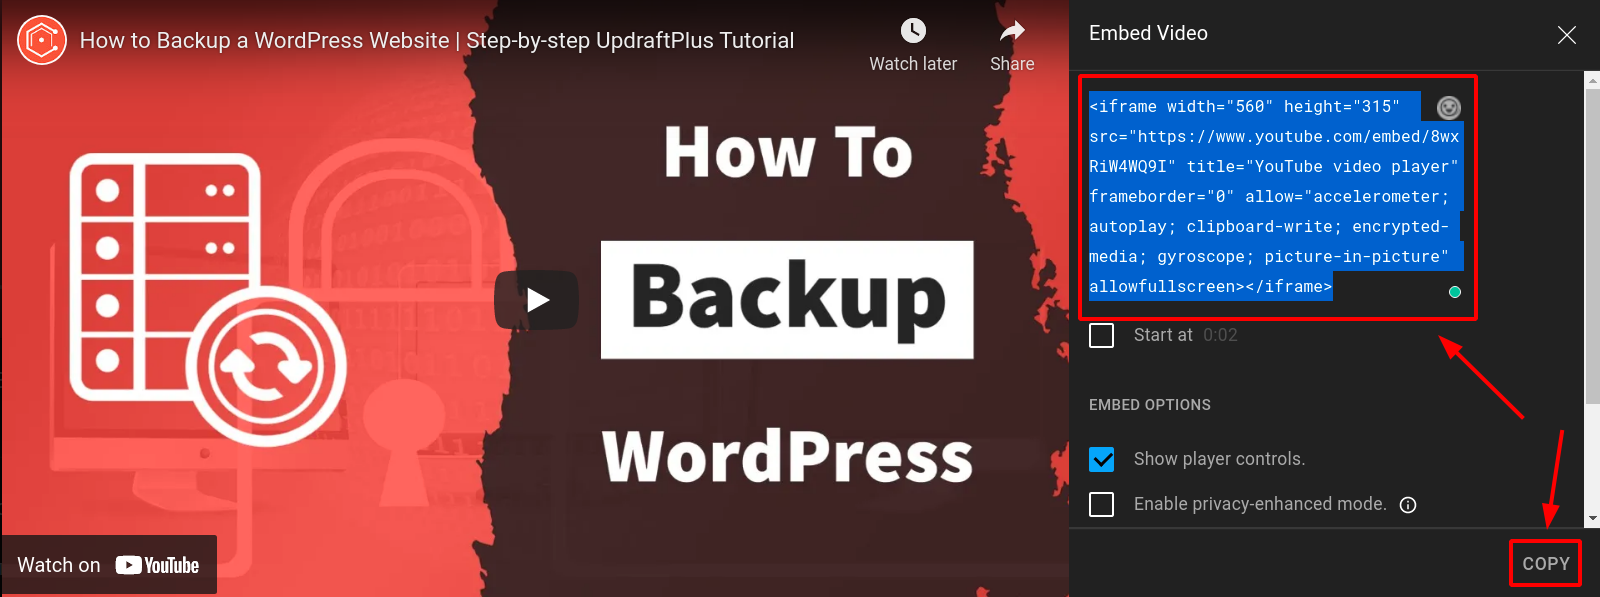
Insert a Custom HTML block in the WordPress editor.
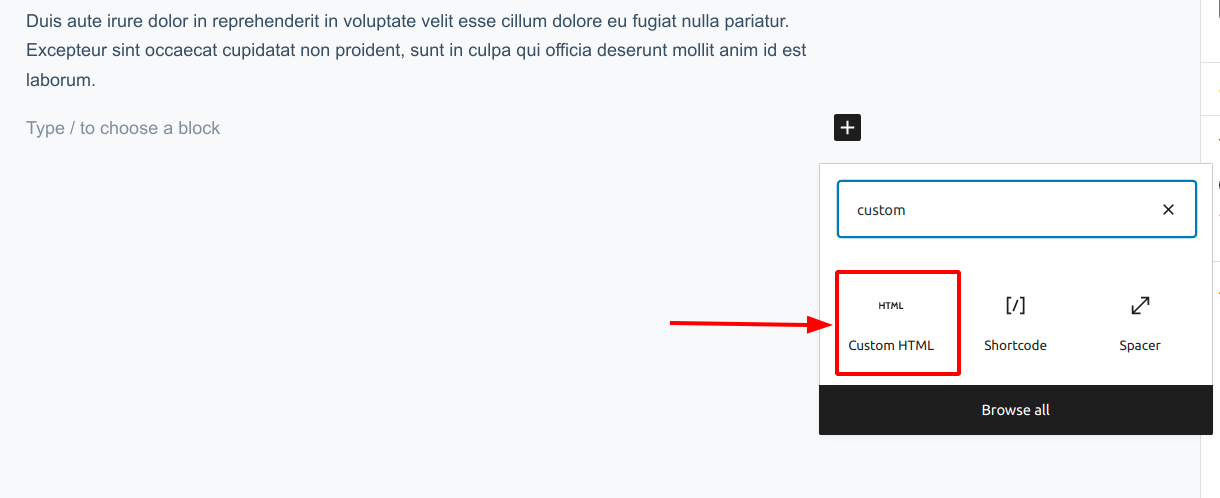
Paste the code in the box.
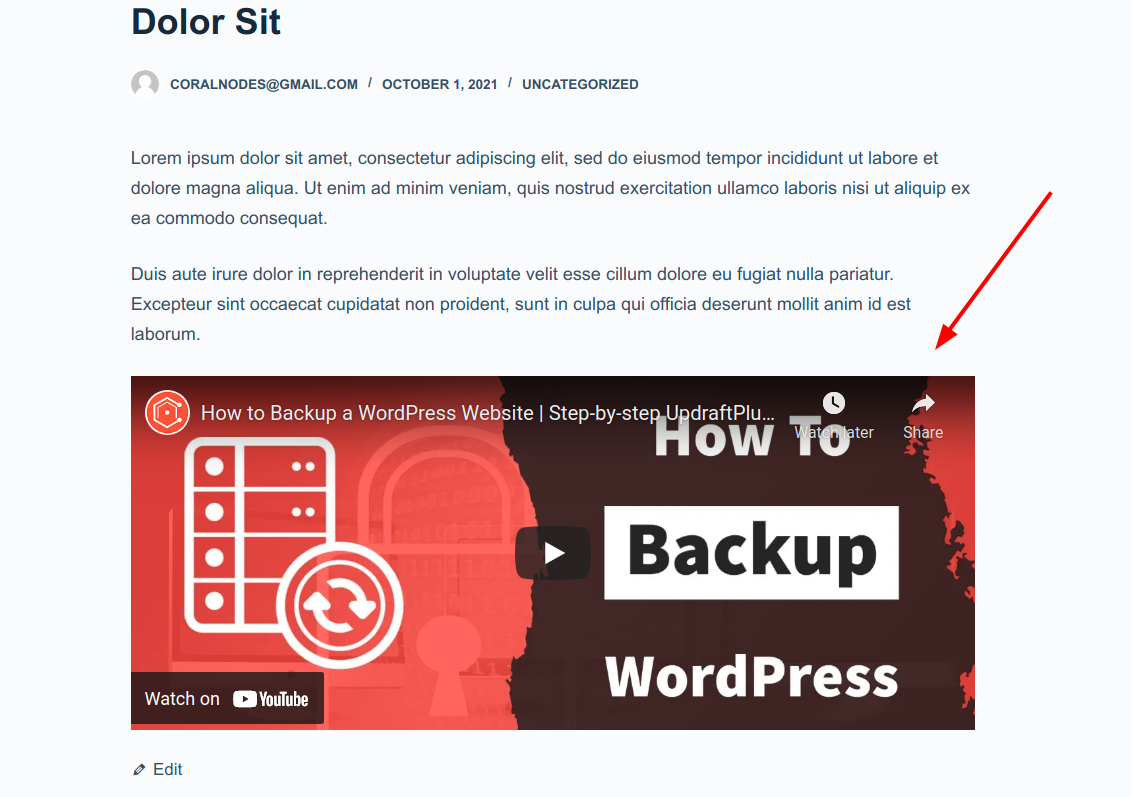
Finally, don't forget to save/update the post. Then preview it, and you should see the embedded YouTube video.
Conclusion
I hope this post helped you in adding videos to your WordPress websites.
