Earlier, I had published a list of the best drag-and-drop WordPress form builder plugins. In that post, I also mentioned that Happyforms is one of my personal favorites.
I found it easier to use than most of the other form plugins, without sacrificing crucial features. There are some other reasons too, which you will find below.
So, in this Happyforms review, we will find out if it is worth considering for your websites. We will look at the pricing, ease of use, advantages, and disadvantages.
Of course, there is always Contact Form 7, if you are looking for a completely free form plugin. But for someone setting up their first WordPress form, CF7's tags can be difficult to wrap their head around.
Happyforms is created by The Theme Foundry, which also sells a couple of WordPress magazine themes, in addition to this plugin.
First, let us see how you can set up the free version of the plugin.
In the beginning, Happyforms used to offer a lot of features in the free version. But starting from version 1.8.11, it looks like they have moved most of the features into the paid version.
Ease of Use
Installing the free version
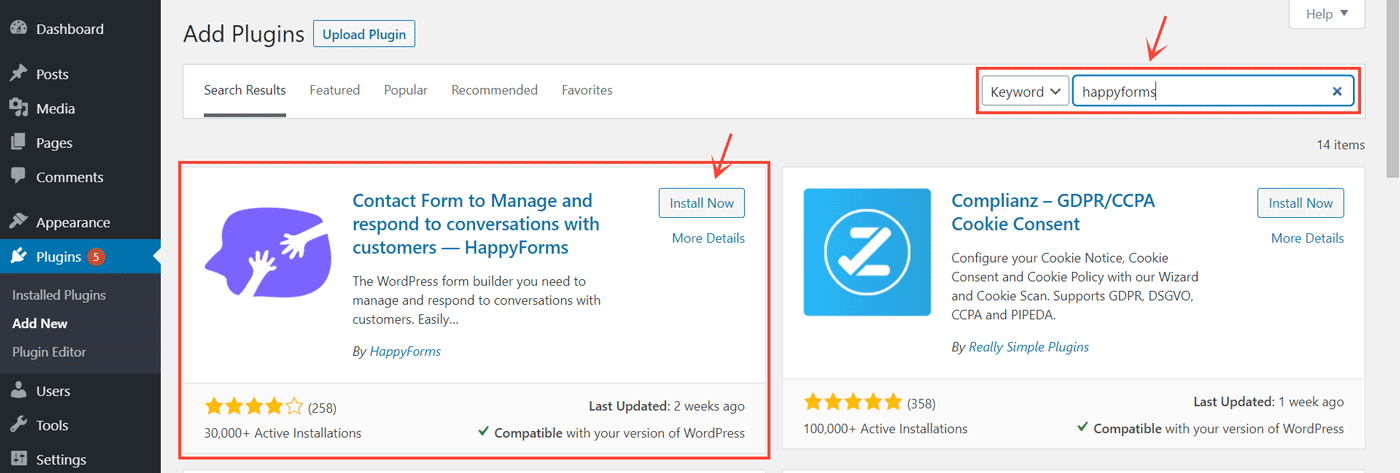
The first step is to install the free Happyforms plugin from the WordPress repository. As of now, the plugin has over 40k active installations and a 4.4/5 rating.
Go to the Add Plugins page in your WordPress admin and search for the keyword - happyforms.
Creating Forms
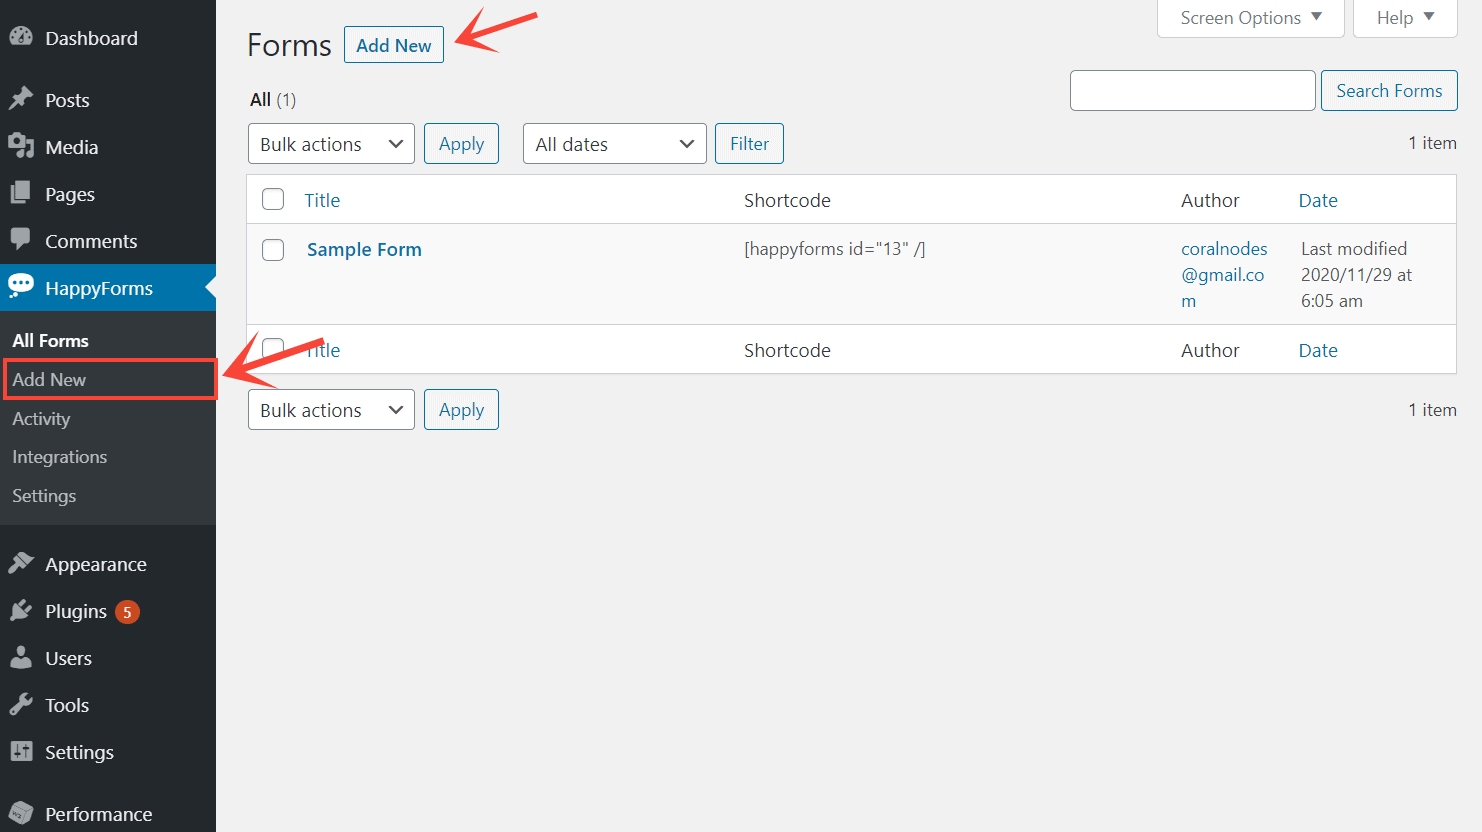
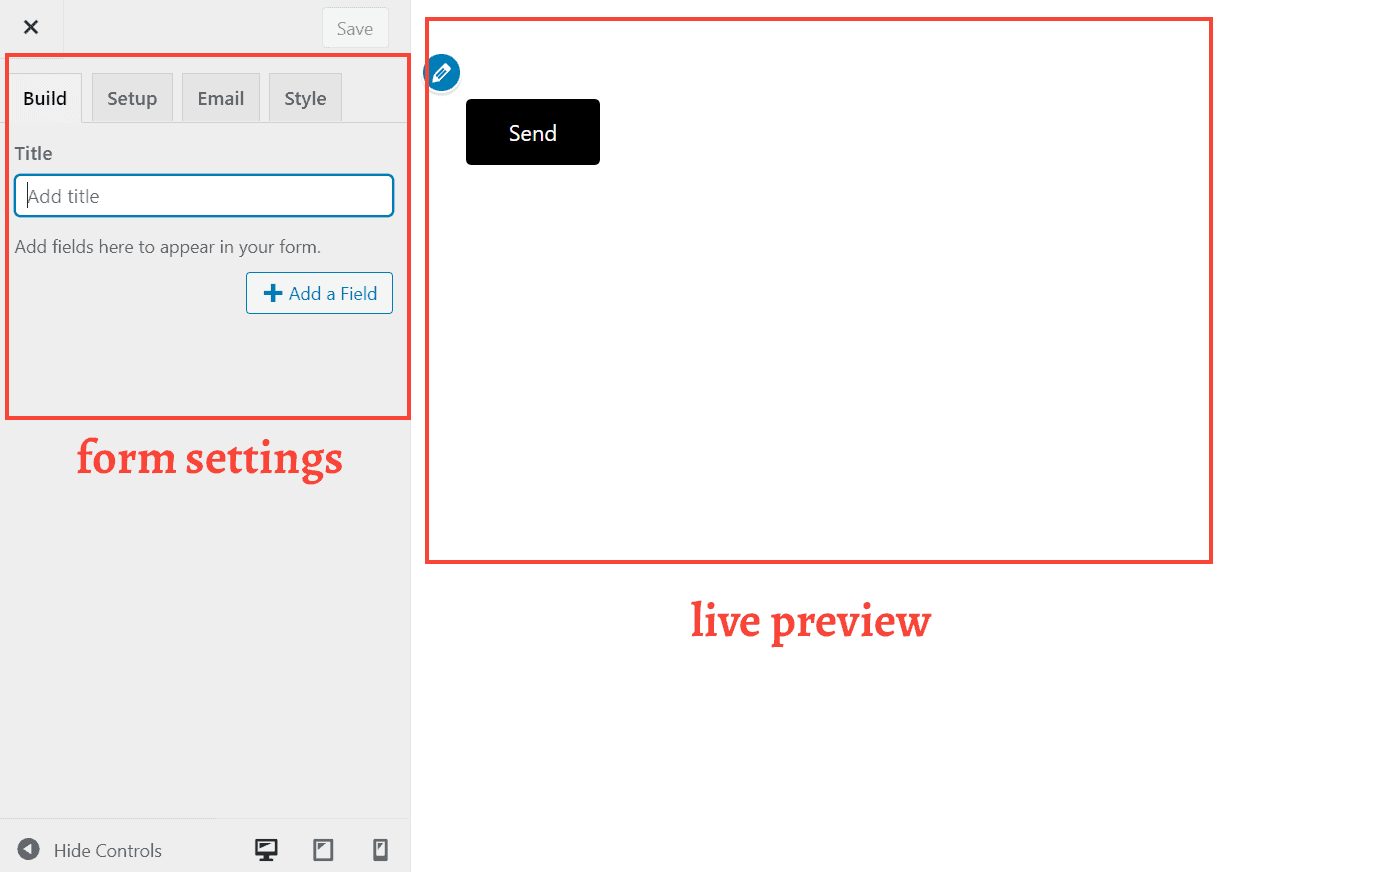
After installing the plugin, you will find a new menu item - Happyforms - on the left side. Since we are now using the free version, we have access only to the All Forms and Add New pages. Clicking on that will open the WordPress customizer, where you can set the various things related to that form.
It's also the main thing I like about Happyforms. It uses the native WordPress customizer for creating forms, instead of a custom interface like on most of the other form plugins. So, if you have any experience customizing themes, you will get instantly familiar with this as well.
The other sections - Activity, Integrations, and Settings need a pro license to unlock. We will discuss those below.
And in the Customizer, the form creation process is split into four steps or tabs:
- Build
- Setup
- Style
Let us check each of them one by one.
Build
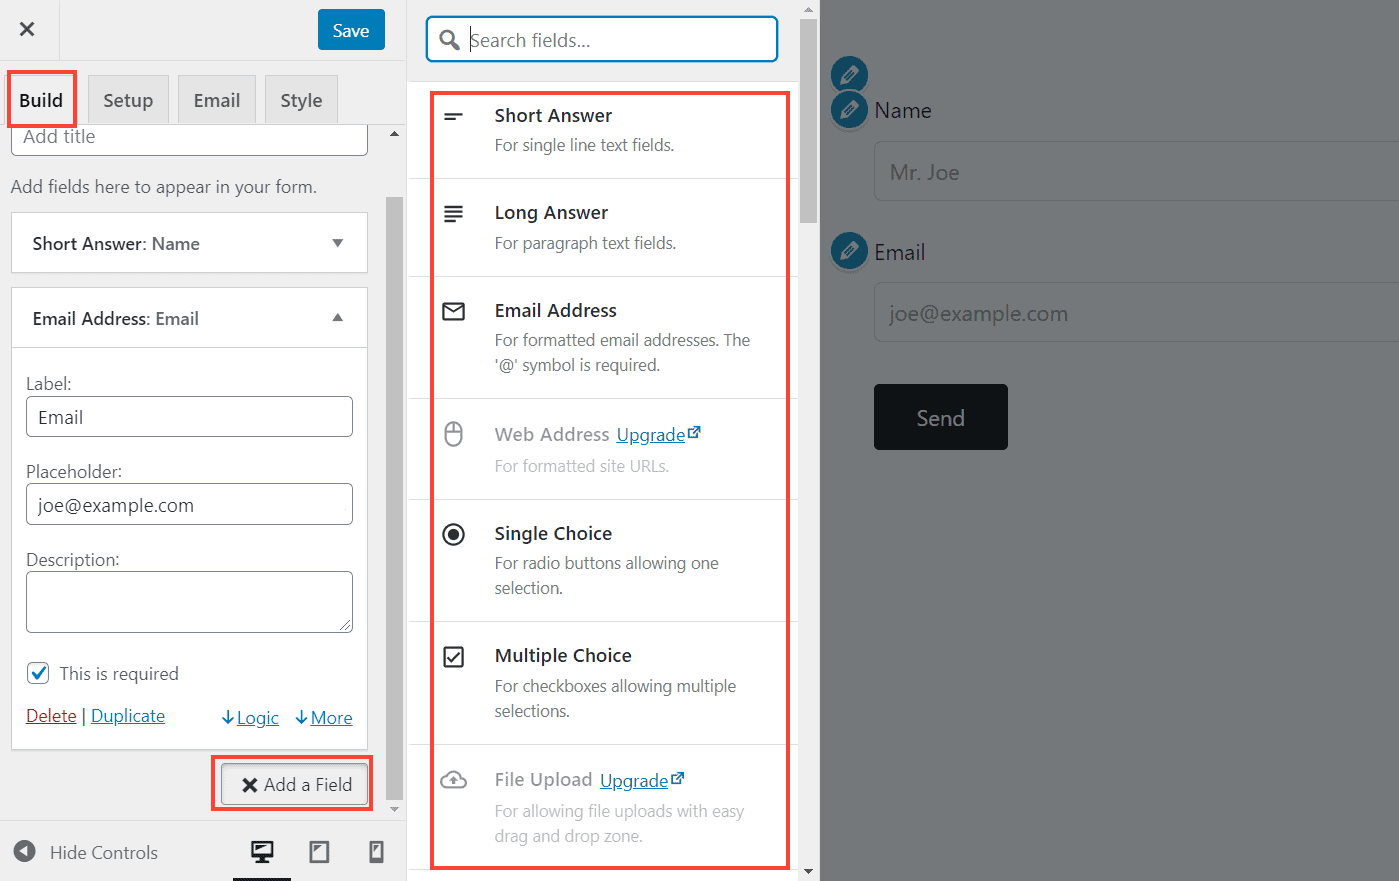
This is the area where you add or remove fields to a form. The free version supports seven different field types:
-
Short answer
-
Long answer
-
Email
-
Radio buttons
-
Checkboxes
-
Dropdown select
-
Number field
You cannot directly drag or drop the fields on the right. Instead, you can drag the widgets on the left pane to rearrange them. The advantage is, you can live preview the form on the right side, without the need to open a new window or refresh the page.
Setup
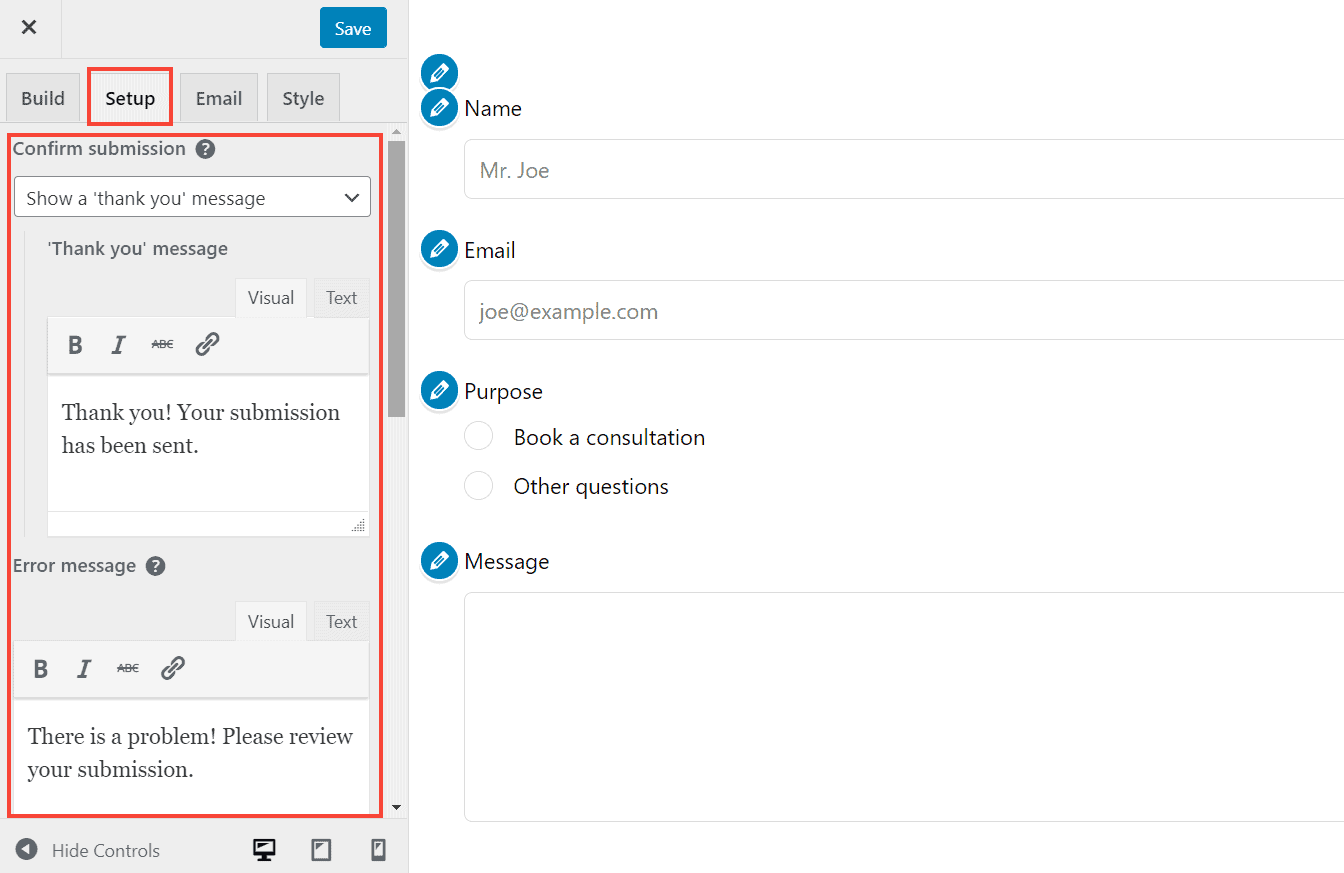
In the Setup tab, you can configure several things such as success and error messages returned to the user when a form is submitted. Also, the submission action is ajax-powered so that the page won't refresh when someone clicks the submit button.
Apart from that, the free version doesn't include much, you can customize the Submit button text, though. The Pro version supports a lot more features, which are grayed out in the free plugin.
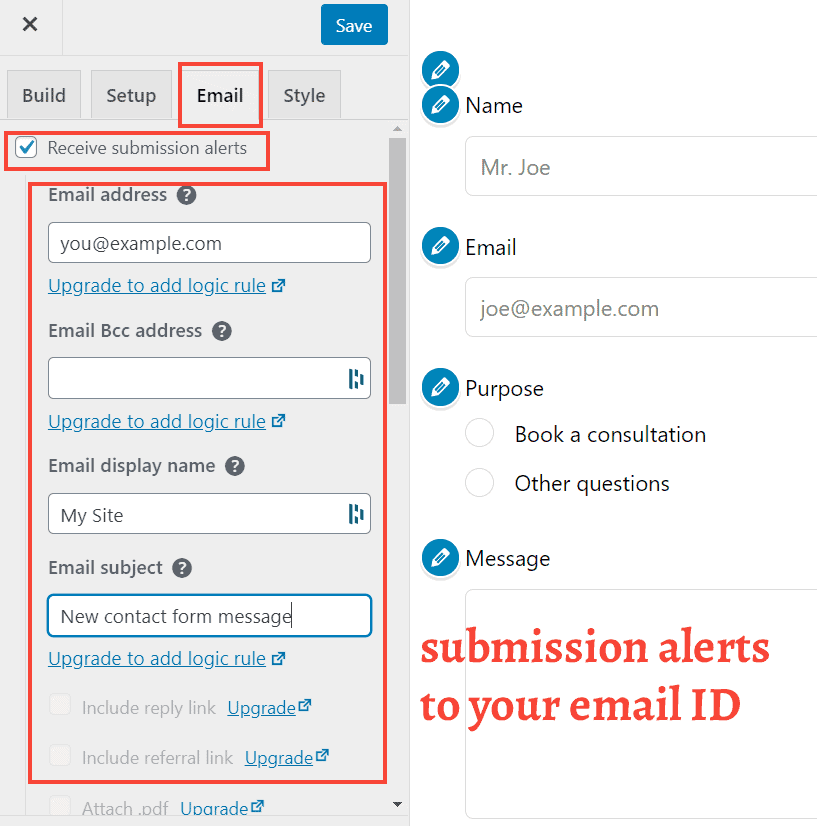
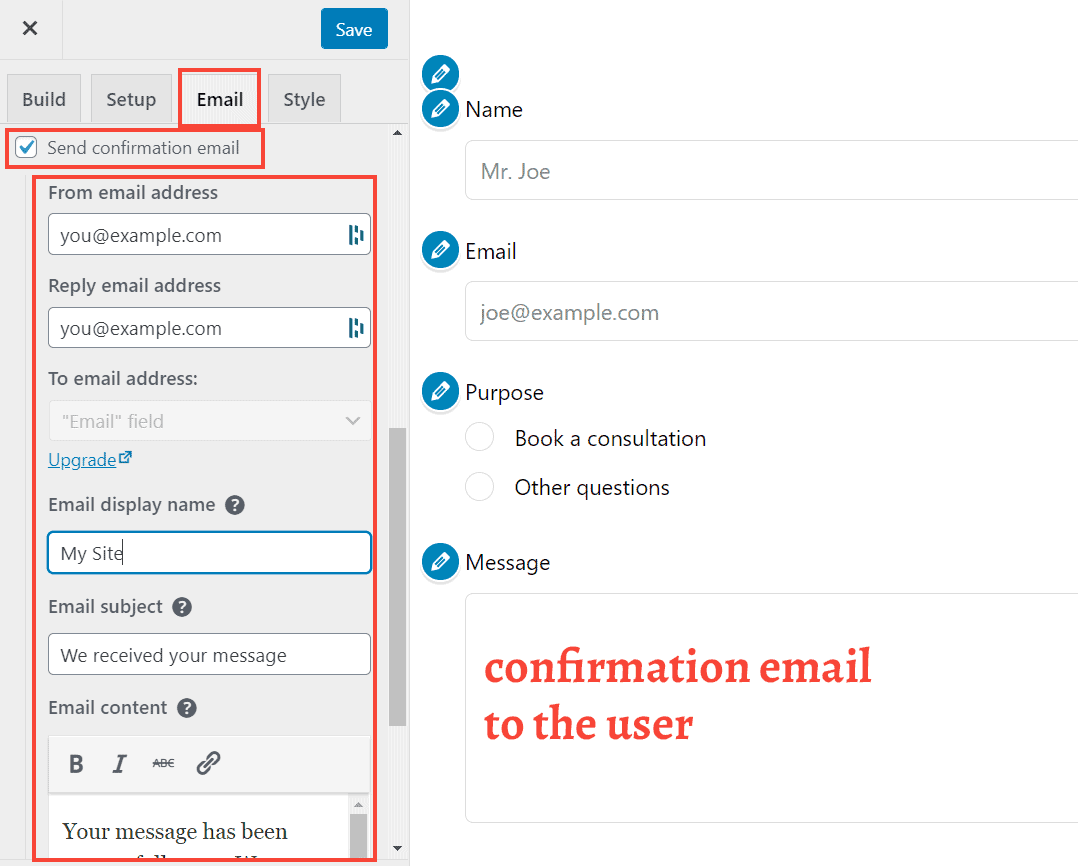
Under the Email tab, you can configure primarily two things:
- how you want to receive form submission alerts, including the email ID, subject, and name
- select whether to send a confirmation email to the user and the name, subject, and content for that email.
However, simply entering a destination email may not ensure deliverability. It will be better if you configure WordPress to use an SMTP email address as the sender. If possible, use a custom domain name-based address.
The paid version supports more things like attaching a PDF and including a referral link.
Style
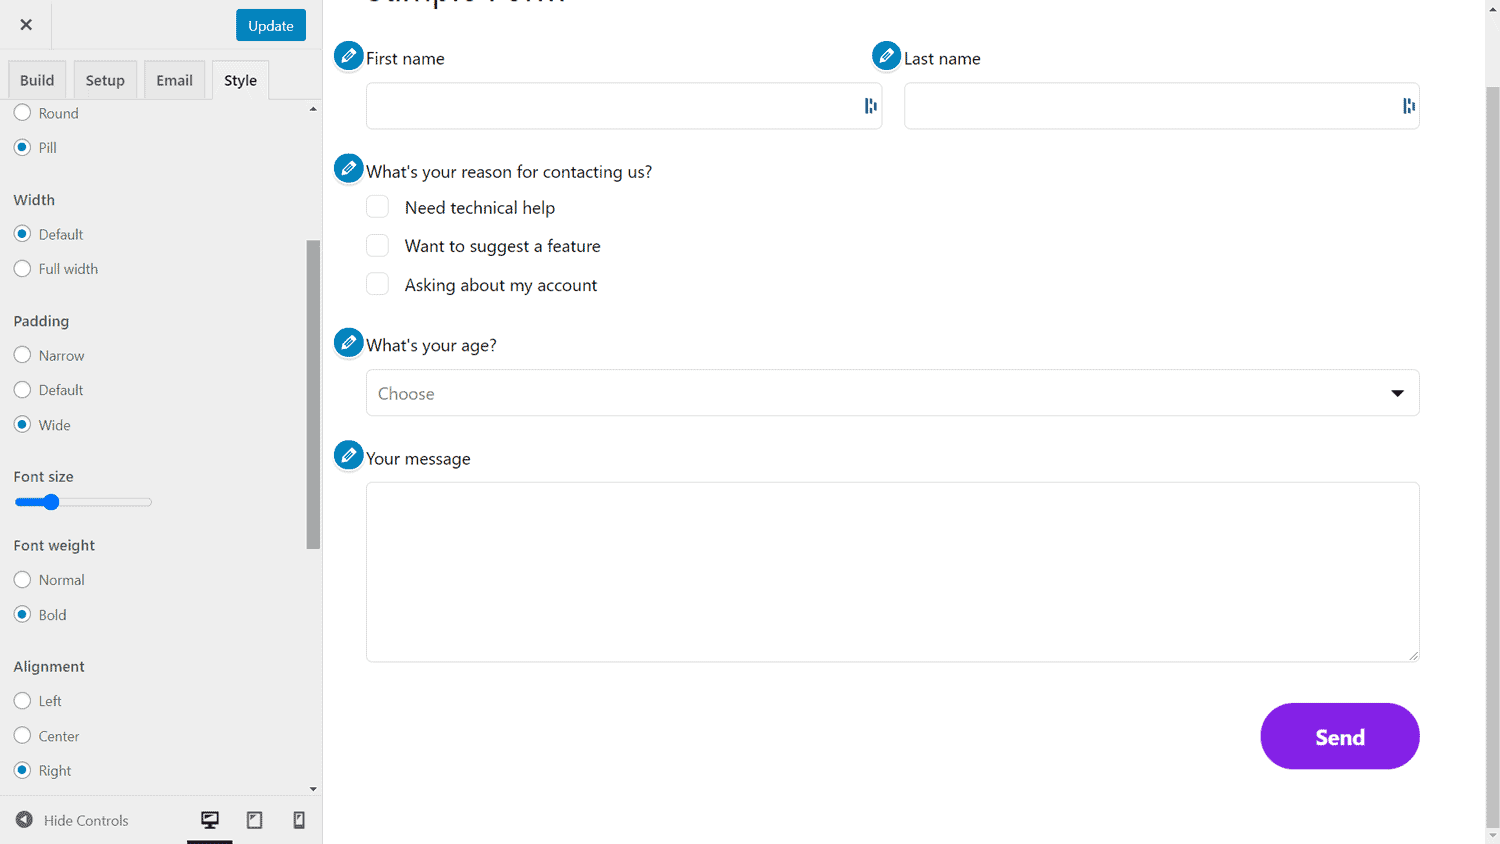
Here you get all the essential things you need to customize the look and feel of a form, including colors, fonts, alignment, label positioning, borders, etc.
For example, in the below form, I have set the submit button to:
- Border radius: pill
- Alignment: right
- Background color: violet (hexadecimal value)
- Padding: wide
- Font weight: bold
The Pro version supports an option to use the theme styles so that you don't need to do the customization separately here. Other than that, most of the styling features are the same in both versions.
Adding forms to Posts/Pages
As we have seen how to create a form, the next thing is to add it to a post or page. For that, there are two ways:
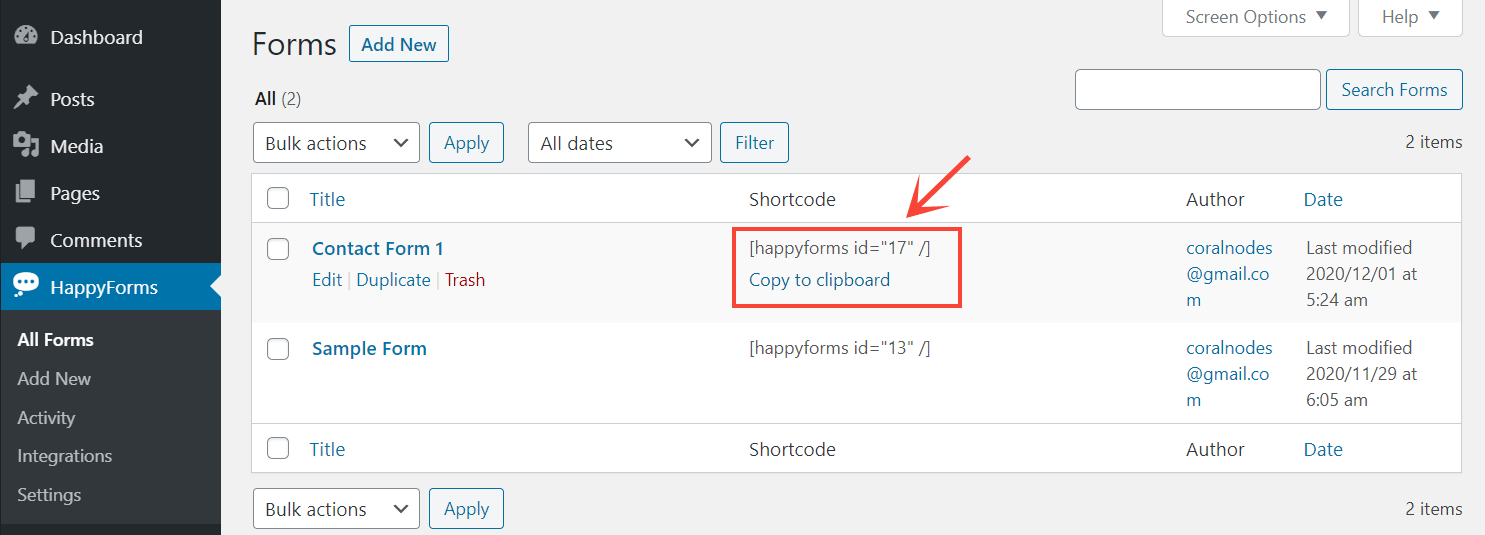
- copy the shortcode and paste it to editor (if using the block editor, use the shortcode block), or
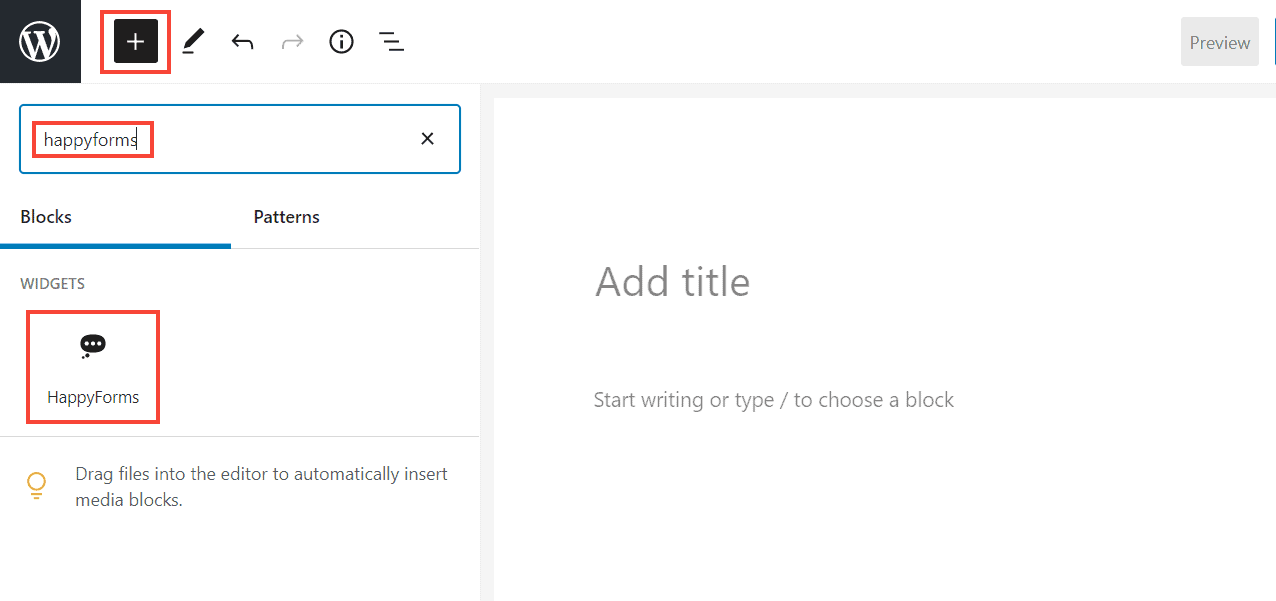
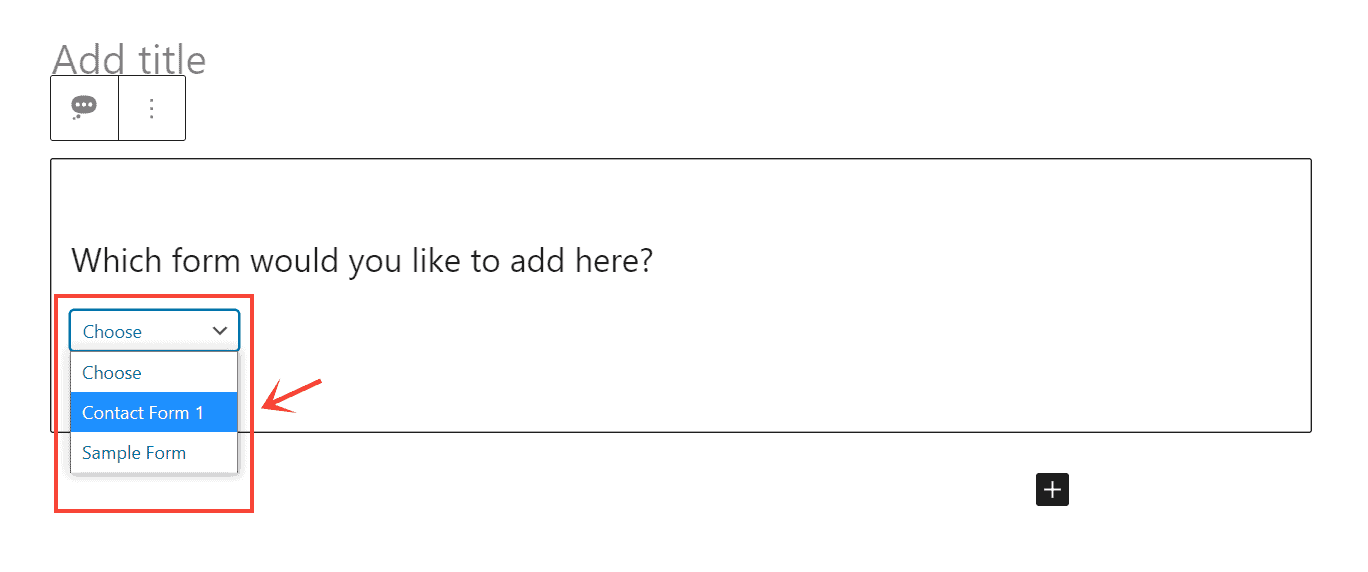
- use the Happyforms Gutenberg block and select the form you want to insert.
method 1 - use shortcode
method 2 - use Happyforms block to insert a form
When to Buy the Pro Version
As you might have guessed, although the free plugin is easy to use, it's quite limited. Other than creating basic contact forms, it doesn't have much to offer. If you are looking to create something complex with it, you will need to get the premium version.
So, let's see what it has on offer.
Important Features in Happyforms Premium
20+ Types of Fields
I had mentioned above that the free plugin supports only seven field types. Whereas the premium version supports nearly twenty-five. These are the additional ones:
-
Web address
-
File upload
-
Radio/checkboxes in a matrix
-
Polls
-
Phone number
-
Date-time
-
Address
-
Slider scale
-
Rank order
-
Likert scale
-
Text editor
-
Consent before submission
-
Star rating
-
Fill in the blanks between paragraphs
-
Email optin
-
Payment
In addition to these additional fields, you can also create multi-page forms and use conditional logic.
Google ReCaptcha for Spam Prevention
An important thing that is lacking in the free version is spam prevention. Without that, there is no way to filter out bot comments and other spammy messages reaching your inbox.
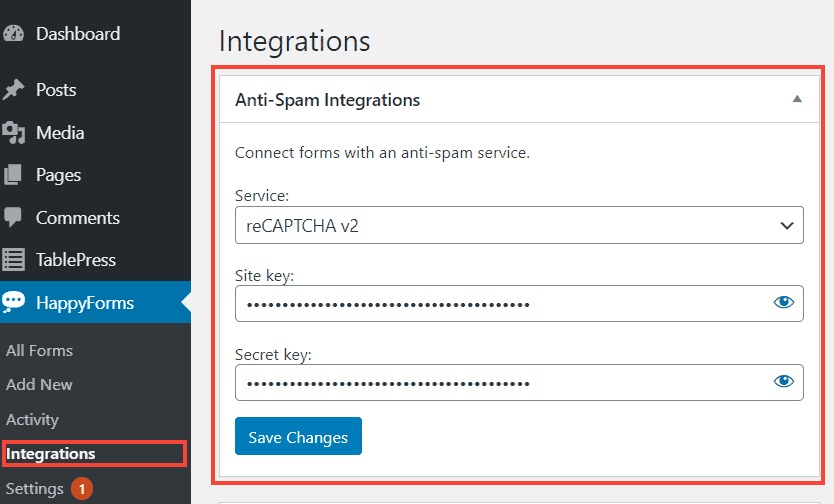
To solve this problem, the premium version supports Google ReCaptcha integration, either v2 or v3. Register your domain on ReCaptcha's website, then enter the site key and secret key back in the plugin's Integrations page.
Other Notable Integrations
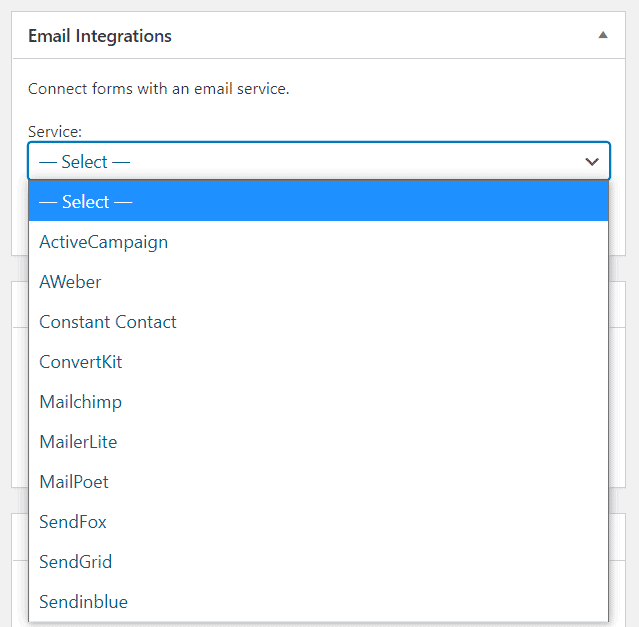
Apart from the ReCaptcha integration, Happyforms also allows connecting popular email, payment, automation, and analytics services.
- Email: MailChimp, Mailpoet, Aweber, and many more...
- Payment gateways: PayPal and Stripe
- Automation: Zapier
- Analytics: Google Analytics
You can find all these things on the Integrations page.
Save Submissions to Database
In case a submission does not make its way to your inbox, you can always view it from Happyform's Activities page. The premium version supports saving submissions to the database.
Save Abandoned Forms
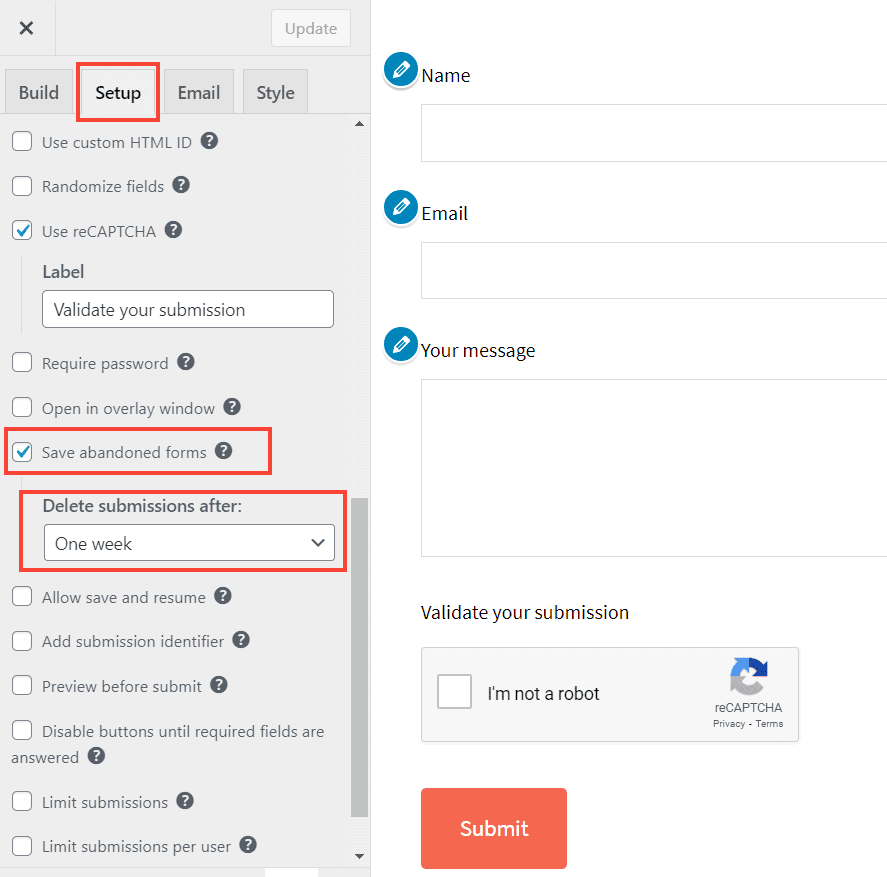
Another cool feature is the ability to save incomplete submissions to the database. That means even if a user abandons a form before hitting the send button, the partial data will be saved to the database, which you can view from the Activities page.
Import & Export Data
In some cases, you might want to export your form data to somewhere else like a Spreadsheet for further inspection. For that purpose, Happyforms allows exporting your form data as a CSV or XML file.
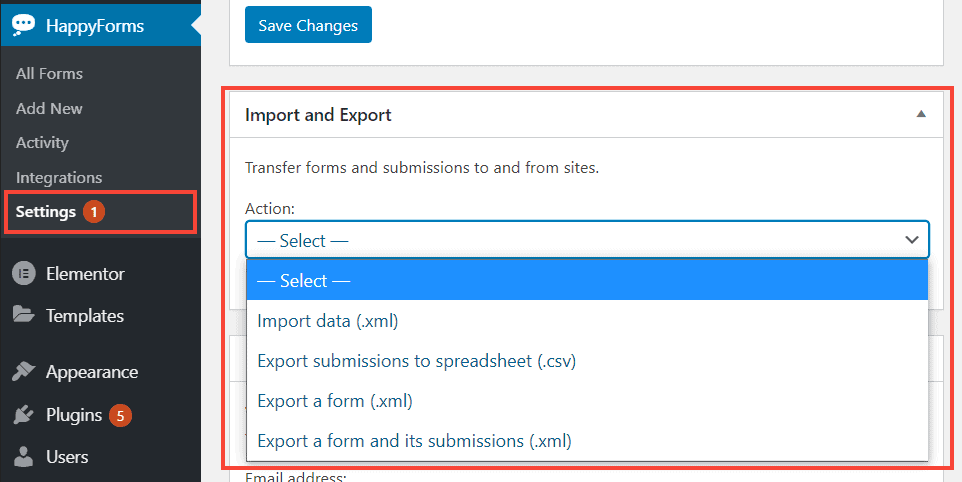
However, there is no option to include or exclude specific fields while your export. Instead, it will export all the form data.
Plans & Pricing
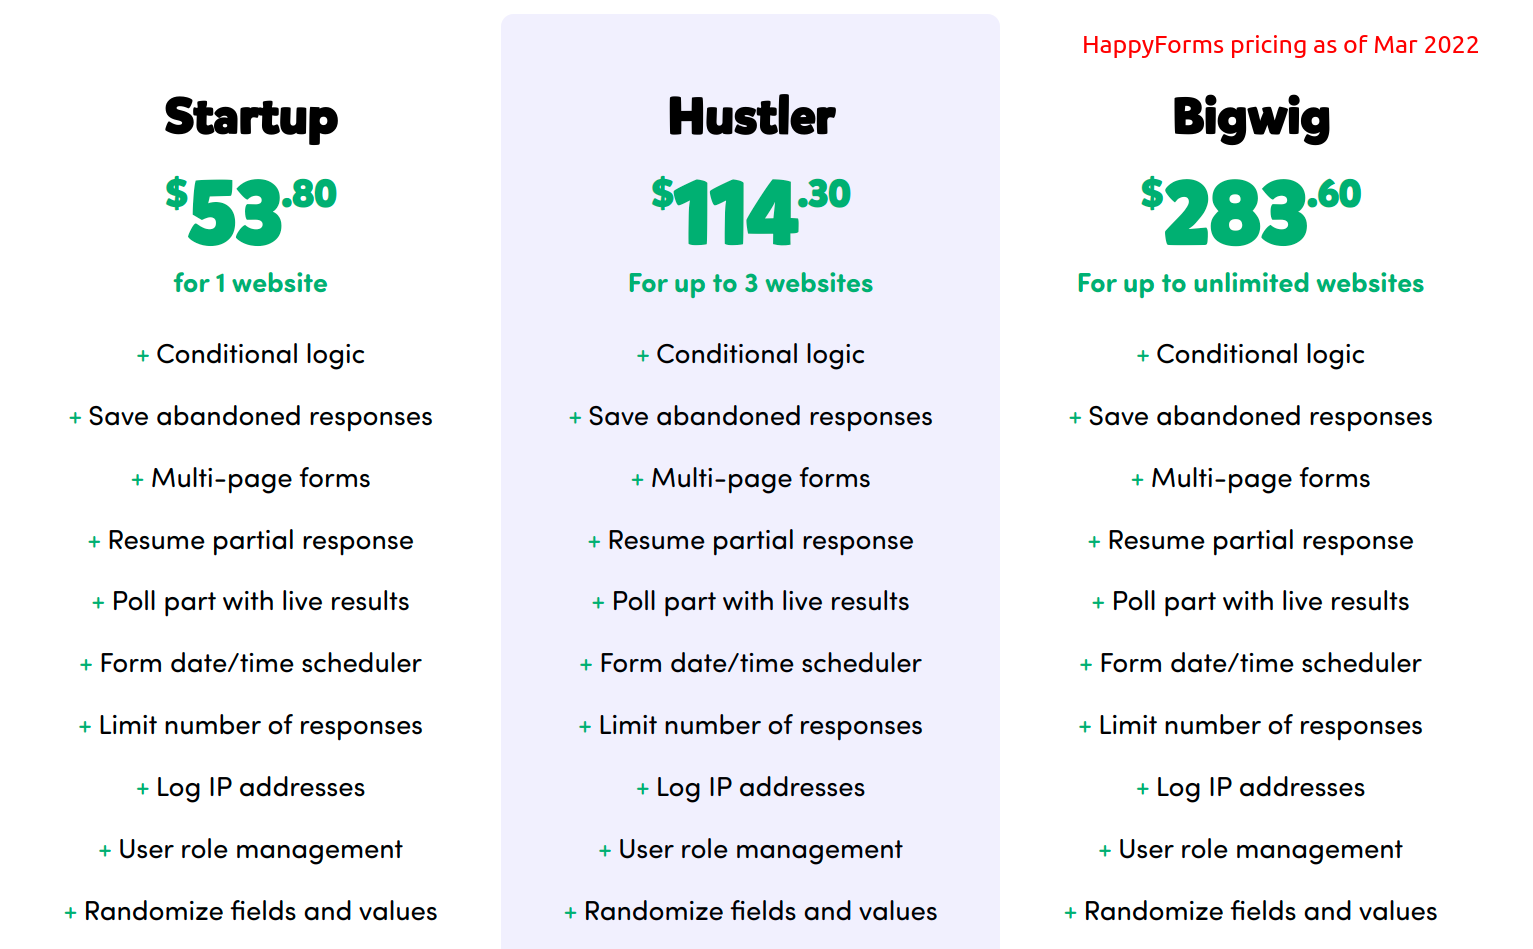
On the Happyforms website, you can find three premium plans - Startup, Hustler, and Bigwig. The lowest plan - Startup - currently sells at $53.8 for one site. However, it does not include most of the third-party integrations except ReCaptcha. For all the things like email and automation integrations, you need to get the higher plans.
How to Upgrade to the Premium
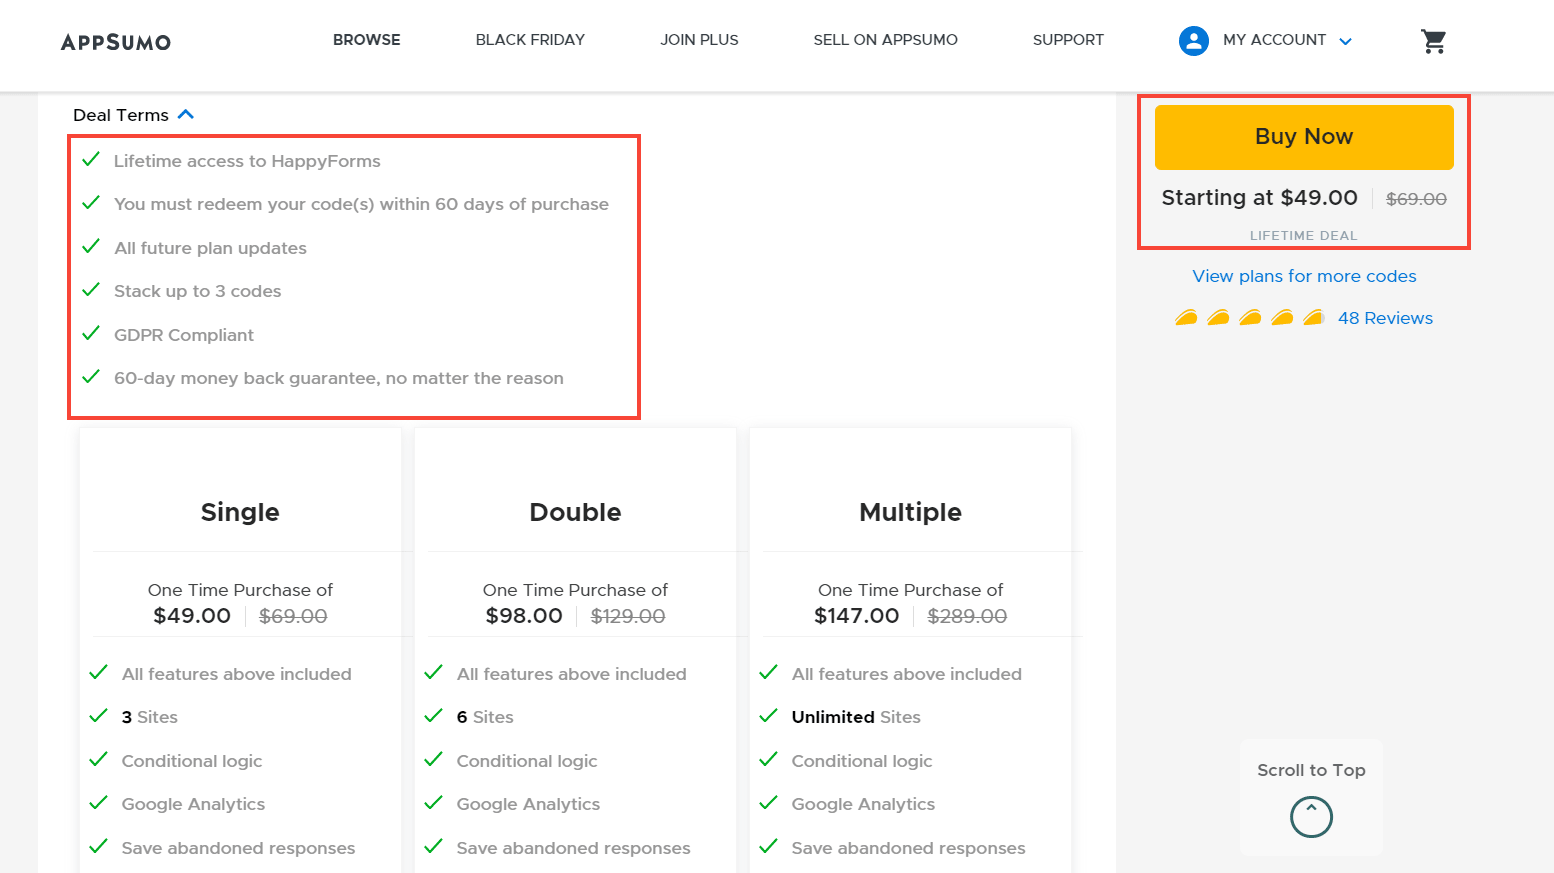
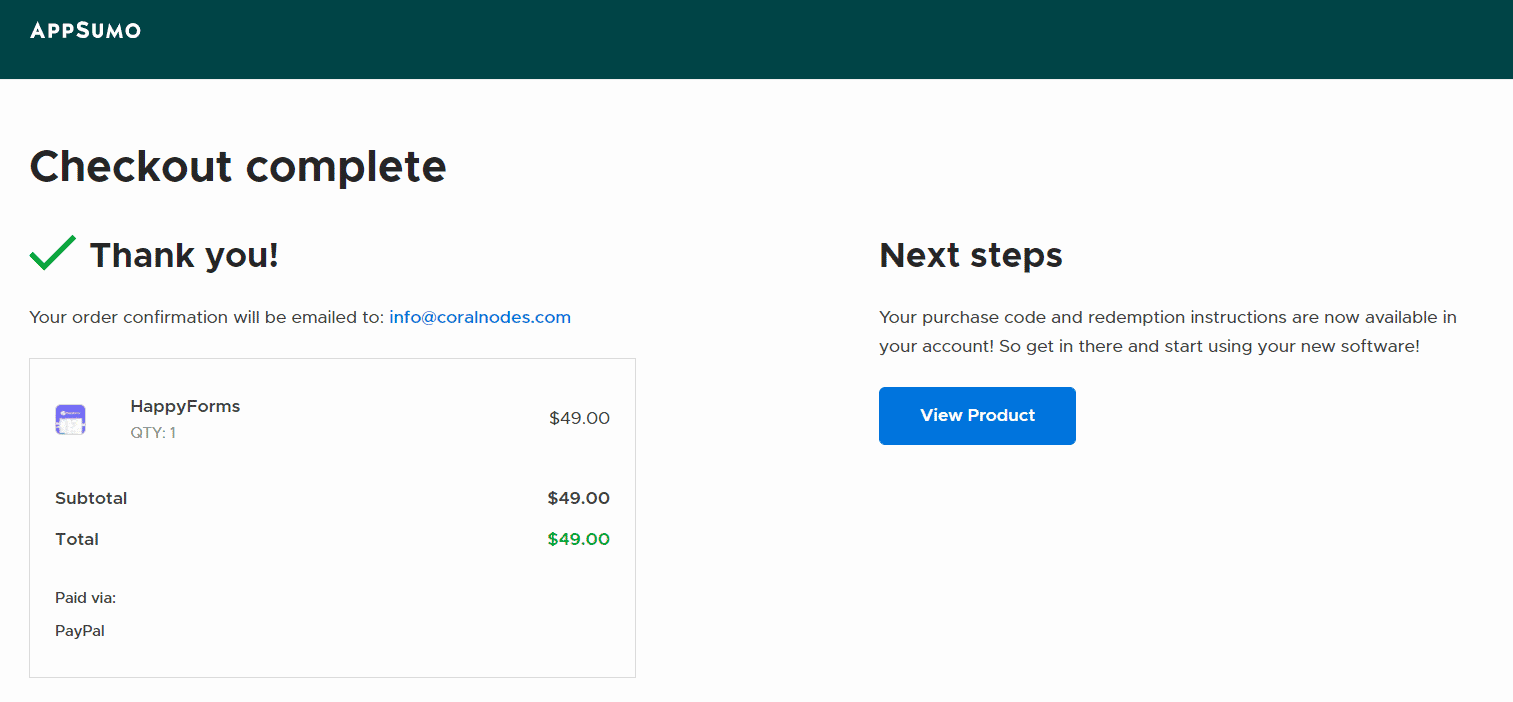
Here I am showing how you can purchase an upgraded version from Appsumo.
Update: This Appsumo deal is not available as of now, so you need to purchase the plugin directly.
There were three plans available, all of them give lifetime usage, no need to upgrade anymore. The only difference was in the number of sites you can use the premium plugin.
I selected the $69 plan, which allowed using the plugin on three sites.
After completing the payment, I got a code, that I redeemed on Happyforms's website. After that, I downloaded the upgrade plugin from my account.
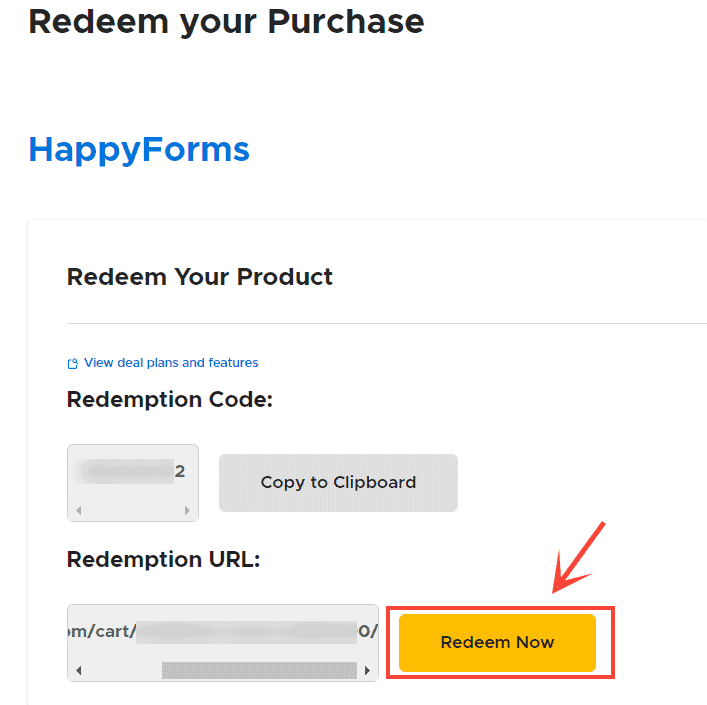
The next step was to upload and install the plugin to my WordPress admin.
Note that the upgrade is a separate plugin, so there aren't any license or activation keys. Also, when you activate the upgrade plugin, the free plugin gets deactivated automatically.

Once the new plugin is active, don't forget to register it from the Settings page. Otherwise, the plugin won't receive any future updates.
How to Get Support
The Theme Foundry, the creators of this contact form plugin, offers support through emails. However, checking on the WordPress plugin support forum, the response seems to be slow. Considering the fact that they are a small company, that is expected, though.
Conclusion
Pros of Happyforms
In my opinion, the following are the main factors that make Happyforms worth considering:
- Uses WP Customizer instead of custom interface
- Appsumo lifetime deals are a value for money
- Sufficient features without sacrificing ease of use
Cons of Happyforms
- No pre-built templates: unlike its competitors like WPForms, Happyforms doesn't offer any pre-built form templates. You need to build all your forms from scratch using the Customizer
- Relatively new: as a relatively new product, Happyforms currently have fewer installations and less overall popularity than its competitors. As a small company, support is also slow.
Currently, I use Happyforms on the contact pages of this site. And my user experiences with it have been fairly positive so far. For the price, it's a great plugin that can serve most of your WordPress form needs.
Otherwise, if you are looking for something that's more established and offers more integrations, then WPForms or Gravity Forms may be a better choice.
You might also want to check:

